To capture stunning photographs in a gazebo, pay attention to the interplay of natural light and shadows. Utilize reflectors to bounce light and soften harsh shadows with diffusers. Choose the golden hour for warm illumination, and experiment with artificial lighting for added creativity. Position your subjects thoughtfully to highlight their features while using backlighting for depth. Overcast days can also provide flattering light. Discover more tips and techniques to elevate your gazebo photography.
Understanding Natural Light in a Gazebo
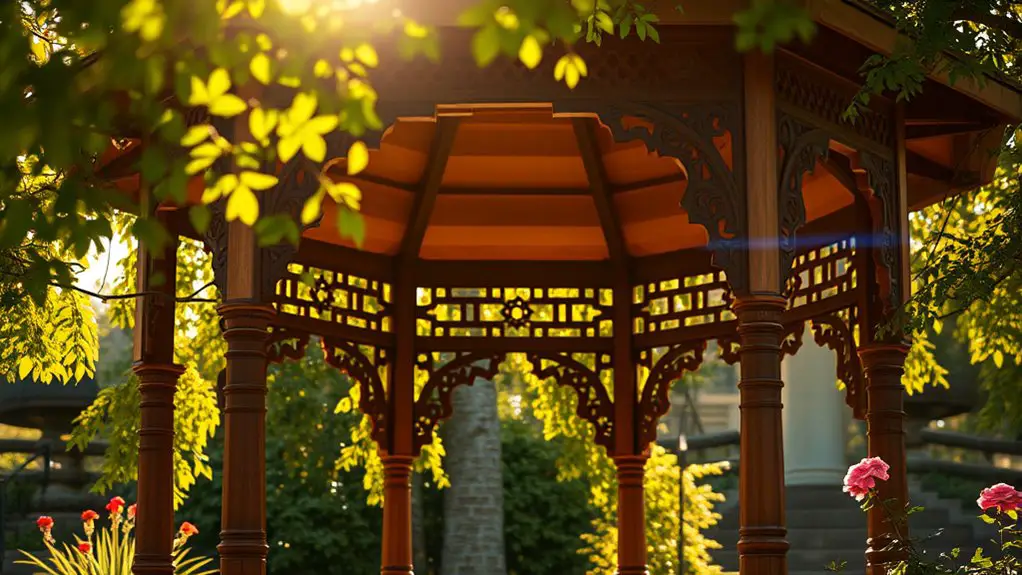
While you might think that a gazebo’s open structure guarantees ample light for photography, the reality is far more nuanced. Gazebos can create a unique interplay of natural light and shadows that can either enhance or hinder your shots. You’ll discover that the roof, while providing shelter, also blocks direct sunlight. This means that the light filtering through can be soft and diffused, perfect for capturing delicate details without harsh contrasts.
However, be mindful of gazebo shadows, which can create unwanted dark areas in your compositions. Position your subjects wisely to avoid these shadows swallowing them whole. Early morning or late afternoon light is your ally, offering a warm glow that infuses life into your images. Additionally, choosing a gazebo with a solid roof design can enhance the quality of light by reducing harsh shadows. Embrace the challenge of working with both light and shadow, and you’ll reveal stunning photographic possibilities that celebrate the beauty of your surroundings.
Utilizing Reflectors for Enhanced Illumination
To elevate your gazebo photography, using reflectors can dramatically enhance your lighting setup. You’ll want to contemplate different materials, as each can alter the quality and color of light hitting your subject. By angling your reflectors just right, you can create stunning effects that bring your images to life.
Choosing Reflector Materials
When it comes to enhancing illumination in your gazebo photography, choosing the right reflector materials can make a significant difference. You’ve got various reflector types to contemplate, such as silver, white, and gold, each offering unique light qualities. Silver reflects the most light and creates a crisp, vibrant look, while white provides a softer, more diffused effect. Gold adds warmth, perfect for golden hour shots. Reflect on material durability too; some reflectors are made of lightweight fabrics, while others use sturdier materials that withstand outdoor conditions. Investing in durable reflectors guarantees they’ll last through many sessions. By carefully selecting your reflector materials, you can release your creativity and achieve stunning lighting in every shot.
Angling for Optimal Light
Although the right reflector material is essential, the angle at which you position it can dramatically transform your gazebo photos. By making precise angle adjustments, you can manipulate light direction to enhance your subject’s features or create mesmerizing shadows.
Here’s a simple guide to help you position your reflectors effectively:
| Angle Adjustment | Light Direction | Ideal Reflector Position |
|---|---|---|
| 0° | Direct | In front of the subject |
| 45° | Soft | Diagonally to the side |
| 90° | Fill Light | Above the subject |
| 135° | Backlight | Behind, angled towards |
Experiment with these angles to discover what works best for your unique shots. This flexibility allows you to truly express your creative vision in the gazebo’s enchanting environment.
Color Effects on Photos
Ever wondered how the color of light can transform your gazebo photography? Utilizing reflectors can greatly enhance your images by manipulating color psychology and creating stunning color harmony. By bouncing natural light off reflectors, you can infuse your photos with warm or cool tones, depending on your artistic vision. For instance, a gold reflector adds warmth, evoking feelings of joy and intimacy, while a silver reflector brightens shadows, enhancing clarity. Experiment with different angles and distances to see how colors shift and interact. This playful approach not only elevates your shots but also allows you to express your unique style. Embrace the freedom to explore these color effects, and watch your gazebo photography come alive with vibrancy!
Managing Harsh Shadows With Diffusers
To effectively manage harsh shadows in your gazebo photography, employing diffusers can make all the difference. These tools soften the light, creating beautiful shadow softness that can elevate your images. When sunlight streams through the gazebo’s structure, it can cast stark, unflattering shadows on your subjects. By placing a diffuser between the light source and your subject, you achieve light diffusion, which disperses the harsh rays, resulting in a more even illumination.
You can use various materials for diffusers—like lightweight fabric, translucent shower curtains, or even specialized photography diffusers. Experiment with different placements; sometimes, moving the diffuser slightly can drastically change the quality of light. Remember, the goal is to create a serene atmosphere, allowing your subjects to shine without the distraction of harsh shadows. With the right diffusing technique, you’ll capture images that feel both vibrant and natural, inviting viewers to step into the moment.
Choosing the Right Time of Day for Shooting
When’s the best time to capture stunning images in a gazebo? The answer lies in the golden hour, that magical time just after sunrise or before sunset. During this period, the sunlight bathes your gazebo in a warm, soft glow, creating enchanting shadows and rich colors. It’s the perfect backdrop for those dreamy shots you crave.
On the other hand, shooting during the midday sun can be tricky. While you might think more light equals better photos, the harsh overhead sun often casts unflattering shadows and can wash out colors. If you must shoot at this time, look for ways to use the gazebo’s structure to your advantage, utilizing its shade to soften the light.
Ultimately, choosing the right time of day allows you to release your creativity and capture the essence of your surroundings, making your photography truly shine.
Experimenting With Artificial Lighting
When you’re ready to elevate your gazebo photography, experimenting with artificial lighting can transform your images dramatically. You’ll want to explore various types of lights, incorporating light modifiers and techniques to achieve the desired effect. Placement and positioning are key, so let’s uncover how to strategically enhance your setup for stunning results.
Types of Artificial Lights
Artificial lighting can transform your gazebo photography, adding depth and creativity to your images. When experimenting with artificial lights, consider these types to elevate your work:
- LED Lights: Versatile and energy-efficient, they provide consistent illumination and are perfect for capturing vibrant colors.
- Strobe Options: These powerful lights can freeze motion and create dramatic effects, especially when paired with light stands for stability.
- Softboxes Techniques: They diffuse harsh light, creating a soft, flattering glow that’s ideal for portraits or intimate settings.
Light Modifiers and Techniques
While experimenting with artificial lighting in a gazebo, using light modifiers can greatly enhance the quality and mood of your photographs. Softboxes and diffusers are perfect for achieving light diffusion, creating a gentle, flattering glow that wraps around your subjects. This not only softens harsh shadows but also adds depth to your images. Alternatively, reflectors can redirect light, amplifying brightness and shaping shadow effects for dynamic contrasts. Consider using gels to add color or mood to your scenes, allowing for creative expression. Experiment with various techniques to see how different modifiers alter the atmosphere, revealing the unique character of your gazebo setting. Embrace the freedom to play with these tools and watch your photography transform.
Placement and Positioning Tips
Achieving the perfect lighting in a gazebo often hinges on the strategic placement of your light sources. To create enchanting shadow play and enhance your photography, consider experimenting with the positioning of your artificial lights. Here are some tips to guide you:
- Angle your lights: Position them at various angles to see how they interact with your subject and the gazebo structure.
- Use multiple light sources: Combine different lights to achieve depth and dimension, avoiding flat lighting that can dull your images.
- Test distance: Move your light sources closer or further away to discover the ideal balance between illumination and shadow.
Positioning Your Subject for Optimal Light
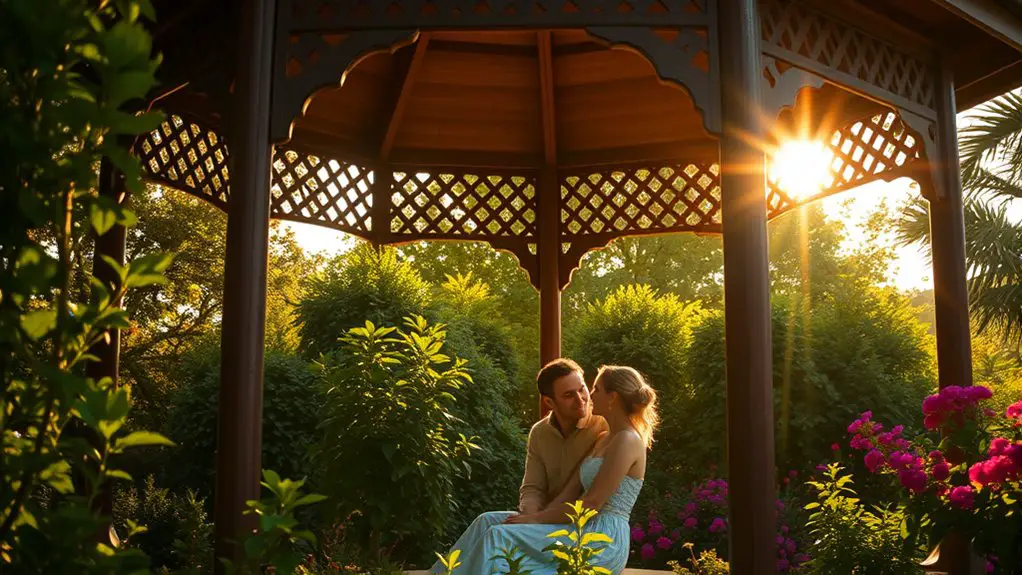
To capture stunning photographs in a gazebo, you need to carefully position your subject to make the most of available light. Start by observing the light direction; the soft, diffused light filtering through the gazebo’s roof can create a magical ambiance. Position your subject so that the light illuminates their face, avoiding harsh shadows. Experiment with different subject angles to discover the most flattering perspectives. A slight tilt of the head or a shift in posture can dramatically enhance the effect of the light, highlighting features and adding depth. Don’t forget about the background; make sure it complements your subject without distracting from them. If the gazebo’s structure creates dappled light, consider moving your subject slightly to catch those beautiful patterns. Ultimately, it’s all about freedom in creativity—play with the positioning until you find that perfect balance between light and shadow, capturing the essence of the moment.
Creating Depth and Dimension With Backlighting
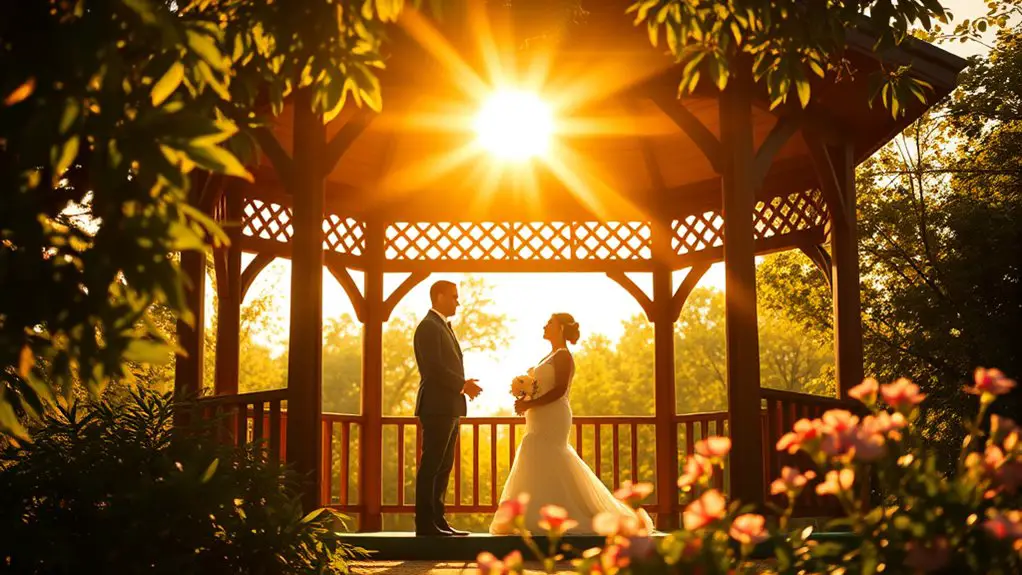
Once you’ve positioned your subject to capture the ideal light, consider how backlighting can add depth and dimension to your photographs. Backlight techniques can transform ordinary scenes into extraordinary works of art, allowing you to create stunning silhouettes that emphasize your subject’s shape and form. Here’s how to make the most of backlighting:
Backlighting can elevate your photography, creating captivating silhouettes that highlight your subject’s form and enhance visual depth.
- Position your subject so the light source is directly behind them, creating a striking outline.
- Experiment with angles to find the sweet spot where the light highlights your subject while still allowing for rich colors in the foreground.
- Incorporate elements like foliage or fabric in the frame to catch the light, enhancing the visual interest and depth.
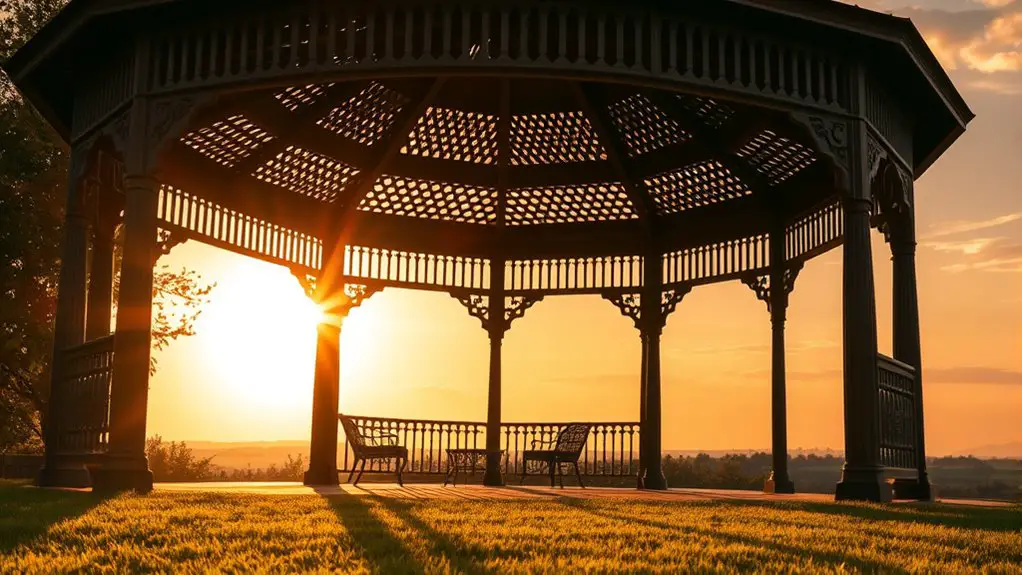
Harnessing the Benefits of Overcast Days
While many photographers shy away from overcast days, these conditions can actually be your best friend when shooting in a gazebo. The overcast advantages are plentiful; diffused light from clouds creates a soft, even illumination that minimizes harsh shadows and highlights. This natural cloud diffusion is perfect for capturing skin tones, ensuring your subjects look their best without the risk of overexposure.
When you’re in a gazebo, the surrounding structure can further enhance this effect, providing a natural frame while protecting against unexpected weather changes. Take advantage of the soft light by focusing on details—textures, colors, and expressions become more vibrant under these conditions. You can shoot freely without worrying about the sun’s harsh glare. Embrace the overcast sky as your creative partner, allowing you to explore rich, moody compositions that celebrate the unique ambiance only a cloudy day can offer.
Post-Processing Techniques for Better Lighting Effects
Effective post-processing can dramatically enhance the lighting in your gazebo photography, and mastering just a few key techniques can elevate your images from good to stunning. With the right post processing software, you can manipulate light and shadow to create enchanting visuals.
Consider these editing techniques to perfect your images:
- Adjust Exposure: Fine-tune the brightness to bring out subtle details, especially in shaded areas.
- Enhance Contrast: Increase contrast to add depth, making your subjects pop against the backdrop.
- Color Correction: Correct color tones to guarantee your photos reflect the true ambiance of the gazebo environment.
Frequently Asked Questions
What Camera Settings Work Best for Gazebo Photography?
For gazebo photography, you’ll want to use a wide aperture setting to create that beautiful background blur. Pair it with a quick shutter speed to freeze movement, ensuring your shots are sharp and vibrant.
How Can I Avoid Glare While Shooting in a Gazebo?
To avoid glare while shooting, consider using polarizing filters for glare reduction. Position yourself away from reflective surfaces, like water or shiny decor, to minimize unwanted reflections, ensuring your images maintain clarity and vibrancy.
What Accessories Are Essential for Gazebo Photography?
When capturing life’s fleeting moments, you’ll want essential accessories like quality lighting equipment, versatile reflectors, soft diffuser options, protective lens filters, creative backdrop choices, and handy portable flashes to elevate your gazebo photography experience.
Can I Use a Tripod in a Gazebo?
You can absolutely use a tripod in a gazebo. It’ll provide stability for your shots, allowing you to explore various angles without worry. Just make certain it’s positioned securely on uneven surfaces for best results.
How Do I Plan for Changing Light Conditions in a Gazebo?
Think of your camera as a ship steering through shifting tides. As natural light changes, be ready to make lighting adjustments. Embrace the unpredictability, capturing unique moments that reflect the beauty of the ever-changing environment.