To build a gazebo with a curved roof, start by sketching your design and selecting durable materials like cedar or metal for roofing. Prepare the site by leveling the ground and guaranteeing proper drainage. Construct a solid foundation, then erect vertical posts and connect them with horizontal beams. For the roof, use high-quality materials to achieve precise curves. Finish with protective coatings and decorative touches to enhance aesthetics. You’ll discover essential steps to guarantee your gazebo lasts for years.
Planning Your Gazebo Design
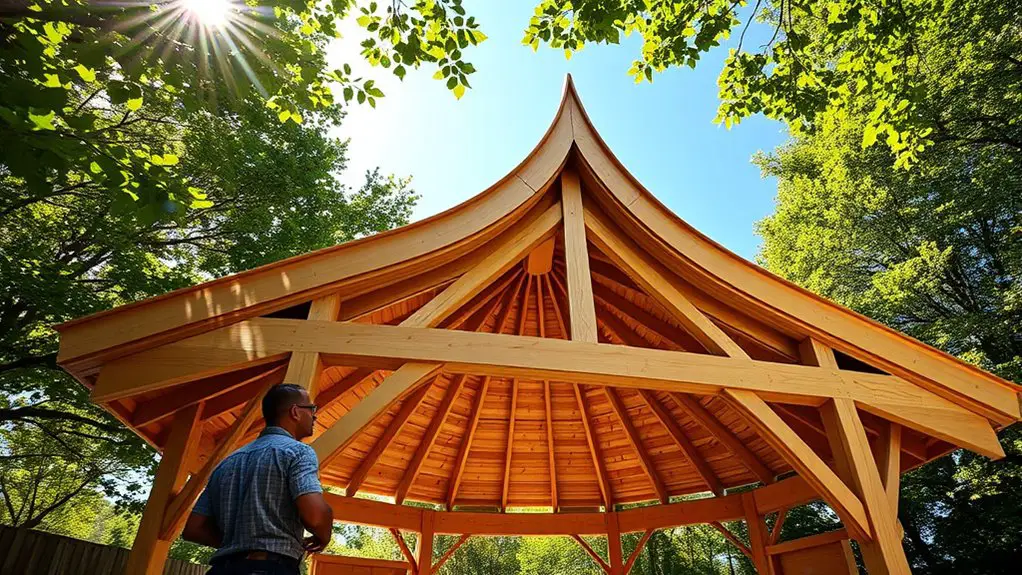
When planning your gazebo design, how can you ascertain it complements your outdoor space while meeting your functional needs? Start by creating detailed design sketches that reflect your vision. Visualizing your gazebo allows you to experiment with various roof styles, like a sleek curved design that not only enhances aesthetics but also improves rain runoff.
Consider the overall layout of your yard; your gazebo should harmonize with existing structures and landscaping. Think about the orientation—positioning it to capture the best views or sunlight can elevate its purpose. Additionally, consider the intended use of your gazebo, as it can guide your design choices and features.
Incorporate elements like built-in seating or lighting in your sketches to guarantee it meets your recreational needs. By thoughtfully blending your design with your surroundings, you’ll achieve a structure that provides freedom in outdoor living while remaining a stunning focal point in your garden.
Selecting the Right Materials
Selecting the right materials for your gazebo is essential, as these choices will affect both its durability and aesthetic appeal. When it comes to wood types, you’ll want to evaluate options like cedar, which is naturally resistant to decay, or pressure-treated pine for a budget-friendly choice.
| Wood Types | Roofing Options |
|---|---|
| Cedar | Asphalt shingles |
| Pressure-treated pine | Metal roofing |
| Redwood | Polycarbonate panels |
For roofing options, you might opt for classic asphalt shingles for their affordability and ease of installation or go for metal roofing if you’re looking for longevity and a modern touch. Each material presents its own set of benefits, so reflect on the climate and style of your yard. Proper material selection contributes to creating a comfortable outdoor experience that complements the landscape and home style. Balancing aesthetics with functionality will lead you to the perfect combination, ultimately giving you a standout gazebo that enhances your outdoor space.
Preparing the Site
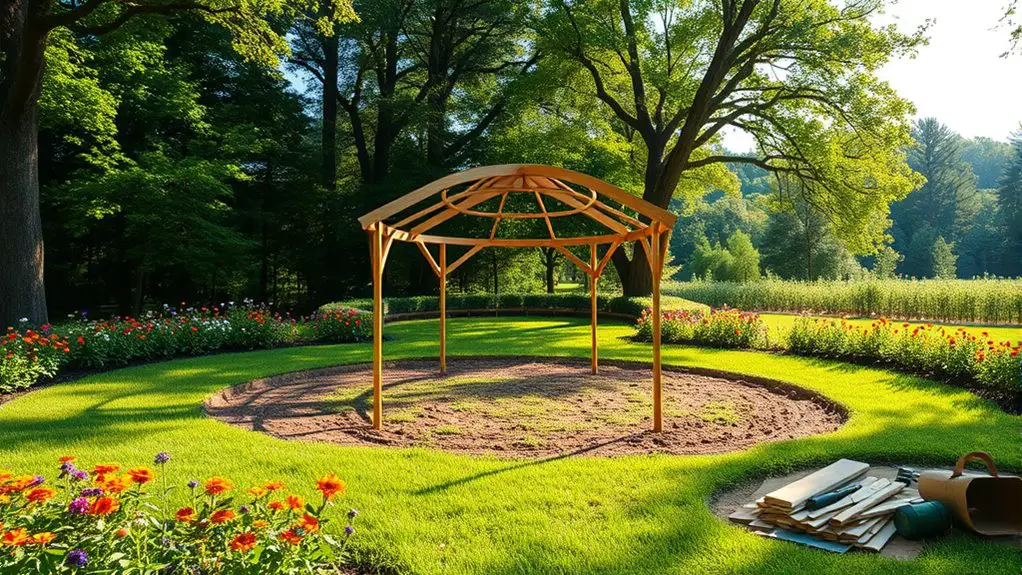
Before you start constructing your gazebo, you’ll need to carefully select the ideal location that provides both beauty and practicality. Clear the area of any debris and vegetation, ensuring a clean slate for your project, then level the ground to create a stable foundation for your curved roof structure. By taking these steps, you’ll set the stage for a successful build and enhance the longevity of your gazebo.
Choosing the Location
Choosing the right location for your gazebo is crucial to its functionality and aesthetic appeal. To create a perfect space, consider these key factors:
- Sunlight Exposure: Assess how much sun your gazebo will receive throughout the day. Morning sunlight is great for early risers, while afternoon shade can offer a cool retreat.
- Privacy Considerations: Think about the surrounding landscape. Position your gazebo where it feels secluded, away from prying eyes, yet accessible for enjoyment.
- Proximity to Amenities: Guarantee your gazebo’s near essential features like the house, garden, or pool for convenience, allowing for seamless outdoor living.
Clearing the Area
Once you’ve pinpointed the ideal location for your gazebo, the next step is clearing the area to create a safe and level foundation. Start by removing any debris, rocks, or vegetation that could obstruct your build. Consider your landscaping options; if you want a garden surrounding the gazebo, think about how that’ll influence your clearing process. Conduct a soil assessment to guarantee you’re working with stable ground. Check for drainage issues or compaction, as these factors can affect the longevity of your structure. If needed, amend the soil to create a more suitable base. This preparation not only enhances the aesthetics of your project but also guarantees your gazebo stands strong against the elements, giving you the freedom to enjoy your outdoor oasis.
Leveling the Ground
With the area cleared and prepared, leveling the ground becomes the next priority for a stable gazebo foundation. A thorough soil assessment is essential to guarantee you’re working with a solid base. Here’s how to tackle ground preparation effectively:
- Check for Slope: Use a level to determine if the ground is even. Identify any high or low spots that need adjustment.
- Excavate as Needed: For high areas, remove soil, while filling in low spots with a mixture of gravel and soil for better drainage.
- Compact the Soil: After leveling, compact the soil using a tamper or plate compactor to create a firm foundation that’ll support your gazebo, allowing for freedom in design without compromising stability.
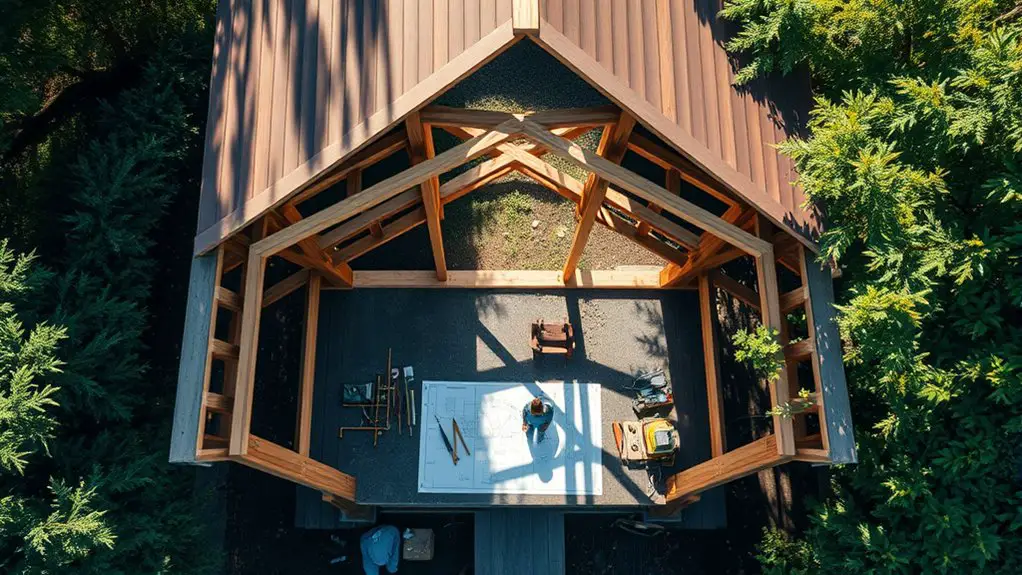
Building the Structure
Begin by laying a solid foundation for your gazebo, as this will provide the structural integrity needed for the curved roof. Confirm your foundation meets the specific requirements, using concrete footings for enhanced stability. Dig holes at least 2 feet deep, spaced evenly around your planned structure to support the load. Pour concrete and let it cure thoroughly.
Next, construct the vertical posts, using sturdy timber like cedar or pressure-treated wood. Secure them into the footings, making sure they’re plumb and level, which is essential for structural stability. Connect the posts with horizontal beams, creating a square or octagonal frame. Use sturdy brackets to reinforce corners, enhancing the overall strength of your structure.
For added architectural flair, consider incorporating decorative elements, but remember that the primary focus should remain on the framework’s resilience. Additionally, ensure that your gazebo’s foundation is suitable for local building codes, as these regulations can affect safety and stability. Your gazebo will soon be a reflection of your craftsmanship and love for outdoor freedom.
Constructing the Curved Roof
As you prepare to construct the curved roof, you’ll need to gather the right materials to achieve that elegant arc. Start by shaping the roof structure with precision, ensuring each beam follows your desired curvature. Once that’s set, you’ll install the curved beams, which will serve as the backbone of your gazebo’s stunning design.
Materials Needed for Curvature
To construct a curved roof for your gazebo, you’ll need a selection of specialized materials that guarantee both aesthetic appeal and structural integrity. Here are some essential material options to evaluate:
- Curved Beams: Choose high-quality timber or laminated veneer lumber, which can be shaped to achieve the desired curve while providing durability.
- Sheeting Material: Opt for flexible materials like plywood or polycarbonate sheeting that can contour to your roof’s curve, offering weather resistance.
- Fasteners and Hardware: Use strong, corrosion-resistant screws and brackets to secure your curved beams and sheeting, ensuring the roof remains stable and secure over time.
With the right materials in hand, you’ll be well on your way to creating a stunning, functional curved roof for your gazebo.
Shaping the Roof Structure
Once you’ve gathered your materials, it’s time to bring your vision to life by shaping the roof structure. Start by laying out your roof framing, ensuring it matches your design aesthetics. Use flexible materials, like thin plywood or bending strips, to create the desired curve.
Secure the base supports firmly and mark where each piece will connect. As you shape the roof, keep the curvature consistent, using a template if necessary to maintain accuracy. Don’t rush—each bend should flow seamlessly into the next.
Consider the final look: the graceful lines can enhance the gazebo’s overall appeal. Take your time to adjust and perfect the form, ensuring that both functionality and beauty are harmoniously achieved in your curved roof design.
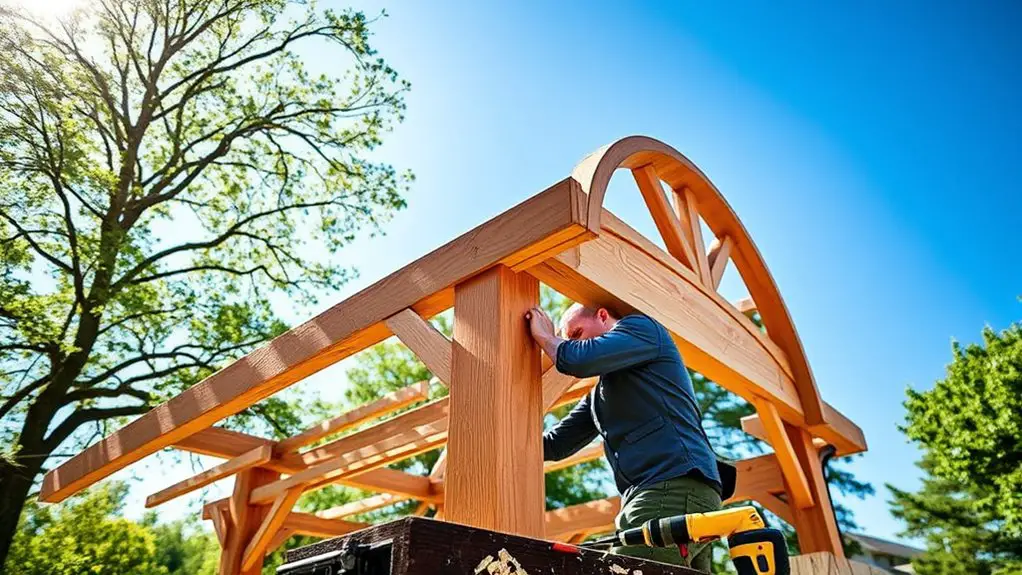
Installing the Curved Beams
Before you begin installing the curved beams, it’s essential to guarantee that the framework is securely anchored and level. The right curved beam types will ensure your gazebo’s roof not only looks stunning but is structurally sound. Follow these steps for effective beam installation:
- Select the Curved Beams: Choose beams that fit your design; laminated wood or metal are popular options for strength and aesthetics.
- Position the Beams: Align each curved beam with the designated anchor points, ensuring uniform curvature and spacing.
- Secure the Beams: Use brackets and screws to attach each beam firmly, checking for level as you go.
With careful installation, your gazebo’s roof will embody freedom and elegance, enhancing your outdoor space beautifully.
Finishing Touches and Maintenance
As you finalize your gazebo project, paying attention to the finishing touches can elevate its aesthetic and functional appeal. Start by sanding any rough edges to guarantee a smooth, safe surface. Stain or paint your gazebo with weather-resistant finishes; this not only enhances its beauty but also protects it from the elements. Consider adding decorative elements like trim or latticework to personalize the structure.
For the roof, verify the shingles or metal panels are properly aligned and secured. Regular maintenance is essential for longevity. Inspect the structure periodically for signs of wear, like loose screws or rotting wood, and address these issues promptly. Clean the roof and gutters to prevent water damage, and reapply protective coatings as needed. By investing time in these finishing touches and routine care, you’ll enjoy a stunning gazebo that stands the test of time, providing a perfect retreat for years to come. Additionally, ensure you perform regular inspections to catch any potential issues early on.
Frequently Asked Questions
What Tools Are Essential for Building a Gazebo With a Curved Roof?
When tackling your project, you’ll need tools like a miter saw, level, and framing square. Remember, design considerations and material choices greatly influence structural integrity, so choose wisely for a lasting, beautiful result.
How Long Does It Typically Take to Build a Gazebo?
Building a gazebo’s like crafting a masterpiece; it takes time. Your construction timeline usually spans one to three weekends, depending on your project planning and experience. Patience pays off for that perfect outdoor retreat!
Can I Customize the Size of the Gazebo?
Absolutely, you can customize the gazebo’s size to fit your vision. By adjusting the custom dimensions in your gazebo design, you can create a unique space that perfectly aligns with your personal style and requirements.
What Are Common Mistakes to Avoid When Building a Gazebo?
Building a gazebo is like crafting a dream; avoid design errors and poor material selection. Guarantee your plans are precise and choose durable supplies to create a lasting sanctuary that stands the test of time.
Are Permits Required for Building a Gazebo in My Area?
You’ll need to check local zoning regulations, as building permits for gazebos can vary by area. Ensuring compliance with these rules lets you enjoy your gazebo without unexpected legal issues or complications later on.