To install a built-in grill in your gazebo, start by choosing the right grill type and fuel based on your cooking style. Plan your layout for efficient use of space, ensuring sufficient clearance for safety. Prepare the installation site by leveling the ground and checking for utilities. Gather necessary tools and materials before assembling the grill frame and connecting gas or electric lines. With the right touches, you can enhance your grilling area. Discover additional tips to optimize your setup!
Choosing the Right Built-in Grill
When you’re ready to choose the right built-in grill for your outdoor kitchen, it’s crucial to evaluate your cooking style and space. Think about the grill types that suit your culinary adventures—gas, charcoal, or even electric. Each has its unique flavor and convenience, so consider what excites you most about grilling.
Next, focus on material choices. Stainless steel is a popular option for its durability and resistance to rust. However, don’t overlook other materials like ceramic or cast iron, which can enhance heat retention and flavor.
Measure your available space to guarantee your grill fits seamlessly into your outdoor kitchen layout. With the right combination of grill type and material, you’ll have the freedom to create delicious meals while enjoying the great outdoors. Make your choice wisely, and you’ll be well on your way to elevating your grilling experience!
Planning Your Grill Layout
Before you start your grill installation, take a moment to assess the available space in your outdoor area. Think about where you want to place the grill for ideal cooking and socializing. A well-planned layout will enhance your grilling experience and make the most of your outdoor space.
Assess Available Space
Evaluating the available space for your built-in grill is essential to creating an efficient and enjoyable outdoor cooking area. Start by taking accurate space measurements to guarantee your grill fits seamlessly into your gazebo. Consider the overall design considerations, like how much counter space you’ll need for prep and serving. Think about traffic flow—make sure there’s enough room for you and guests to move around comfortably. Factor in any additional features you might want, such as storage or seating. By mapping everything out, you’ll create a layout that maximizes your freedom to cook and entertain. You’ll love the flexibility of an organized space that enhances your outdoor cooking experience!
Determine Grill Placement
As you plan your grill layout, consider the relationship between your grill and other outdoor elements to guarantee a functional cooking space. Start by determining the grill orientation; position it where you can easily access utensils and ingredients. Think about sun exposure, too—grilling in direct sunlight can be uncomfortable, so aim for a spot that offers some shade or allows for a canopy. Also, make certain there’s enough room for ventilation and safety, keeping combustible materials at a distance. Consider your seating arrangements nearby, as you’ll want to engage with friends and family while cooking. With thoughtful placement, you’ll create an inviting area that enhances your outdoor experience and offers the freedom to enjoy grilling whenever you like!
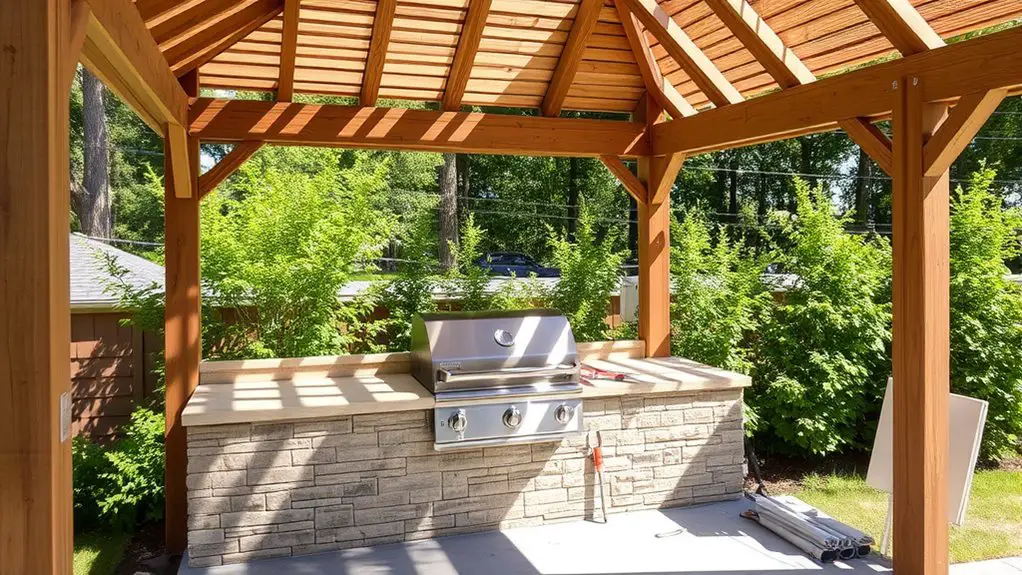
Preparing the Installation Site
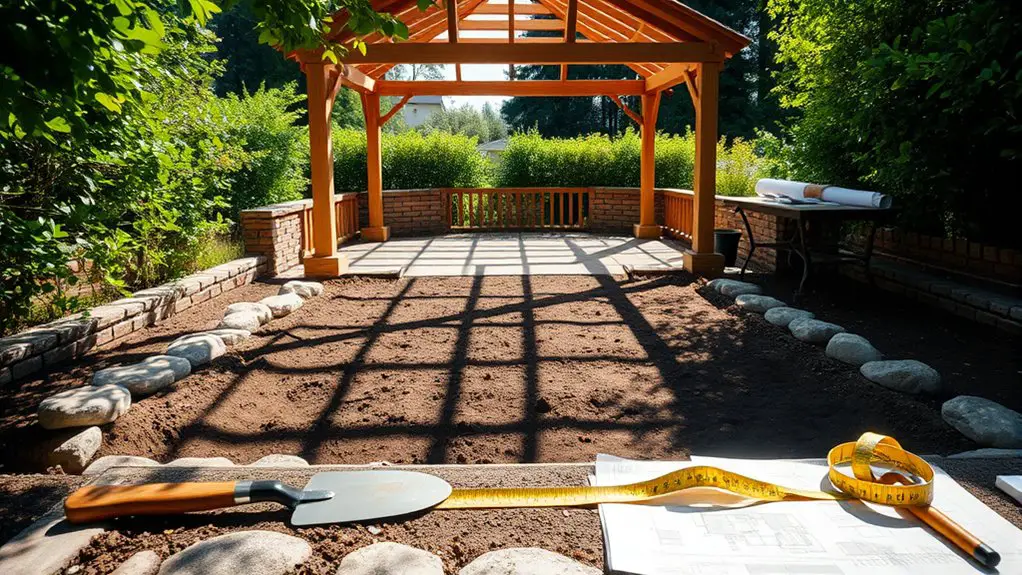
When you’re ready to install your built-in grill, preparing the installation site is essential for a smooth setup. Start with site preparation by clearing the area of any debris, furniture, or obstacles. This gives you a clean slate to work with and guarantees safety during installation. Next, focus on ground leveling. Uneven ground can cause instability, so use a level to check for any dips or rises. If you find any, you might need to dig out high spots or fill in low areas with compacted gravel or soil. This step not only stabilizes your grill but also improves its longevity, allowing you to enjoy countless barbecues without worry. Additionally, it’s important to check for underground utilities before digging to ensure safety and compliance with local regulations. Finally, make sure your site is close to utilities and has proper drainage to keep things running smoothly. With a well-prepared site, you’re one step closer to enjoying delicious meals in your gazebo.
Ensuring Proper Ventilation
While setting up your built-in grill, ensuring proper ventilation is essential for both safety and performance. You need to meet specific ventilation requirements to allow for adequate air circulation, preventing smoke buildup and potential hazards. Start by positioning your grill at least a few feet away from walls or any enclosed areas. This distance promotes free airflow, which helps maintain a comfortable cooking environment.
Consider installing vents or exhaust fans in your gazebo. These features can greatly enhance air circulation, allowing smoke and heat to escape efficiently. If your gazebo has windows, keep them open during grilling sessions to boost airflow. Additionally, ensure that the gazebo materials are fire-resistant options, as this will further minimize risks while grilling.
Also, check your local building codes, as they may have regulations about venting outdoor grills. By prioritizing proper ventilation, you’ll not only create a safer cooking space but also enjoy a more enjoyable grilling experience. So, grill confidently knowing you’ve got the airflow covered!
Gathering Necessary Tools and Materials
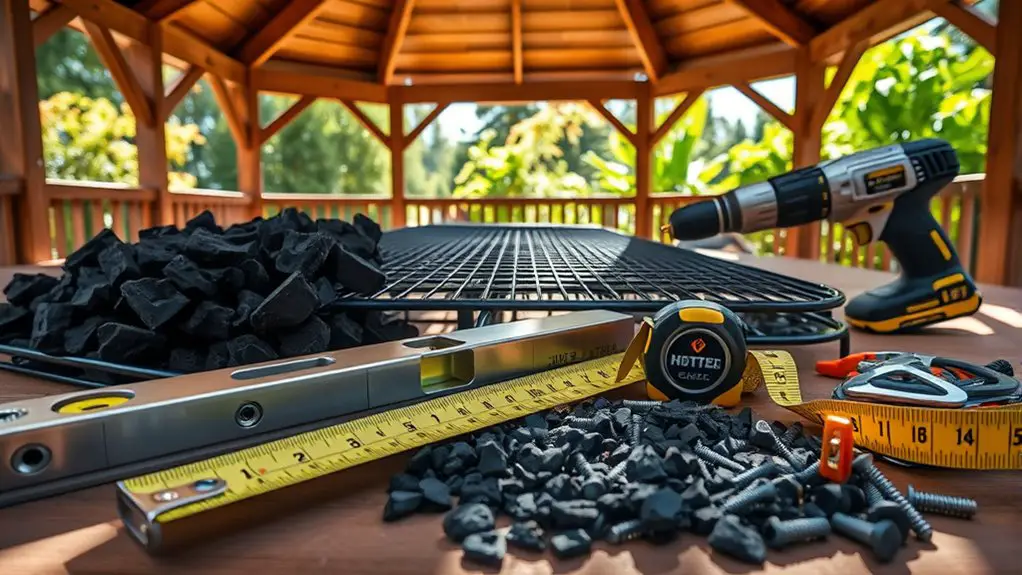
With proper ventilation in place, you’re ready to gather the tools and materials needed for your built-in grill installation. Ensuring you have the right tool types and material selection will make the process smoother and more enjoyable. Here’s a quick reference table to help you get organized:
| Tool Types | Materials Needed | Additional Items |
|---|---|---|
| Drill | Fire-resistant board | Level |
| Screwdriver | Concrete blocks | Tape measure |
| Wrench | Heat-resistant sealant | Safety goggles |
| Hammer | Stainless steel grill | Work gloves |
Collect these items before you start, and you’ll have everything at your fingertips. Having the right tools not only boosts your efficiency but also contributes to a successful installation. So, let’s get ready to create a fantastic grilling space that enhances your outdoor freedom!
Installing the Grill Frame
As you engage in installing the grill frame, it’s essential to confirm you’ve got a solid foundation for your built-in grill. Start by choosing durable grill frame materials, like stainless steel or treated wood, to guarantee longevity. Once you’ve selected your materials, measure the space carefully; this will help you determine the dimensions of your frame.
For frame construction techniques, consider using a combination of screws and brackets for a sturdy assembly. Begin by constructing the base, making sure it’s level and securely anchored. Then, build the sides and back, ensuring they’re flush and tight. Don’t forget to leave openings for ventilation and access to gas or electric lines later on. Additionally, ensure that your grill area is in a location with appropriate wind protection to enhance safety and enjoyment during use.
Taking your time with these steps will give you a robust frame that not only supports your grill but also enhances your outdoor cooking experience. Enjoy the freedom of grilling in style!
Connecting Gas or Electric Lines
Before you connect the gas or electric lines to your built-in grill, it’s essential to determine which fuel type you’ll be using. Safety precautions are a must, as working with gas or electricity can be dangerous. For peace of mind and proper installation, consider hiring a professional to handle the connections.
Determine Fuel Type
Choosing the right fuel type for your built-in grill is essential since it directly impacts both your cooking experience and the installation process. You’ll primarily choose between propane options and natural gas. Each has its benefits, and knowing what works best for you can enhance your grilling freedom.
- Propane options: Portable, versatile, and great for outdoor spaces.
- Natural gas: Convenient for permanent setups, with a continuous supply.
- Installation complexity: Consider the required gas lines or electrical setup.
- Heat control: Different fuel types offer varying temperature control.
- Cost-effectiveness: Evaluate long-term costs versus initial installation expenses.
Ultimately, understanding these factors will lead you to the fuel type that fits your lifestyle and grilling needs.
Safety Precautions Required
Once you’ve decided on your fuel type, ensuring safety during the installation process becomes a top priority, especially when connecting gas or electric lines. Always check for leaks in gas lines using a soapy water solution; bubbles indicate escaping gas. For electric connections, make sure to turn off the power supply before you start. It’s essential to have a fire safety plan in place, including a fire extinguisher nearby. Also, familiarize yourself with basic first aid procedures; accidents can happen, and being prepared can make all the difference. If you’re ever in doubt, don’t hesitate to consult a professional. Your safety and peace of mind are worth it as you begin your grilling adventure!
Professional Installation Recommended
While you might be tempted to handle the installation of gas or electric lines yourself, enlisting a professional is often the best choice for guaranteeing safety and compliance with local codes. A professional installer will not only save you time but also help avoid potential hazards. Though installation costs may seem high at first, the peace of mind you’ll gain is invaluable.
- They understand local regulations and code requirements.
- They’ll guarantee proper connections to prevent leaks.
- Professionals can handle unexpected challenges during installation.
- They often offer warranties for their work.
- Hiring an expert can enhance your grill’s performance and longevity.
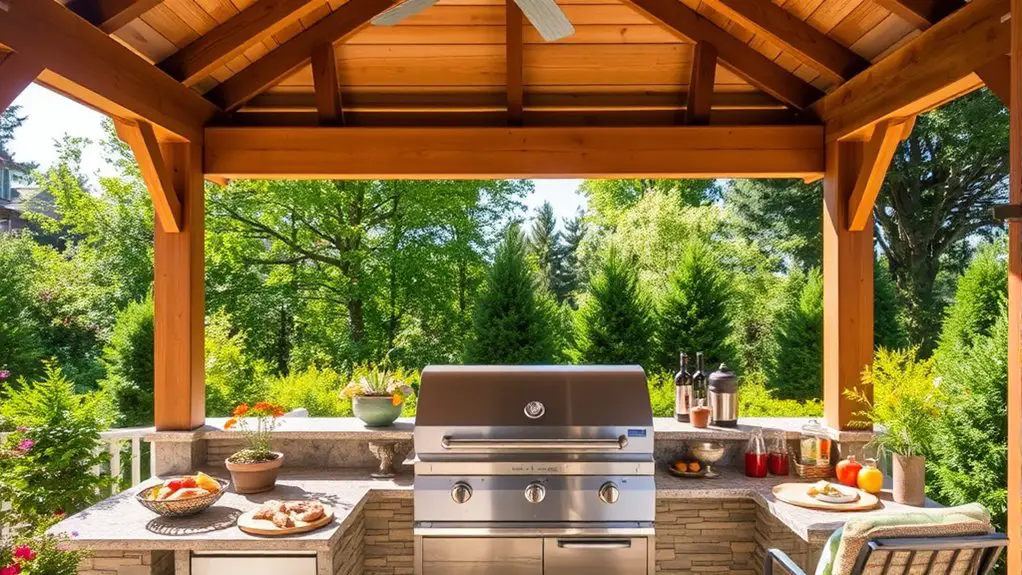
Adding Finishing Touches
When it comes to adding finishing touches to your built-in grill, attention to detail can make a world of difference. You want your outdoor space to be inviting and functional, so consider incorporating decorative accents and outdoor lighting. These elements not only enhance your grill area but also create a cozy atmosphere for gatherings. Additionally, consider using outdoor lighting options to highlight the beauty of your grill space during evening gatherings.
Here’s a quick guide to help you choose the right accessories:
| Element | Purpose |
|---|---|
| Decorative Accents | Personalize your grill area with items like colorful pots or stylish utensils. |
| Outdoor Lighting | Install string lights or lanterns to add warmth and visibility. |
Safety Tips for Using Your Built-in Grill
Before you fire up your built-in grill, it’s essential to keep safety in mind to guarantee a worry-free cooking experience. Proper grill maintenance and fire safety should always be your top priorities. Here are some key tips to assure a safe grilling session:
- Always inspect your grill for leaks or damage before use.
- Keep a fire extinguisher nearby, and know how to use it.
- Never leave the grill unattended while it’s in use.
- Make sure your grilling area is free of flammable materials.
- Allow the grill to cool completely before covering it or performing maintenance.
- Ensure adequate ventilation to prevent smoke accumulation, especially in enclosed spaces like gazebos.
Frequently Asked Questions
How Long Does the Installation Process Typically Take?
You’re probably wondering how long the installation process takes. Typically, it can range from a few hours to a couple of days, depending on installation complexity and your skills. It’s all about mastering that installation duration!
Can I Install a Grill on a Wooden Gazebo?
Yes, you can install a grill on a wooden gazebo, but you’ve gotta consider safety considerations and material choices. Make sure proper ventilation and use fire-resistant materials to keep your grilling experience enjoyable and safe.
What Type of Grill Is Best for Small Spaces?
Oh, the irony of grilling in tight quarters! You’ll love compact grill options like portable gas grills or electric models with space-saving designs. They’ll let you savor freedom while maximizing every precious inch of your outdoor sanctuary.
Do I Need a Permit for Outdoor Grill Installation?
You’ll want to check local regulations before installing your outdoor grill. Ensuring grill safety often involves permits, so it’s wise to confirm what’s required in your area to enjoy your grilling experience without worries.
How Do I Maintain My Built-In Grill?
Picture your grill as a trusty steed. To keep it galloping smoothly, establish a maintenance schedule. Regular grill cleaning, including grates and burners, guarantees longevity and delicious meals. A little care goes a long way!