To install interlocking tiles under your gazebo, start by choosing durable materials and colors that complement your space. Prepare the site by leveling the ground and compacting the soil for stability. Accurately measure and plan your layout, taking note of obstacles. Begin laying tiles from one corner, ensuring snug fits and considering drainage. Regular maintenance is key for longevity and aesthetics. For more tips and detailed installation steps, continue your exploration for a flawless outdoor setup.
Choosing the Right Interlocking Tiles
When it comes to choosing the right interlocking tiles for your gazebo, you’ll want to take into account several key factors to guarantee a perfect fit for both aesthetics and functionality. Start by exploring different tile materials like rubber, plastic, and wood. Each material offers unique benefits, from durability to comfort underfoot. Next, consider the color options that resonate with your style. Go for vibrant hues to create a lively atmosphere or earthy tones for a more natural look. Keep in mind that lighter colors can reflect heat, while darker shades may absorb it. By balancing these elements, you can create a stunning space that not only enhances your gazebo but also allows you to enjoy your outdoor sanctuary to the fullest.
Preparing the Site for Installation
Before diving into the installation of interlocking tiles under your gazebo, it’s vital to prepare the site properly. Start with a thorough site assessment; check for level ground and remove any debris, roots, or rocks that could interfere. Proper ground preparation is essential—guarantee the area is compacted and graded to avoid water pooling. Additionally, ensure the placement of the gazebo considers privacy considerations to enhance your overall outdoor experience.
Here’s a quick reference table to guide your preparation:
| Step | Action | Purpose |
|---|---|---|
| Site Assessment | Inspect the area | Identify potential issues |
| Debris Removal | Clear the ground | Guarantee a clean base |
| Leveling | Adjust the ground | Promote even tile placement |
| Compacting | Use a tamper | Stabilize the surface |
| Grading | Slope for drainage | Prevent water accumulation |
With these steps, you’re on your way to a successful installation!
Measuring and Planning the Layout
Before laying your interlocking tiles, you first need to measure your gazebo’s dimensions accurately to guarantee a perfect fit. Next, consider how you want to configure the tiles—whether in a traditional pattern or something more unique, as this will affect both aesthetics and functionality. Finally, don’t forget to plan for drainage; guaranteeing water flows away from your gazebo will keep the area dry and maintain the longevity of your tiles.
Determine Gazebo Dimensions
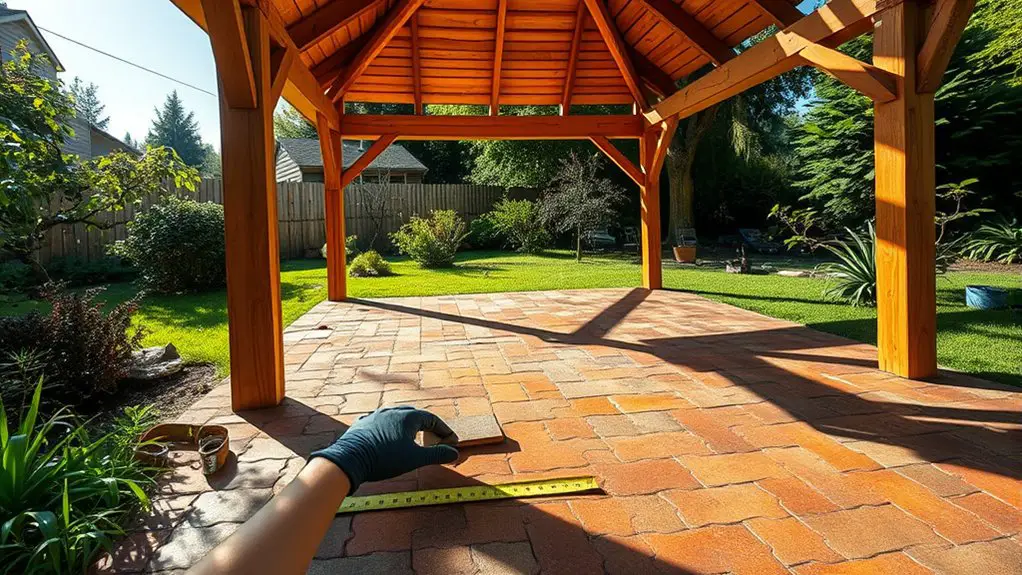
To create a stunning outdoor space under your gazebo, accurate measurements are essential. Start by using measuring tools like a tape measure and a level to determine the gazebo dimensions. Measure the width and depth of the area where you’ll place the gazebo, noting any obstacles around it. Consider the desired distance from the edges of your gazebo to the surrounding landscape, ensuring it feels spacious and inviting. Once you’ve got your dimensions, sketch a layout plan to visualize how the interlocking tiles will fit beneath. This planning stage is vital for proper gazebo placement, allowing you to create a seamless, harmonious outdoor retreat that reflects your personal style and enhances your freedom to enjoy the space.
Choose Tile Configuration
As you map out your tile configuration, envision how the interlocking tiles will complement your gazebo’s design and enhance the overall aesthetic of your outdoor space. Think about tile patterns that can create visual intrigue; perhaps alternating colors or geometric designs will add charm.
To help you visualize, consider this configuration table:
| Row/Column | 1 | 2 | 3 |
|---|---|---|---|
| 1 | Solid | Striped | Solid |
| 2 | Striped | Solid | Striped |
| 3 | Solid | Striped | Solid |
Account for Drainage Needs
When planning your layout for interlocking tiles under a gazebo, it’s important to account for drainage needs to prevent water accumulation and guarantee longevity. Proper drainage systems facilitate smooth water flow away from your gazebo, keeping your space dry and functional. Here are some key considerations:
- Slope the base: Confirm the ground beneath the tiles slopes away from the gazebo.
- Use a gravel base: This provides excellent drainage and supports tile stability.
- Install drainage channels: These can guide water away from the area, enhancing flow.
- Leave gaps between tiles: Allow for natural drainage between interlocking tiles to prevent pooling.
Installing the Interlocking Tiles
Before laying down those interlocking tiles, you’ll want to guarantee the ground surface is level and free of debris—this sets the stage for a flawless installation. Once that’s done, you’ll arrange the tiles with precision, ensuring each piece fits snugly together for a seamless look. Don’t forget to check alignment frequently, as even a slight miscalculation can throw off the entire layout.
Preparing the Ground Surface
Preparing the ground surface is essential for a successful installation of interlocking tiles under your gazebo. Start with a thorough soil assessment to guarantee your foundation is solid. This groundwork can make or break your project, so take your time. Here’s what you need to focus on:
- Clear debris and vegetation to create a clean workspace.
- Level the ground by filling in low spots and removing high ones.
- Compact the soil to prevent settling and guarantee stability.
- Install a weed barrier to keep unwanted plants from disrupting your tiles.
Laying the Tiles
Once you’ve guaranteed the ground is properly prepared, you’ll find that laying the interlocking tiles is a straightforward yet rewarding process. Start by selecting your desired tile patterns—whether it’s a classic grid or a more intricate design, this choice will define your gazebo’s aesthetic. Begin placing the tiles from one corner, ensuring each piece fits snugly against its neighbor. Pay attention to the surface textures; some tiles offer a smooth finish, while others provide grip, adding a unique flair to your space. As you lay each tile, visualize how the vibrant colors and textures will harmonize, creating an inviting oasis beneath your gazebo. Enjoy the freedom of customization and let your creativity shine through as you complete this satisfying project!
Ensuring Proper Alignment
Achieving proper alignment while installing your interlocking tiles is essential for a polished finish and durability. Misalignment can lead to uneven surfaces, making your gazebo area less enjoyable. To guarantee perfect tile placement, consider these alignment techniques:
- Start with a straight line: Use a chalk line to mark your starting point.
- Check each tile: After placement, verify each tile is snugly fitted and level.
- Work from the center: Begin in the middle and move outward; this helps maintain balance.
- Use spacers: If needed, utilize spacers between tiles to ensure uniform gaps.
Ensuring Stability and Leveling
While you might be enthusiastic to lay down your interlocking tiles, guaranteeing stability and leveling beforehand is essential for a long-lasting installation. Start by evaluating the ground stability; it should be firm and free from debris. If the ground’s uneven, utilize leveling techniques such as digging out high spots or filling in low areas with gravel. Compact the soil to create a solid foundation. A level surface not only prevents water pooling but also guarantees your tiles interlock seamlessly. Use a level tool to check your progress, making adjustments as needed. Remember, a stable base enhances the durability of your gazebo setup, allowing you to enjoy the freedom of your outdoor space without worry. Additionally, having a well-constructed foundation for a gazebo can significantly improve its longevity and stability against weather elements.
Adding Finishing Touches
With a stable and level foundation established, you’re ready to focus on adding the finishing touches that will elevate your gazebo space. These aesthetic enhancements can transform the atmosphere, making it a welcoming retreat. Consider these ideas to bring your vision to life:
- Outdoor Rugs: Add warmth and comfort underfoot.
- Decorative Lighting: String lights or lanterns create a cozy ambiance.
- Planters: Incorporate greenery with stylish pots or hanging planters.
- Furniture: Select comfortable seating that complements your design.
Additionally, adding plants and flowers can provide color, texture, and fragrance, enhancing the overall appeal of your gazebo. These finishing touches not only enhance the look of your gazebo but also create a space where you can truly relax and enjoy the freedom of the outdoors. Embrace your creativity and make it uniquely yours!
Maintaining Your Interlocking Tiles
Although interlocking tiles are designed for durability and ease of installation, maintaining them is essential to ascertain their longevity and aesthetic appeal. To keep your tiles looking fresh, regularly sweep away debris and dirt using a soft broom. For deeper cleaning, employ gentle cleaning techniques like a mixture of mild soap and warm water—avoid harsh chemicals that can degrade the tiles. If you notice any stains, act quickly with a soft cloth and the soapy solution. Inspect joints and seams periodically to ascertain they remain intact, and replace any damaged tiles promptly. By staying proactive with maintenance, you’ll not only enhance tile longevity but also create an inviting space under your gazebo that resonates with freedom and relaxation. Additionally, regular inspections are crucial to prevent any long-term damage caused by environmental factors.
Frequently Asked Questions
Can Interlocking Tiles Be Installed Over Grass or Soil?
You can install interlocking tiles over grass or soil, but proper surface preparation’s essential. Consider leveling and compacting the ground for stability. Without this, your tiles might shift, compromising your freedom of movement and enjoyment.
How Long Do Interlocking Tiles Typically Last?
You might think interlocking tiles won’t last long, but with proper care, they can have impressive lifetime expectations. Follow maintenance tips like regular cleaning and inspections, and you’ll enjoy your outdoor space for years to come!
Are Interlocking Tiles Suitable for Winter Climates?
Yes, interlocking tiles can be suitable for winter climates if they’re designed with temperature resistance and winter durability in mind. Just guarantee they’re properly installed to withstand snow and freezing conditions, keeping your outdoor space functional.
Can I Use Interlocking Tiles for a Permanent Structure?
Yes, you can use interlocking tiles for permanent structures. They offer durability, flexibility, and a stylish finish, allowing you to create a unique space that withstands the test of time—perfect for your creative freedom!
What Tools Are Needed for Installing Interlocking Tiles?
For tile installation tools, you’ll need a level, rubber mallet, utility knife, measuring tape, and possibly a saw. Exploring gazebo flooring options, these tools guarantee a smooth, precise finish, allowing your creativity to flow freely.