To plan a collaborative art project in your gazebo, start by defining a clear artistic vision that inspires everyone involved. Gather essential supplies, ensuring you’re prepared for the space’s unique environment. Choose diverse participants who are open to collaboration, and set a date that accommodates everyone. Create a detailed project plan with defined goals and responsibilities. Don’t forget to document the process and results for future reference. You’ll discover more insights and tips along the way.
Define Your Artistic Vision
When you’re starting on a collaborative art project, defining your artistic vision is essential, as it sets the foundation for the entire endeavor. Begin by brainstorming your artistic themes, which reflect the emotions, messages, or concepts you want to convey. Consider what inspires you and your collaborators—nature, community, or abstract ideas can all serve as powerful themes.
Next, craft a vision statement that encapsulates your collective goals. This statement should be both concise and inspiring, serving as a guiding light for the project. Make sure everyone involved understands and resonates with it, as this alignment fosters creativity and unity.
Finally, encourage open dialogue among your team to refine these ideas. Collaboration thrives on diverse perspectives, so embrace the freedom to explore and adjust your vision as necessary. With a clear artistic vision, you’ll be well-equipped to set out on a meaningful and cohesive project together.
Gather Your Supplies
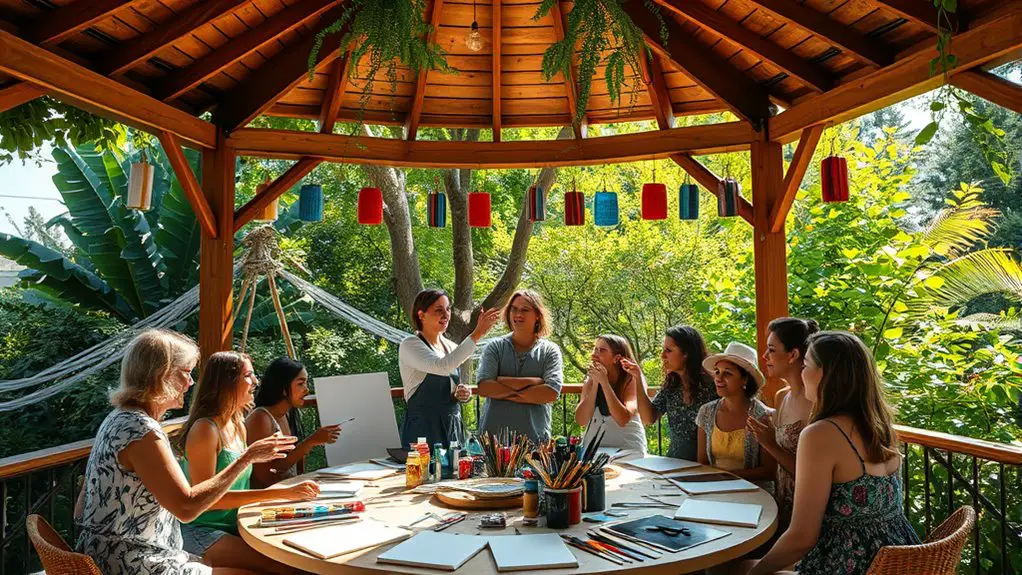
With a clear artistic vision in place, it’s time to gather your supplies to bring that vision to life. Start by listing the essential art supplies you’ll need. Think about paints, brushes, canvases, and any other materials that align with your concept. Don’t forget to reflect on creative tools like stencils, markers, or collage materials that can add depth and dimension to your project.
Next, evaluate whether you’ll need any larger items, such as easels or tables, to facilitate the collaborative nature of your project. If you’re working outdoors in your gazebo, make certain you have protective coverings for your supplies from the elements.
Finally, check if any participants might bring their own creative tools to share. This can expand your resource pool and encourage collaboration. With everything gathered, you’re ready to plunge into the exciting world of creative expression together!
Choose Your Participants
Choosing the right participants can greatly impact the success of your collaborative art project, as diverse perspectives and skills often lead to richer creative outcomes. When considering participant selection, think about how different group dynamics will enhance your project. Here are some key factors to keep in mind:
Selecting diverse participants is crucial for enriching your collaborative art project and enhancing creative outcomes.
- Skill diversity: Include artists with varying techniques and expertise.
- Creative mindset: Look for individuals who embrace experimentation and collaboration.
- Communication style: Choose participants who are open to sharing ideas and feedback.
- Commitment level: Verify everyone’s ready to engage and contribute actively.
Set a Date and Time
When setting a date and time for your collaborative art project, it’s crucial to take into account your participants’ availability to guarantee everyone can join in. Additionally, picking a season that aligns with the weather can enhance your experience and the quality of your artwork. Planning these elements thoughtfully will help create a more enjoyable and productive collaboration.
Consider Participants’ Availability
To guarantee everyone can participate in your collaborative art project, it’s essential to take into account each participant’s availability while setting a date and time. Consider the following factors to make sure smooth scheduling:
- Scheduling preferences: Ask each participant when they’re most free.
- Time zone: Be sensitive to different time zones if participants are spread out.
- Duration: Decide how long you expect the project to take.
- Flexibility: Be open to adjusting the date or time if necessary.
Choose Weather-Appropriate Season
Selecting the right season for your collaborative art project can greatly influence both the experience and the outcome. Seasonal considerations are key; think about how weather impacts your plans. For instance, spring and summer often provide pleasant temperatures and longer days, making it easier for participants to gather and create. But don’t forget about autumn, which can offer stunning backdrops and vibrant colors, perfect for inspiration.
If you’re considering winter, make certain you’re prepared for colder temperatures and potentially inclement weather, as this could limit your project’s success. Ultimately, picking a season that aligns with both your creative vision and the comfort of your participants will lead to a more enjoyable and productive experience. So, choose wisely!
Create a Project Plan
Now that you’ve set a date and time, it’s time to create a project plan. Start by defining your project goals, setting a realistic timeline, and allocating resources wisely. These steps will guarantee everyone’s on the same page and that your collaborative art project runs smoothly.
Define Project Goals
Creating a clear set of project goals is essential for the success of any collaborative art project. By focusing on goal setting, you’ll guarantee everyone’s on the same page and working towards shared project objectives. Here are a few tips to help define your goals:
- Identify the theme: What’s the central idea or message behind your art?
- Establish roles: Who will be responsible for each aspect of the project?
- Determine the desired outcome: What do you hope to achieve with this collaboration?
- Encourage creativity: How can participants express their unique artistic visions?
Set a Timeline
With your project goals clearly defined, it’s time to establish a timeline that keeps the collaboration on track. Start by outlining key timeline milestones, ensuring everyone knows what’s expected and when. But remember, flexibility is essential; life happens, and adjustments may be necessary.
Here’s a simple table to visualize your timeline:
| Milestone | Date |
|---|---|
| Initial brainstorming | Week 1 |
| Design drafts | Week 2-3 |
| Final review | Week 4 |
Allocate Resources Wisely
As you commence your collaborative art project, allocating resources wisely can greatly enhance the overall outcome. Effective resource allocation and budget management are essential for bringing your vision to life without overspending. Here are some key points to take into account:
- Materials: Identify what supplies you need and source them affordably.
- Time: Set realistic deadlines for each phase of the project.
- Skills: Leverage the strengths of each team member to maximize efficiency.
- Space: Make certain your gazebo is organized and conducive to creativity.
Promote Your Event
When it comes to promoting your event, harnessing the power of social media can greatly boost your reach. Start by creating eye-catching posts that showcase your project’s vision and invite community engagement. Use platforms like Instagram, Facebook, and Twitter to share updates, countdowns, and sneak peeks. Encourage your collaborators to share the posts on their networks, amplifying your audience.
Next, consider community outreach. Connect with local art groups, schools, and businesses to spread the word. Collaborate with them for co-promotions or workshops that can draw in more participants. Don’t forget to use hashtags relevant to your project and location to attract a wider audience.
Lastly, create an event page that includes all important details, and encourage attendees to RSVP. This not only helps you plan better but also builds excitement. With these strategies, you’ll foster a vibrant community around your collaborative art project!
Document the Process and Results
Documenting the process and results of your collaborative art project not only captures the journey but also provides valuable insights for future endeavors. By employing effective documentation techniques, you can guarantee that the artistic experience is preserved and shared. Here are some ways to document your project:
- Photographs: Capture key moments during the creation process to visualize the evolution of your artwork.
- Videos: Record time-lapses or interviews with participants to convey the project’s spirit and dynamics.
- Journals: Encourage team members to write reflections on their experiences, thoughts, and inspirations throughout the project.
- Surveys: Gather feedback from participants about the project outcomes to improve future collaborations.
Frequently Asked Questions
What Types of Art Can Be Created in a Gazebo?
In a gazebo, you can release your creativity by painting murals on the walls or crafting sculptures with natural materials. It’s a perfect space for collaboration, allowing everyone to express their artistic freedom together.
How Do I Handle Disagreements Among Participants?
When storms brew among participants, don’t fret. Embrace conflict resolution with open dialogue. Use communication strategies like active listening and empathy, transforming disagreements into opportunities for growth and creativity. Let collaboration thrive amidst differences!
Can Children Participate in the Collaborative Art Project?
Absolutely, children can participate in the collaborative art project! Their artistic skills can enrich group dynamics, fostering creativity and teamwork. Encourage their involvement to create a vibrant and diverse artistic environment for everyone.
What Weather Precautions Should I Consider for Outdoor Projects?
When planning outdoor projects, consider rain protection like tents or tarps. Also, think about temperature management—providing shade or heating elements guarantees everyone stays comfortable, allowing for a more enjoyable and productive creative experience.
How Can I Ensure Everyone Feels Included in the Project?
To guarantee everyone feels included, use inclusive practices by encouraging open dialogue. Acknowledge diverse perspectives and adapt to group dynamics. Foster a welcoming environment where every voice matters, allowing creativity to flourish freely among participants.