To plan a gardening DIY class in your gazebo, start by choosing a theme that excites you and your audience. Set a date based on seasonal trends and gather essential supplies like gloves and trowels. Promote your class through social media and prepare the gazebo for an inviting atmosphere. Create a dynamic agenda filled with hands-on activities to engage participants. Finally, think about how to follow up and build a lasting community of gardeners, and you’ll discover even more tips ahead.
Determine Your Class Theme and Focus
When planning your gardening DIY class, it’s essential to first determine your theme and focus, as this will set the tone for everything else. Think about what class topics resonate with your target audience—are they beginners keen to learn about container gardening, or seasoned green thumbs interested in permaculture techniques?
Once you’ve pinpointed your audience, consider what will excite and inspire them. You might choose to focus on sustainable gardening, edible plants, or even creating a wildlife-friendly garden. Each of these themes offers freedom to explore diverse techniques and ideas, allowing participants to connect with nature in a meaningful way.
Don’t forget to incorporate hands-on activities that align with your theme, as this practical approach enhances learning and keeps everyone engaged. By clearly defining your class focus, you’ll create an inviting atmosphere where your audience feels empowered to release their creativity and cultivate their gardening skills.
Set a Date and Time
When you’re setting a date and time for your gardening DIY class, think about seasonal weather patterns to guarantee a pleasant experience for everyone. You’ll also want to coordinate with participants’ schedules, so everyone can join in on the fun. Plus, don’t forget to allow yourself enough time for preparation to make the class as smooth as possible.
Consider Seasonal Weather Patterns
Although planning a gardening DIY class can be exciting, it’s essential to take into account seasonal weather patterns to guarantee your event is successful. Start by researching local weather trends; knowing when the rainy or dry seasons hit can help you choose the perfect date. Consider scheduling your class during a period when seasonal plants thrive, ensuring participants can see the best results from their efforts. For instance, spring is ideal for planting and nurturing, while fall is great for harvesting. Flexibility is key—if the forecast looks grim, don’t hesitate to reschedule. Ultimately, aligning your class with favorable weather patterns will create a more enjoyable and productive experience for everyone involved. Make your gardening journey a memorable one!
Coordinate With Participants’ Schedules
After considering the weather patterns, it’s time to focus on coordinating with participants’ schedules. Start by reaching out to your potential attendees to gauge their availability. Use scheduling tools like Doodle or Google Calendar to simplify this process. These platforms can help you find a date and time that works for most people, making it easier to gather your gardening enthusiasts. Keep in mind that flexibility is key—consider offering a few options to accommodate different schedules. Once you’ve settled on a date, send out reminders to guarantee everyone’s on the same page. By prioritizing participant availability, you’ll create a more inviting atmosphere that encourages everyone to join in on the fun. Happy planning!
Allow Time for Preparation
To guarantee your gardening DIY class goes off without a hitch, it’s essential to set a clear date and time well in advance. This allows participants to clear their schedules and assures everyone can join in the fun. Consider using a pre-class checklist to help you manage your time effectively. Make sure to include tasks like sending reminders and confirming supplies, which will keep you organized and stress-free.
Also, be mindful of the season; some plants thrive better in certain months. By planning ahead, you not only foster a relaxed atmosphere but also give participants the freedom to enjoy the experience without the pressure of last-minute arrangements. Time management is key, so take the time to plan wisely!
Gather Necessary Supplies
Gathering necessary supplies for your gardening DIY class is crucial for a successful experience. Having the right items on hand not only makes the class smoother but also enhances the overall fun. Start by creating a supply checklist to guarantee you don’t miss anything important. Here are three crucial tools you shouldn’t overlook:
- Gardening gloves: Protect your hands while digging and planting.
- Hand trowels: Perfect for planting seeds and transplanting small plants.
- Watering cans: Important for keeping your plants hydrated during the class.
Make certain to gather these items ahead of time, so you’re fully prepared when your participants arrive. By being organized and ready, you empower everyone to embrace their creativity and enjoy the gardening process. Remember, the right supplies can truly make or break your class experience, allowing everyone to explore their green thumbs freely! Additionally, consider setting up your class in a gazebo, as it provides shade and shelter that enhances outdoor comfort and encourages a more enjoyable gardening experience.
Promote Your Class
To make your gardening DIY class a success, you’ll need to get the word out effectively. Use social media platforms to reach a wider audience, connect with local community groups, and create eye-catching flyers that grab attention. These strategies will help guarantee that your class attracts the right participants enthusiastic to learn.
Use Social Media
How can you effectively use social media to promote your gardening DIY class? Utilizing various social platforms can boost your audience engagement and attract like-minded enthusiasts. Here are three practical strategies to get you started:
- Create Eye-Catching Posts: Share images and videos of your gardening projects, highlighting what participants will learn.
- Engage with Your Audience: Respond to comments and questions, encouraging conversations about gardening tips and tricks.
- Host Virtual Q&A Sessions: Use live streams to answer potential attendees’ queries, building excitement and connection before the class.
Local Community Outreach
While social media can reach a broad audience, local community outreach is essential for attracting participants who are genuinely interested in gardening. Start by forming community partnerships with local gardening clubs, schools, and libraries. These organizations can help promote your class through their networks. Consider hosting outreach programs at local events or farmers’ markets where you can engage with potential participants directly. Hand out brochures or cards that highlight your class details and benefits. You might also collaborate with local businesses to sponsor your class, providing mutual exposure. By building these connections, you create a supportive environment that encourages community involvement and fosters a sense of belonging among gardening enthusiasts. Embrace this opportunity to inspire your neighbors!
Create Eye-Catching Flyers
Wondering how to grab the attention of potential participants for your gardening DIY class? Eye-catching flyers are the way to go! Here’s how to create an appealing flyer design that stands out:
- Vibrant Color Schemes: Use bright, inviting colors that reflect the beauty of nature and gardening.
- Clear, Bold Text: Make sure your class details—date, time, and location—are easy to read at a glance.
- Engaging Images: Include beautiful photos of plants or previous classes to inspire interest.
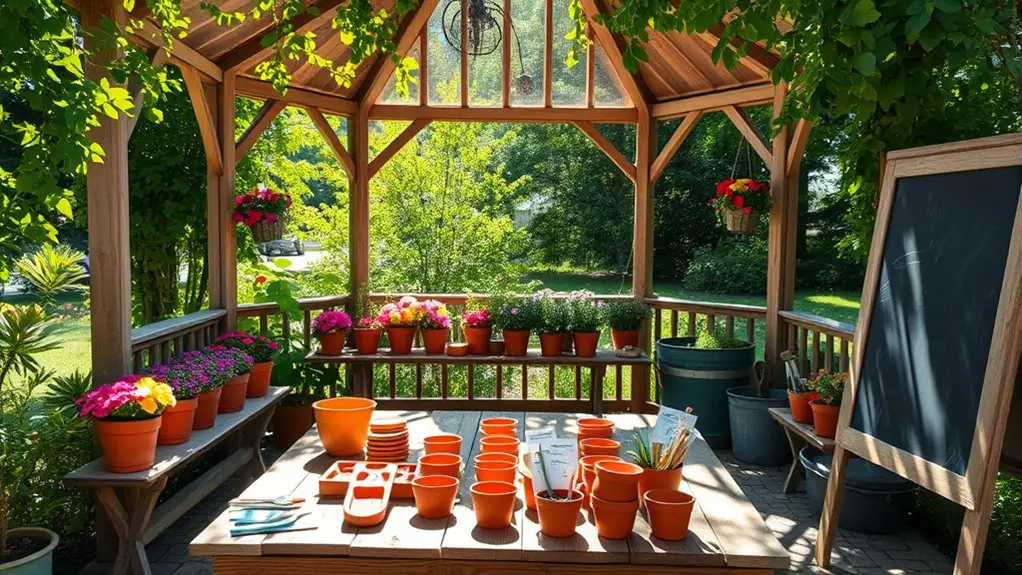
Prepare Your Gazebo Space
Creating a welcoming atmosphere in your gazebo is vital for a successful gardening DIY class. Start by considering your gazebo layout; make certain it allows for movement and interaction. Arrange tables and workstations to encourage collaboration and creativity. Seating arrangements are also important—opt for comfortable chairs or benches that invite participants to relax and engage.
Add personal touches like potted plants or decorative gardening tools to create a vibrant ambiance. Make sure there’s adequate shade or coverage from the elements, so everyone stays comfortable. If your gazebo has side panels, think about opening them up for airflow, or use them to display gardening tips and inspiration. Additionally, ensure that your gazebo provides excellent shelter from environmental elements, which will help keep everyone focused on the class. Finally, make certain you have all necessary supplies within arm’s reach, so participants can easily grab what they need. With the right setup, you’ll foster an enjoyable environment that inspires creativity and learning.
Create a Class Agenda
An effective class agenda serves as the backbone of your gardening DIY class, guiding participants through the day’s activities and ensuring a seamless flow. Start by outlining your class objectives, so everyone knows what to expect and can look forward to achieving specific skills.
An effective class agenda is essential for guiding participants and ensuring a smooth, engaging gardening DIY experience.
Consider including these key components in your agenda:
- Welcome and Introductions: Kick off the class by creating a friendly atmosphere.
- Instructional Segments: Break down topics like soil preparation, plant selection, and watering techniques.
- Discussion Time: Allow space for participant feedback throughout the class, encouraging questions and shared experiences.
This structured approach enables participants to feel engaged and empowered, fostering a sense of community. You want them to leave not just with knowledge, but also with the confidence to apply what they’ve learned, making their gardening endeavors truly their own.
Engage Participants With Hands-On Activities
While theory is important, engaging participants with hands-on activities is what truly brings a gardening DIY class to life. Encourage everyone to jump right in with hands-on planting sessions where they can dig, sow seeds, and feel the earth beneath their fingers. This tactile experience deepens their connection to gardening and reinforces learning.
Incorporate interactive demonstrations that showcase various techniques, like proper transplanting or creating a compost bin. These demos not only capture attention but also allow participants to ask questions and share insights.
You might even consider dividing into small groups, giving each one a specific gardening challenge. This fosters teamwork and keeps the energy high. By prioritizing active participation, you’ll create a dynamic atmosphere that inspires creativity and boosts confidence. So, roll up your sleeves and let your participants experience the joy of gardening firsthand!
Share Helpful Tips and Resources
To guarantee your gardening DIY class is a success, it’s essential to share helpful tips and resources that participants can refer to both during and after the class. Here are some ideas to keep everyone engaged and informed:
- Class Materials: Provide a list of all necessary materials, including tools and seeds, so participants can prep beforehand.
- Gardening Resources: Share links to reputable websites, books, or local experts they can consult for additional guidance and inspiration.
- Participant Feedback: Encourage attendees to share their thoughts on the class. This can help you improve future sessions and build a community of gardeners.
Follow Up After the Class
Following up after the class is essential for reinforcing what participants have learned and keeping their enthusiasm alive. A simple email can go a long way in fostering participant engagement and encouraging feedback collection. Consider asking participants about their experience and what they found most valuable.
Here’s a quick table to guide your follow-up strategy:
| Action | Purpose |
|---|---|
| Send Thank You Emails | Show appreciation and maintain connection |
| Request Feedback Surveys | Gather insights for future improvements |
| Share Additional Resources | Keep the learning going and inspire creativity |
Frequently Asked Questions
How Many Participants Can Fit in My Gazebo Comfortably?
You’ll want to contemplate your gazebo’s size for comfortable seating arrangements. Generally, six to eight participants can fit well, allowing space for discussing growing techniques without feeling cramped. Comfort’s key for an enjoyable experience!
What if It Rains on the Day of the Class?
If it rains on class day, don’t fret! Having a rain plan is essential. Consider an alternative location, like a covered porch or indoor space, ensuring you can still enjoy the gardening experience without worry.
Can I Charge a Fee for Attending the Class?
Absolutely, you can charge a fee for attending! Consider innovative pricing strategies and fee structures that reflect the value you provide. This way, you’ll not only cover costs but also empower participants to invest in their gardening journey.
What Age Groups Is My Gardening Class Suitable For?
Your gardening class can cater to various age groups, promoting youth engagement while encouraging senior participation. It’s a great way for everyone to connect with nature and learn, fostering freedom through hands-on experiences.
How Can I Make My Class Accessible for Everyone?
Imagine a garden where everyone blooms together. To guarantee accessibility, use adaptive tools and engage in community outreach, inviting diverse participants. By nurturing inclusivity, you’ll cultivate a thriving environment where all can flourish.