To plan an outdoor DIY furniture-making class, start by defining your target audience and their skill level. Choose a scenic, accessible location that caters to comfort and creativity. Select projects that vary in complexity to engage participants of all abilities. Gather necessary tools and sustainable materials to guarantee a successful workshop. Promote your class through social media and local partnerships. On the day, create a welcoming atmosphere, and embrace collaboration to enhance the experience. There’s so much more you can explore to make your class unforgettable!
Define Your Target Audience
When planning an outdoor DIY furniture-making class, it’s crucial to define your target audience, as this will shape every aspect of your event. Start with a demographic analysis to identify age, interests, and skill levels of potential participants. Are they beginners keen to learn or seasoned DIY enthusiasts looking for new projects? Knowing this helps tailor your class content, ensuring audience engagement. You might focus on eco-conscious individuals or families wanting to create lasting memories together. By understanding who they are, you can create a welcoming atmosphere that fosters creativity and connection. Ultimately, this clarity will not only enhance the learning experience but also empower your participants to express their unique styles through furniture they’ve crafted themselves.
Choose the Right Location
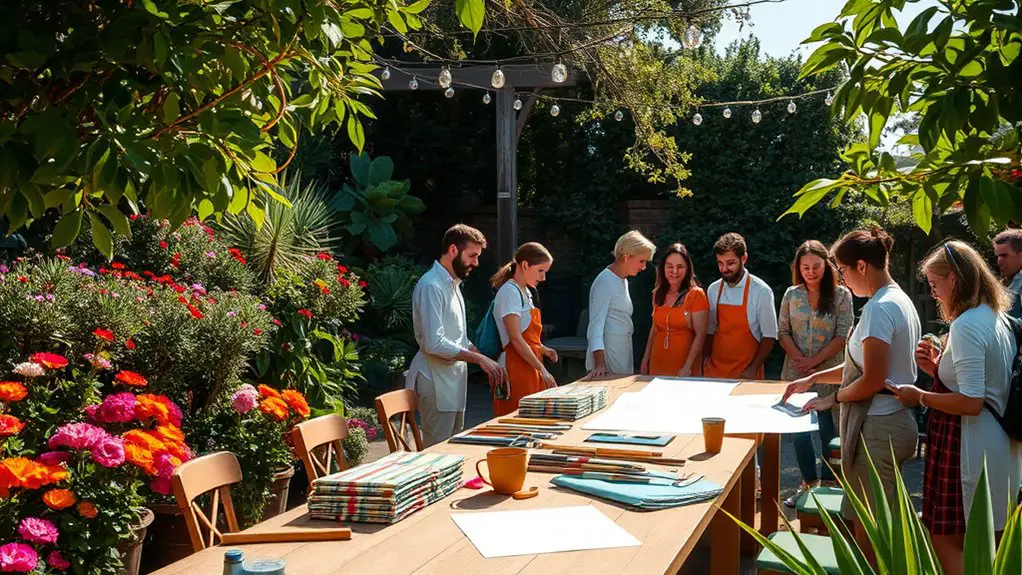
Choosing the right location for your outdoor DIY furniture-making class can greatly impact the overall experience. You want a spot that inspires creativity and allows participants to feel free. Consider these factors:
Selecting an inspiring outdoor location for your DIY furniture class enhances creativity and ensures a memorable experience for all participants.
- Outdoor Ambiance: Look for a scenic area with natural beauty, like parks or gardens.
- Location Accessibility: Confirm it’s easy for everyone to reach, with ample parking or nearby public transport.
- Space to Work: Choose a location with enough room for participants to spread out and work comfortably.
- Weather Considerations: Have a backup plan for unexpected weather changes, like tents or sheltered areas. Additionally, consider how the sun and shade exposure will affect comfort during the class.
Select the Furniture Projects
When selecting furniture projects for your class, think about what items are both popular and practical for your participants. Consider their skill levels; you want to choose projects that challenge them without causing frustration. A good mix will keep everyone engaged and excited to create!
Popular Furniture Choices
As you immerse yourself in planning your outdoor DIY furniture-making class, selecting the right projects can set the tone for a fun and engaging experience. Consider these popular furniture choices that balance style and functionality:
- Rustic Benches: Perfect for outdoor gatherings, they add charm and can be customized to fit any space.
- Modern Stools: Great for casual seating, these can be adapted to various heights and designs.
- Coffee Tables: A centerpiece for your outdoor area, they can showcase your creativity with unique designs.
- Planter Boxes: Functional and attractive, they allow participants to incorporate greenery into their furniture.
Skill Level Considerations
How can you guarantee that your outdoor DIY furniture-making class caters to a range of skill levels? Start by selecting a variety of projects that appeal to both beginners and those looking to refine their skills. For beginners, consider simple projects like a basic garden bench or a rustic side table. These allow them to grasp essential techniques without feeling overwhelmed. For more experienced participants, introduce advanced techniques like mortise and tenon joints or intricate designs that challenge their creativity. Providing clear instructions and visual aids for each project will help everyone feel confident, regardless of their skill level. Remember, the more inclusive your project selection, the more freedom participants will feel to express their unique style.
Gather Necessary Materials and Tools
To kick off your outdoor DIY furniture-making class, you’ll need to gather all the essential tools and materials. Start by creating a checklist to guarantee you have everything on hand, from saws to sandpaper. Don’t forget to explore local sources or online options for your materials, making certain they’re both budget-friendly and suitable for your projects.
Essential Tools Checklist
When planning your outdoor DIY furniture-making class, having the right tools on hand is vital for a smooth and successful experience. You want to guarantee everyone can create with confidence, so gather these essential tools and safety equipment:
- Power Drill – A must for assembling and securing pieces quickly.
- Saw – Whether it’s a hand saw or a power saw, it’s important for cutting wood accurately.
- Measuring Tape – Precise measurements keep your projects looking professional.
- Safety Gear – Don’t forget goggles and gloves to protect everyone while they work.
Material Sourcing Tips
While sourcing materials for your outdoor DIY furniture-making class, it’s essential to contemplate both quality and budget. Start by searching for sustainable materials, like reclaimed wood or bamboo, which not only look great but also minimize your environmental impact. Check out local suppliers, as they often offer unique options and can reduce shipping costs. Don’t hesitate to negotiate prices or ask about bulk discounts; building relationships with vendors can lead to better deals over time. Also, consider organizing a group purchase with your class participants to save even more. By prioritizing sustainability and supporting local businesses, you’ll create stunning furniture while fostering a sense of community and responsibility within your class.
Set a Date and Time
How can you choose the perfect date and time for your outdoor DIY furniture-making class? Start by considering a few key factors that can enhance the experience. Here’s a quick checklist:
- Weather Considerations: Check forecasts and aim for a day with mild temperatures and no rain.
- Scheduling Flexibility: Choose a weekend or holiday when most people can attend without work obligations.
- Time of Day: Late morning or early afternoon often works best to avoid harsh sun or evening chill.
- Local Events: Be aware of nearby happenings that could draw attention or distract potential participants.
Promote Your Class
To successfully fill your outdoor DIY furniture-making class, you’ll need to get the word out effectively. Start by leveraging social media marketing; create eye-catching posts showcasing your projects and class details. Engage with potential attendees through platforms like Instagram and Facebook, encouraging them to share your posts.
Don’t forget local partnerships! Reach out to nearby craft shops or community centers; they might help promote your class in exchange for cross-promotion or a small referral fee. You could even host a collaborative event to attract a wider audience.
Prepare for the Day of the Class
Once you’ve successfully promoted your outdoor DIY furniture-making class, it’s time to focus on the logistics for the day of the event. Start by considering the weather—check forecasts and have a backup plan, like a tent or indoor space. Then, think about your class setup. You want a welcoming environment that encourages creativity.
- Gather all materials and tools beforehand, ensuring everything’s in good condition.
- Arrange tables and seating to promote interaction and comfort.
- Set up a designated area for finished pieces, showcasing your participants’ hard work.
- Finally, create a clear flow for the day, allowing for breaks and Q&A sessions. This way, you’ll create an enjoyable atmosphere that fosters freedom and creativity!
Facilitate the Class Effectively
While you may feel a mix of excitement and nerves as the class begins, effective facilitation will guarantee participants have a rewarding experience. Start by establishing a welcoming environment where everyone feels comfortable to express their ideas. Use class management techniques like setting clear expectations and maintaining a flexible schedule to keep things running smoothly. Encourage participant engagement by asking questions, inviting collaboration, and celebrating their creative choices. Be approachable and attentive to their needs, adjusting your guidance as necessary. Remember, it’s about empowering them to explore their creativity while providing the right support. By fostering an open atmosphere, you’ll inspire confidence and assure everyone leaves feeling accomplished and inspired to continue their DIY journey.
Follow Up and Gather Feedback
As the class wraps up, it is crucial to follow up and gather feedback to enhance future sessions. Engaging participants in this process not only improves your classes but also fosters a sense of community. Here are some effective feedback methods you can use:
- Evaluation Forms: Distribute simple forms asking about their experience, what they loved, and areas for improvement.
- Group Discussions: Facilitate an open conversation, allowing everyone to share insights and suggestions.
- Follow-Up Emails: Send a thank-you note with a brief survey link to gather additional thoughts.
- Social Media Polls: Create quick polls on your platforms to get instant feedback in a fun way.
Utilizing these methods will help you refine your approach and keep your classes vibrant and engaging!
Frequently Asked Questions
What Skill Level Is Required for Participants in the Class?
For this class, you’ll need basic skills in woodworking but don’t worry! You’ll learn advanced techniques along the way, allowing you to release your creativity and gain confidence in crafting unique outdoor furniture pieces.
Can I Host the Class at My Own Home?
Absolutely, you can host the class at your own home! Just make certain your outdoor setup has enough space for everyone to work comfortably. Creating a welcoming atmosphere will enhance the experience for all participants.
How Many Participants Can I Accommodate?
You’ve gotta consider your space and materials when deciding on participant capacity. A smaller class size allows for more personalized attention, making the experience more enjoyable. Aim for a balance between comfort and engagement!
What Safety Measures Should I Consider During the Class?
When planning your class, consider first aid kits for minor injuries and guarantee fire safety measures are in place, like keeping flammable materials away from tools. It’ll help everyone feel secure and enjoy the creative process!
Is Insurance Needed for Hosting the Class?
Think of hosting your class like jumping off a diving board. You’ll need liability coverage to cushion any potential falls, and insurance can protect you from class cancellations too. Better safe than sorry, right?