To set up your gazebo for science demonstrations, first choose a location with shade and stability. Create an engaging layout that promotes natural flow and interaction. Equip your space with essential tools like microscopes and safety gear. Always prioritize safety by evaluating hazards and preparing for emergencies. Don’t forget to incorporate interactive elements to captivate attendees. By focusing on these aspects, you can enhance your event’s impact, and there’s even more to reflect on for a successful setup!
Choosing the Right Location for Your Gazebo
When you’re setting up a gazebo for science demonstrations, how do you choose the best location? First, consider sunlight exposure. You want to guarantee your demonstrations are visible and engaging, so position the gazebo to maximize natural light while avoiding harsh glare. Next, think about ground stability. A sturdy, level surface is essential for safety and preventing any accidents during your activities. Look for areas with firm ground, avoiding sandy or overly soft spots. Additionally, keep in mind the surroundings—make sure there’s enough space for participants to move easily and interact without feeling cramped. By carefully selecting a location that balances sunlight exposure and ground stability, you’ll create an inviting atmosphere for everyone involved in the demonstration. Furthermore, ensure that the gazebo is located on flat, sturdy ground to enhance stability and safety during your presentations.
Designing an Engaging Layout
When designing your gazebo layout, think about how to make the most of your space while keeping it visually inviting. You’ll want to arrange your demonstrations and displays in a way that flows naturally and captures attention. Adding eye-catching elements can enhance the overall experience and draw people in. Consider incorporating features like design versatility to ensure your setup complements the natural beauty of the gazebo while serving its educational purpose.
Optimize Space Utilization
Creating an engaging layout for your gazebo can transform a simple space into an interactive hub for science demonstrations. To optimize space utilization and guarantee layout efficiency, consider these key elements:
- Define Activity Zones: Designate areas for various demonstrations, guaranteeing smooth changes and easy access.
- Use Vertical Space: Incorporate shelves or hanging displays to maximize your area without cluttering the ground.
- Flexible Seating: Choose movable seating arrangements that allow you to adapt to different group sizes and activities.
Visual Appeal Elements
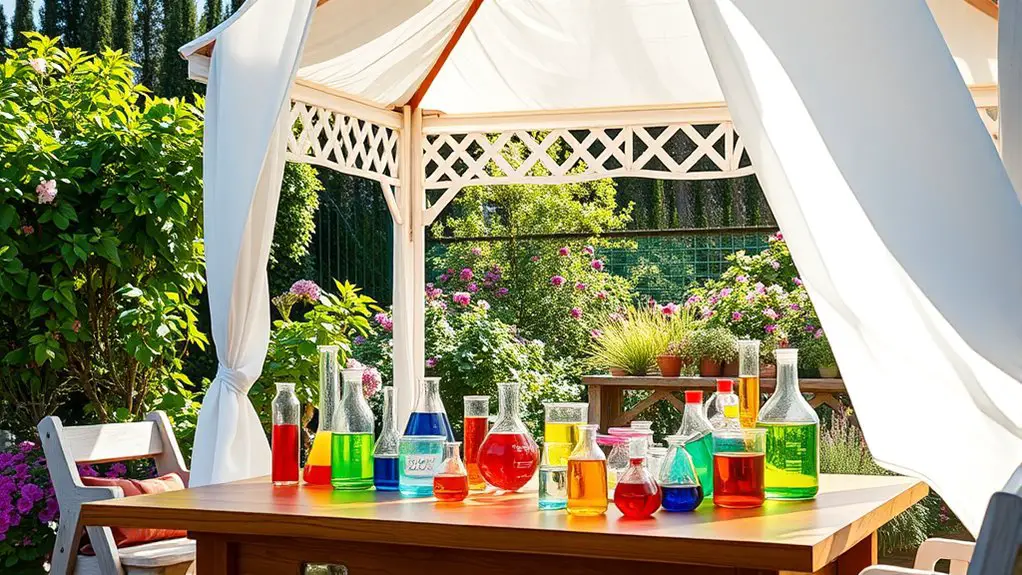
Visual appeal plays an essential role in drawing attention to your science demonstrations and enhancing the overall experience. To create an engaging layout, consider using vibrant color schemes that reflect the themes of your experiments. Bright colors can ignite curiosity, while softer tones can create a calming atmosphere. Pair these colors with strategic lighting effects; soft, ambient lighting can make your gazebo feel inviting, while focused lights can highlight key demonstrations or displays. Don’t forget to arrange your materials in an organized yet dynamic way, allowing for easy viewing and interaction. By thoughtfully combining color schemes and lighting effects, you’ll foster an environment that captivates your audience and encourages them to explore the wonders of science.
Essential Equipment and Supplies
When setting up your gazebo, having the right equipment and supplies is key to a successful science demonstration. You’ll need must-have scientific tools, safety gear, and effective display materials to keep your audience engaged and informed. Let’s explore what you really can’t do without for a smooth and exciting event.
Must-Have Scientific Tools
To effectively engage your audience during science demonstrations, having the right tools at your disposal is essential. You’ll want to include must-have scientific instruments and research tools that spark curiosity and facilitate understanding. Here are some key items to contemplate:
- Microscope: Perfect for examining small specimens and showcasing the intricacies of biology.
- Volumetric Flask: Ideal for demonstrating precise liquid measurements and mixing solutions.
- Digital Thermometer: Useful for experiments requiring temperature monitoring, making your demonstrations more interactive.
With these tools, you’ll not only enhance your demonstrations but also inspire your audience’s love for science. Remember, the right equipment can transform a simple demonstration into an unforgettable experience!
Safety Gear Essentials
Having the right scientific tools is just one part of creating an engaging demonstration; safety gear is equally important. To protect yourself and your audience, you need to focus on gloves selection and the goggles importance. Here’s a quick guide to essential safety gear:
| Safety Gear | Purpose | Tips |
|---|---|---|
| Safety Goggles | Protects eyes from splashes and debris | Guarantee a snug fit |
| Nitrile Gloves | Protects hands from chemicals | Choose the right size for comfort |
| Lab Coats | Shields clothes from spills | Opt for long sleeves |
| Face Masks | Reduces inhalation of harmful particles | Use when necessary |
Display and Presentation Supplies
While safety gear is essential, the effectiveness of your science demonstration also heavily relies on the right display and presentation supplies. Choosing the best presentation materials can elevate your demonstration and keep your audience engaged. Here are some key items to contemplate:
- Visual Aids: Use posters, charts, or digital slides to illustrate your points clearly.
- Tables and Stands: Ascertain your materials are at eye level with sturdy tables and stands to showcase experiments.
- Interactive Elements: Incorporate hands-on activities that invite participation and enhance learning through display techniques.
Safety Considerations for Demonstrations
Although setting up a gazebo for science demonstrations can be exciting, safety must always come first. Before diving into your activities, conduct a thorough hazard assessment of your setup. Identify potential risks, such as sharp objects, chemicals, or electrical equipment. It’s vital to have emergency protocols in place—know the nearest exits, have first aid kits ready, and make certain everyone knows how to respond to an emergency. Make sure to communicate safety rules to participants and supervise demonstrations closely. Encourage a culture of safety where everyone feels comfortable voicing concerns. By prioritizing these measures, you create an environment that fosters learning while keeping freedom and exploration at the forefront of your science demonstrations. Additionally, ensure that your gazebo is secured from wind to prevent any unexpected accidents during demonstrations.
Incorporating Interactive Elements
To make your science demonstrations more engaging, consider incorporating interactive elements that invite participation and ignite curiosity. People love to get involved, and interactive activities can really elevate their experience. Here are a few ideas to get you started:
- Hands-on experiments: Encourage attendees to try simple experiments themselves, making science tangible and fun.
- Question and answer sessions: Foster discussion by inviting questions throughout your demonstrations, creating a dialogue that enhances understanding.
- Interactive displays: Set up stations where participants can explore concepts at their own pace, using visual aids and hands-on materials.
Promoting Your Science Demonstrations
Effective promotion is essential for attracting an audience to your science demonstrations, as it creates buzz and sets the stage for a successful event. Start by identifying your target audience—are they families, students, or science enthusiasts? Tailor your promotional strategies accordingly. Use social media to spread the word, create eye-catching flyers, and engage local schools or community groups. Don’t underestimate word-of-mouth; encourage friends and family to share the event. Consider hosting a teaser demonstration to spark interest. Collaborate with local businesses to display your promotional materials. Remember, the goal is to ignite curiosity and invite freedom of exploration, so make every communication inspiring and accessible. With the right approach, your gazebo will be filled with enthusiastic participants ready to learn! Additionally, choose a location that provides adequate shade to ensure comfort for all attendees during your demonstrations.
Frequently Asked Questions
What Types of Science Demonstrations Work Best in a Gazebo Setting?
Imagine a vibrant garden, where hands-on experiments bloom like flowers. In a gazebo, interactive exhibits thrive, sparking curiosity and joy. You’ll find that chemistry reactions and physics challenges captivate minds and ignite a passion for discovery.
How Can I Attract More Participants to My Science Demonstrations?
To attract more participants to your science demonstrations, leverage social media for promotion and engage in community outreach. Share exciting content, collaborate with local groups, and create interactive experiences to draw in curious minds enthusiastic for exploration.
What Should I Do in Case of Bad Weather During the Event?
When weather’s worrisome, whip up a weather contingency! You should’ve safety protocols ready—consider moving indoors or providing canopies. Keeping participants comfortable and secure guarantees everyone enjoys the event, rain or shine.
Can I Use My Gazebo for Other Events Besides Science Demonstrations?
Absolutely, your gazebo’s event versatility allows for alternative uses beyond science demos. You can host parties, workshops, or community gatherings, making it a fantastic space for various occasions and giving you the freedom to explore creativity.
How Do I Gather Feedback From Participants After the Demonstration?
You might think feedback isn’t necessary, but gathering it’s essential. Utilize participant surveys and various feedback methods like informal chats or suggestion boxes to guarantee you’re meeting their needs and improving future events.