To organize a successful gardening DIY workshop in your gazebo, start by defining clear goals for participants. Pick a date that avoids holidays and seasonal conflicts. Plan engaging hands-on activities, like potting plants and making seed bombs, and gather all necessary materials ahead of time. Promote your event through social media and local groups. Create a cozy atmosphere with comfortable seating and decorations. Ultimately, follow up with participants to nurture connections and encourage future involvement. There’s so much more you can explore!
Define Your Workshop Goals
Before you plunge into planning your gardening DIY workshop, it’s important to establish clear goals that’ll guide your efforts. Think about your workshop objectives—do you want to teach specific skills, inspire creativity, or promote sustainable practices? Defining these aims will help shape your content and structure. Next, consider participant expectations. What do your attendees hope to gain from the experience? Surveying potential participants or discussing with friends can provide valuable insights. By aligning your objectives with their expectations, you’ll create a more engaging and fulfilling workshop. Remember, clarity in your goals not only keeps you focused but also enhances the overall experience for everyone involved, allowing for a rewarding journey into the world of gardening.
Choose the Right Date and Time
When planning your gardening workshop, picking the right date and time is essential. Consider the season and local weather forecasts to guarantee a pleasant experience for everyone. Also, think about when your attendees are most likely to be available, as this can greatly impact attendance.
Seasonal Considerations
Choosing the right date and time for your gardening DIY workshop can make all the difference in attracting participants and ensuring a successful event. Consider the seasonal plants you’d like to focus on and align your timing with their peak growth. Additionally, keep in mind local weather patterns to enhance the experience. Here’s a simple table to help guide your planning:
| Month | Seasonal Plants | Ideal Time |
|---|---|---|
| March | Spring bulbs | Late morning |
| June | Annuals | Early afternoon |
| September | Perennials | Late morning |
| November | Winter vegetables | Early afternoon |
| December | Holiday herbs | Mid-morning |
Weather Forecast Check
How can a simple weather check transform your gardening DIY workshop? By choosing the right date and time, you can guarantee a more enjoyable experience for everyone involved. Keeping an eye on weather patterns and precipitation predictions can help you avoid any unpleasant surprises. Here are some tips to guide you:
- Check forecasts a week in advance to spot any potential rain or extreme heat.
- Consider your audience’s availability; weekends may be more suitable for most.
- Look for patterns in local weather; certain months may be more reliable.
- Have a backup plan for inclement weather, like moving indoors or rescheduling.
With a little foresight, you can create a successful and fun workshop!
Timing for Attendees
Selecting the right date and time for your gardening DIY workshop can make all the difference in attendance and overall enjoyment. To maximize participation, consider attendee preferences—weekends or evenings often work best for those with busy schedules. You’ll want to avoid common scheduling conflicts, like holidays or major local events.
Poll potential attendees beforehand to gauge their availability; this simple step can provide valuable insight. Also, think about the season—spring and early summer are ideal for gardening themes. Once you’ve chosen your date, provide plenty of notice so everyone can plan accordingly. Remember, the goal is to create a relaxed atmosphere where everyone can express their creativity and love for gardening. Happy planning!
Plan Your Workshop Activities
When planning your workshop activities, it’s essential to prioritize engagement and hands-on learning. Carefully consider your activity selection to guarantee participants enjoy a fulfilling experience. Here are four ideas for hands-on projects that will inspire creativity and connection:
- Plant Potting Station: Let attendees pot their own plants while learning about soil types and care.
- DIY Seed Bombs: Craft seed bombs using clay, compost, and seeds, making gardening accessible to everyone.
- Herb Garden Creation: Guide participants in assembling small herb gardens they can take home.
- Garden Design Workshop: Encourage creativity by having attendees sketch their dream garden layouts.
These activities not only foster hands-on learning but also create a memorable experience that cultivates a love for gardening.
Gather Necessary Materials and Supplies
Gathering the right materials and supplies is essential for a successful gardening DIY workshop, and having a well-prepared checklist can make all the difference. Start with tool selection—consider what gardening tasks you’ll tackle and guarantee you have the necessary tools, like trowels, pruners, and gloves. Don’t forget about safety gear! Next, focus on supply sourcing; gather seeds, soil, pots, and any other materials your projects require. Local garden centers or online shops can be great resources. Organize everything in your gazebo before the workshop begins. This way, you’ll create a welcoming environment that encourages hands-on participation. By being prepared, you’ll not only enhance the experience for yourself but also empower your participants to embrace their gardening journey.
Promote Your Workshop Effectively
To get the word out about your workshop, you need to harness the power of social media and local advertising. Connecting with community organizations can also help you reach a wider audience. Let’s explore some effective strategies to promote your gardening DIY workshop and attract enthusiastic participants!
Leverage Social Media
While social media platforms may seem overwhelming, they’re invaluable tools for promoting your gardening DIY workshop effectively. By leveraging social media strategies, you can engage your audience and build excitement around your event. Here are some practical tips:
- Create eye-catching graphics: Use vibrant images of past workshops or plants to draw attention.
- Engage with your audience: Ask questions and encourage comments to spark discussions.
- Share behind-the-scenes content: Post sneak peeks of what participants can expect to learn.
- Utilize event pages: Create an event on platforms like Facebook to keep everyone informed and excited.
These strategies will help you connect with potential participants and create a buzz that can lead to a successful workshop!
Utilize Local Advertisements
After building anticipation through social media, it’s time to take your promotional efforts offline. Start by tapping into local partnerships; collaborate with nearby nurseries, garden centers, or community groups. They can help spread the word and even display flyers in their shops. Utilize targeted advertising strategies like local newspapers, bulletin boards, and community newsletters to reach potential participants who appreciate hands-on experiences. Don’t forget about word-of-mouth; encourage friends and family to share your workshop details. Consider placing eye-catching posters in popular spots like coffee shops and libraries. By combining online buzz with these local advertising efforts, you’ll increase visibility and attract attendees enthusiastic to join your gardening DIY workshop in your gazebo.
Engage Community Organizations
Engaging community organizations can greatly enhance your workshop’s reach and impact, as these groups often have established networks and dedicated members who share a passion for gardening. By forming community partnerships, you can tap into their resources and expertise. Here are some effective ways to engage them:
- Collaborate on outreach programs: Work together to create events that promote gardening education.
- Share resources: Offer your gazebo space for their meetings, and in return, they can help spread the word about your workshop.
- Leverage social media: Ask organizations to share your event on their platforms, reaching a broader audience.
- Host joint activities: Plan mini-events or gardening contests to increase excitement and participation.
With these strategies, your workshop can flourish!
Create a Welcoming Atmosphere
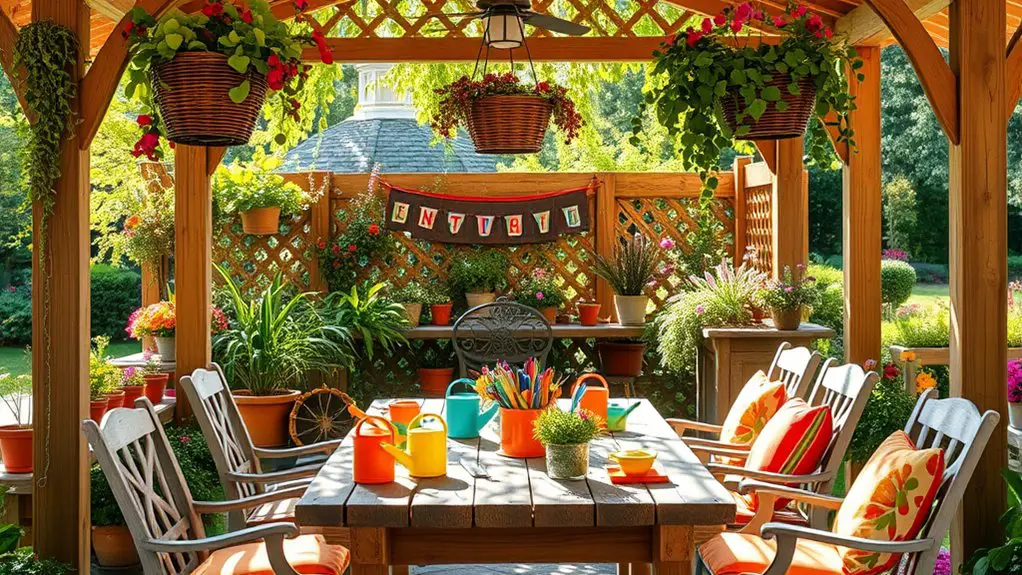
How can you transform your gardening DIY workshop into a space that feels inviting and friendly? Start by enhancing the ambiance with soft lighting—think string lights or lanterns to create a warm glow. This sets a relaxed mood that encourages creativity and conversation. Next, focus on seating arrangements; opt for a mix of comfortable chairs and cozy blankets to invite participants to settle in. Arrange seats in a circle or semi-circle to foster interaction, allowing everyone to see and engage with each other easily. Don’t forget to add personal touches like potted plants or colorful decorations that resonate with your gardening theme. With the right atmosphere, your workshop will be a space where everyone feels free to share and explore.
Follow up With Participants
While it may be easy to wrap up your gardening DIY workshop and move on, taking time to follow up with participants is essential for building lasting connections and fostering a sense of community. Engaging with your attendees post-workshop can enhance their experience and encourage future participation. Here are some effective ways to follow up:
Following up with workshop attendees fosters community and enhances their gardening experience.
- Send a thank-you email – Express gratitude for their attendance and enthusiasm.
- Collect feedback – Use surveys to gather insights and improve future workshops.
- Share resources – Provide links to helpful articles or videos related to gardening.
- Encourage sharing – Invite participants to share their progress and photos on social media.
This approach not only boosts participant engagement but also strengthens your community ties.
Frequently Asked Questions
How Many Participants Can Fit Comfortably in My Gazebo?
To determine how many participants can fit comfortably in your gazebo, consider its dimensions and your seating arrangements. Generally, aim for about 6-8 people for a cozy atmosphere, ensuring everyone has enough space to move freely.
What Should I Do if It Rains on the Workshop Day?
When the skies weep, don’t fret like a poet caught in a tempest. Embrace rainy day activities by relocating your workshop indoors or to a cozy alternative location, ensuring creativity blooms despite the weather’s whims.
Can I Charge a Fee for the Workshop?
Yes, you can charge a fee for the workshop. Consider a fee structure that aligns with your audience’s budget and a pricing strategy that reflects the value you offer, ensuring an engaging experience without feeling restrictive.
How Do I Handle Dietary Restrictions for Snacks?
When it comes to snacks, think of a rainbow—variety’s key! Offer vegan options and gluten-free snacks to guarantee everyone’s included. A little planning can make your gathering a delightful experience for all attendees.
What Should I Do With Leftover Materials After the Workshop?
After the workshop, consider recycling options for leftover materials. You could also check local donation centers; they might appreciate your extra supplies. It’s a great way to reduce waste and support your community!