To organize a stunning photography gallery under your gazebo, start by choosing a location that captures natural light and offers a scenic entrance. Clear any clutter and make certain your space is safe and accessible. Select a cohesive theme that resonates with your audience, and display your photographs in an engaging layout. Use effective lighting to enhance visibility and create inviting labels for each piece. Don’t forget refreshments for guests! This foundation sets the stage for more engaging tips ahead.
Choosing the Right Location for Your Gazebo Gallery
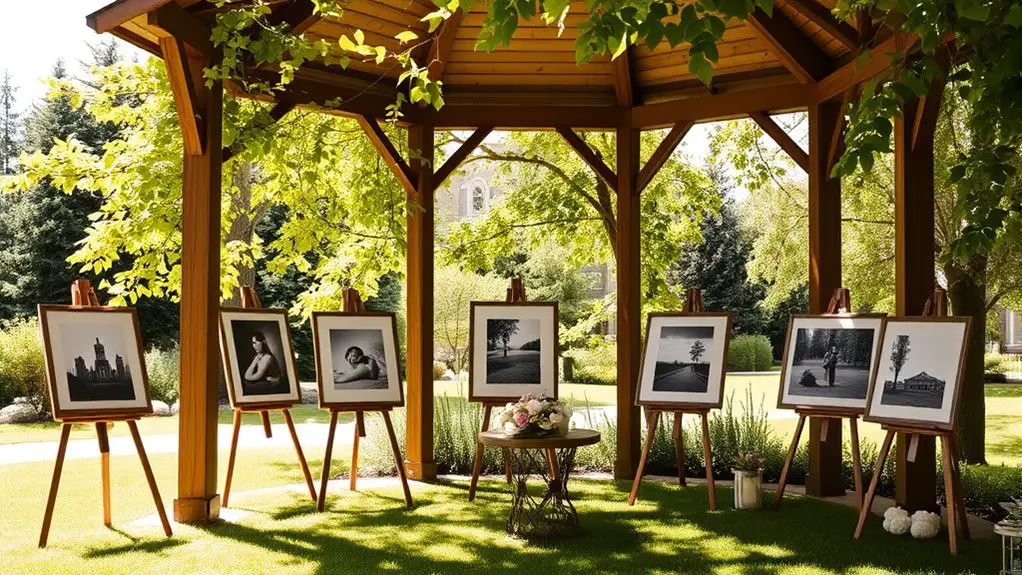
When you’re considering the perfect spot for your gazebo gallery, it’s vital to think about both aesthetics and accessibility. Start by determining the gazebo orientation; positioning it to capture natural light can enhance your photographs’ appeal. Ideally, the entrance should face the most scenic view, drawing visitors in. Next, consider the ground surface; a stable, level area is essential for safety and comfort. Grass can be inviting, but a paved surface may offer better accessibility for all visitors. You might also want to verify that the location is easily reachable, allowing guests to wander freely and explore your work without obstruction. Balancing these elements can create an inviting atmosphere that celebrates your photography in a fascinating way. Additionally, ensure that the gazebo is placed in a way that considers sun exposure to keep the area comfortable throughout the day.
Selecting a Theme for Your Photography Exhibit
When selecting a theme for your photography exhibit, it’s essential to think about your audience and what resonates with them. A well-defined theme not only creates visual cohesion but also tells a story that engages viewers. By aligning your chosen theme with their interests, you’ll enhance the overall impact of your exhibit.
Consider Your Audience
How do you choose a theme that resonates with your audience for your photography exhibit? Start by identifying your target audience. Think about their interests, values, and emotional triggers. Are they drawn to nature, urban landscapes, or social issues? Once you’ve defined who they are, brainstorm themes that align with their preferences. For example, if your audience loves travel, consider a theme showcasing the beauty of different cultures. Engaging your audience is essential, so think about how your theme can spark conversation and connection. Use storytelling through your photographs to create an immersive experience. Ultimately, a well-chosen theme not only captivates but also fosters deeper audience engagement, encouraging them to explore and appreciate your work.
Explore Visual Cohesion
To create a compelling photography exhibit, it’s crucial to guarantee visual cohesion throughout your selected theme. Start by choosing a theme that resonates with your creative vision—whether it’s nature, urban life, or abstract art. Ascertain thematic consistency by selecting images that share a common narrative or emotion. This creates visual harmony, allowing your audience to engage deeply with the exhibit. Pay attention to color palettes, as complementary hues can elevate the overall aesthetic. Additionally, consider the arrangement of your photographs; grouping similar styles or subjects can enhance the flow. Remember, each piece should contribute to the overarching theme, inviting viewers into a cohesive experience. Embrace your artistic freedom, and let your theme guide your selections for a memorable gallery.
Preparing the Gazebo Space for Display
Although the gazebo offers a charming and unique backdrop for your photography gallery, preparing the space for display requires careful attention to detail. Start with space preparation: clear any debris or clutter that might distract from your artwork. Make sure the gazebo is well-maintained; check for loose boards or rusted nails that could pose safety hazards. Consider how your pieces will be displayed—using easels, string lines, or hangers should enhance visibility. Arrange your photographs in a way that guides the viewer’s eye, maintaining a flow that feels natural. Finally, think about how the gazebo’s structure can complement your work, framing each piece while allowing freedom for movement. Additionally, ensure that the gazebo is placed in a location that offers sun and shade exposure, which can enhance the viewing experience by balancing light. This thoughtful preparation sets the stage for a fascinating gallery experience.
Effective Lighting Tips for Outdoor Exhibitions
When it comes to outdoor exhibitions, using natural light can enhance your photography, so consider the time of day for ideal exposure. You’ll also want to invest in adjustable lighting fixtures to adapt to changing conditions and highlight your work effectively. Finally, think about how to illuminate your pieces during evening events, ensuring they remain fascinating as daylight fades.
Natural Light Utilization
How can you make the most of natural light during your outdoor photography exhibition? Start by considering the time of day. Early mornings and late afternoons offer softer, more flattering light—perfect for showcasing your work. Use natural light techniques like positioning your images to avoid direct sunlight, which can create harsh shadows and glares. Instead, place your photographs in shaded areas or under your gazebo, ensuring they’re still visible yet protected from extreme brightness. Don’t forget to account for the weather; overcast days can provide diffused, even lighting that enhances colors, making it ideal for outdoor photography. Embrace the freedom of nature’s light—experiment with different angles and placements to discover what works best for your unique exhibition.
Adjustable Lighting Fixtures
While natural light can beautifully enhance your photographs, adjustable lighting fixtures are essential for creating a versatile and dynamic outdoor exhibition. These fixtures allow you to control the ambiance by providing adjustable brightness, ensuring your artwork shines in every condition. With flexible positioning, you can easily direct light to highlight specific pieces or create intriguing shadows that add depth to your display.
Consider using LED lights, which are energy-efficient and offer a range of color temperatures. Position them strategically around your gazebo to eliminate harsh glares while illuminating your work evenly. This freedom to adapt lighting not only elevates the viewing experience but also enhances the overall atmosphere, making your photography gallery truly enchanting for every visitor.
Evening Exhibition Considerations
As the sun sets and twilight envelops your outdoor gallery, three key lighting strategies can transform your exhibition into a fascinating experience. First, consider using soft, warm lights to create an inviting evening ambiance. String lights or lanterns can add a magical touch while illuminating your artwork without overpowering it. Second, pay attention to weather considerations; confirm your fixtures are weatherproof and stable to prevent any mishaps. Finally, spotlight specific pieces to draw attention, highlighting their details and textures against the night sky. By thoughtfully combining these elements, you’ll not only enhance the visibility of your photography but also invite your guests to linger and enjoy the atmosphere, creating a memorable evening under your gazebo.
Displaying Your Photographs: Layout Ideas
When planning the layout for your photography gallery, it’s essential to contemplate how each piece interacts with its surroundings, as this can greatly enhance the viewer’s experience. Begin by grouping photographs with similar themes or colors, guaranteeing color harmony flows throughout the space. Use framing techniques to create visual interest; try varied sizes and styles to draw attention. Consider a grid layout for a clean, organized look, or a salon-style arrangement for a more eclectic feel. Don’t shy away from leaving some open space—this allows your audience to breathe and appreciate each piece fully. Finally, make sure good lighting highlights your work, inviting guests to linger and explore your artistic vision in a relaxed, free-spirited atmosphere.
Incorporating Interactive Elements for Engagement
To truly engage your audience, consider adding interactive elements like a photo booth station where visitors can capture their own moments. A live demonstration area can showcase your photography techniques, inviting participation and sparking curiosity. Additionally, interactive art displays can encourage guests to explore and connect with the photographs on a deeper level, enhancing their overall experience.
Photo Booth Station
While a traditional gallery can captivate with stunning visuals, incorporating a photo booth station elevates the experience by inviting guests to engage directly with the art. Set up a designated area with an eye-catching backdrop—think vibrant colors or a mural that complements your theme. Include a variety of photo props that reflect the essence of your showcased photography, like fun hats, frames, or even themed masks. Encourage creativity; let guests mix and match props for unique shots. Consider using a Polaroid camera for instant prints, allowing attendees to take home a piece of the experience. This interactive element not only fosters connection but also creates lasting memories, making your gallery truly unforgettable.
Live Demonstration Area
Creating a live demonstration area adds an exciting layer to your photography gallery, allowing guests to witness the artistic process in real-time. This space can host live demonstrations or photography workshops, letting visitors engage with the art form. Here’s how to visualize your setup:
| Time Slot | Activity |
|---|---|
| 10:00 AM – 11:00 AM | Landscape Photography |
| 11:30 AM – 12:30 PM | Portrait Lighting Techniques |
| 1:00 PM – 2:00 PM | Macro Photography Tips |
| 2:30 PM – 3:30 PM | Editing Techniques |
Interactive Art Displays
Incorporating interactive art displays can transform your photography gallery into an immersive experience, inviting guests to engage with the artwork on a personal level. Consider adding interactive installations where visitors can manipulate elements of the photographs, like adjusting colors or zooming in on details. This hands-on approach fosters audience participation, allowing attendees to express their creativity and connect with the art. You might also set up a digital kiosk where guests can leave feedback or share their interpretations of the work, creating a dynamic dialogue. Additionally, consider integrating augmented reality features that bring static images to life, deepening the engagement. By embracing these interactive elements, you’ll create a memorable atmosphere that encourages exploration and connection.
Creating Informative Labels and Descriptions
How can you effectively convey the essence of each photograph in your gallery? Start with thoughtful label design. Use clear fonts and colors that complement your images, ensuring they’re easy to read. Each label should include the title, artist’s name, and the year it was taken, creating a structured yet inviting look.
Next, focus on engaging description content. A brief narrative or insight into the photo’s context can deepen viewers’ appreciation. Share the story behind the shot or the emotions it evokes, inviting them to connect on a personal level. Keep it concise—just a few sentences that spark curiosity without overwhelming. Remember, these labels and descriptions are your chance to celebrate creativity and foster a sense of freedom in interpretation.
Curating a Guest Experience With Refreshments
While you focus on showcasing the art, don’t underestimate the impact of thoughtfully curated beverages on your guests’ experience. Offering a diverse selection of drink options enhances the atmosphere and encourages mingling. Consider invigorating lemonade, artisanal teas, or even a signature cocktail for a touch of flair.
Pair these beverages with light bites—think savory canapés or sweet treats that complement the drinks. For instance, a crisp white wine pairs beautifully with cheese platters, while sparkling water can cleanse the palate between art pieces.
Promoting Your Photography Gallery Event
To effectively draw attention to your photography gallery event, it’s essential to utilize a multi-faceted promotional strategy that captivates your audience’s interest. Here are three key ways to promote your event:
- Leverage Social Media: Share sneak peeks of your photography and behind-the-scenes content. Use platforms like Instagram and Facebook to create buzz. Don’t forget to engage with your followers!
- Form Local Partnerships: Collaborate with local businesses or artists. They can help spread the word, and you can cross-promote each other’s events, expanding your reach.
- Create Eye-Catching Flyers: Distribute flyers in your community, focusing on popular spots. Use vibrant visuals to draw attention and include all the essential event details.
With these strategies, you’ll invite freedom-loving art enthusiasts to your gallery!
Gathering Feedback and Building Connections
After successfully promoting your photography gallery event, the next step is to gather feedback and build connections with your audience. Set up feedback forms at the exit, encouraging attendees to share their thoughts on the display and overall experience. This not only helps you improve future events but also shows you value their opinions.
Consider hosting a casual networking opportunity afterward, where guests can mingle and discuss their favorite pieces. Create an inviting atmosphere with refreshments to foster open conversations. By engaging with your audience, you’ll establish meaningful relationships that can lead to collaborative projects or future exhibitions. Remember, feedback and connections are essential for your growth as a photographer, so embrace this chance to connect authentically.
Frequently Asked Questions
What Equipment Do I Need for Setting up My Gallery?
Did you know that 70% of art impressions come from proper lighting? For your gallery, you’ll need a solid lighting setup and durable display materials to showcase your work beautifully and create an inviting atmosphere.
How Can I Protect My Photographs From Weather Elements?
To protect your photographs, use waterproof materials for frames and coverings. Consider climate factors like humidity and sunlight. Investing in quality protective gear guarantees your gallery remains vibrant, allowing you to showcase your art freely.
What Is the Best Time of Year for an Outdoor Gallery?
Like a canvas kissed by spring blooms, the best time for your outdoor gallery is late spring through summer. You’ll capture vibrant colors and summer vibes, creating an inviting atmosphere that draws everyone in effortlessly.
How Do I Handle Sales or Pricing for My Displayed Work?
To handle sales, consider diverse pricing strategies that reflect your work’s value. Offer clear payment options, like cash or digital payments, ensuring a seamless experience for buyers while showcasing your creativity and passion for photography.
Can I Collaborate With Other Artists for My Gallery Event?
“Many hands make light work.” Collaborating with other artists enriches your gallery through diverse perspectives. Seek out artist networking opportunities to spark creative ideas and form collaborative projects that enhance your event’s appeal and reach.