Did you know that sealing gaps with foam can reduce energy loss by up to 30%? This significant improvement in energy efficiency not only lowers utility bills but also enhances indoor comfort. However, choosing the right foam sealant and applying it correctly is essential for best results. Understanding the various types and application techniques can make all the difference in achieving effective gap blocking. Let’s explore these key aspects further.
Benefits of Foam Sealants
When it comes to sealing gaps in your home, foam sealants offer several key benefits that make them a preferred choice. They markedly enhance energy efficiency by preventing air leaks, which helps maintain your desired indoor climate and reduces heating and cooling costs. Additionally, foam sealants provide impressive soundproofing benefits, effectively dampening noise between rooms or from outside. This creates a more peaceful living environment, allowing you to enjoy your space without distractions. By choosing foam sealants, you’re not just sealing gaps; you’re investing in comfort, cost savings, and a quieter home, giving you the freedom to fully enjoy your living space.
Types of Foam Sealants
Foam sealants come in various types, each designed for specific applications and conditions. Spray foam is ideal for filling large gaps and providing insulation, expanding to fit irregular spaces. It’s perfect for areas that need both air sealing and thermal resistance. On the other hand, rigid foam offers structural support and is often used in exterior applications, like sheathing or foundation insulation. Both types provide excellent moisture resistance and can be used to enhance energy efficiency in your home. Understanding these differences helps you choose the right foam sealant for your project, ensuring peak performance and durability.
How to Apply Foam Sealants
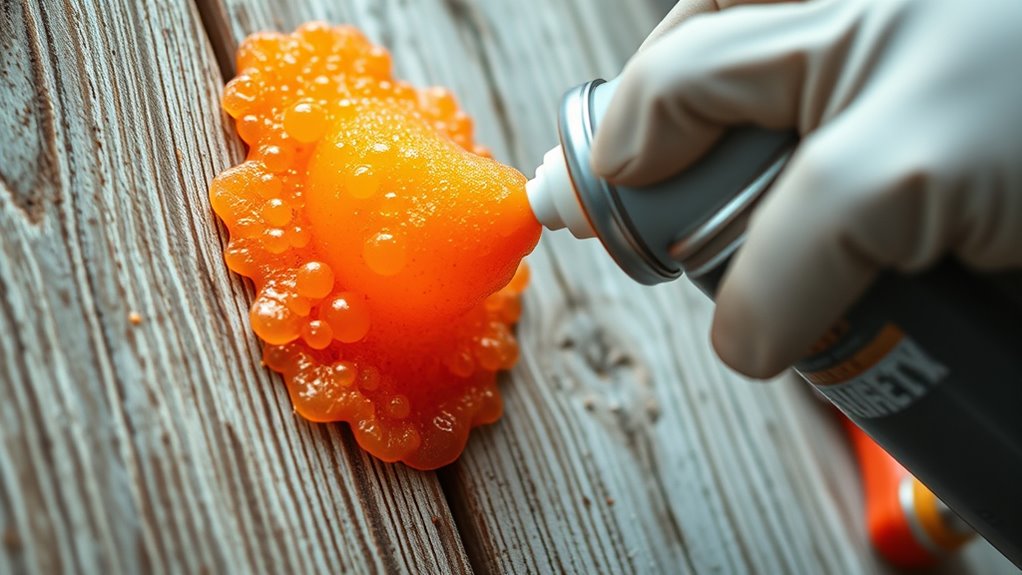
To guarantee a successful application of foam sealants, proper preparation and technique are essential. Start by ensuring the surfaces are clean, dry, and free of debris. This surface preparation will enhance adhesion and effectiveness. Next, familiarize yourself with the application techniques recommended for the specific foam sealant. Shake the canister thoroughly before use and attach the nozzle. Apply the foam steadily, filling gaps evenly without overexpanding. Allow it to cure according to the manufacturer’s instructions. Finally, trim any excess foam once it’s fully cured, ensuring a neat finish that effectively blocks gaps. Your efforts will yield lasting results.
Tips for Effective Gap Blocking
Although gap blocking may seem straightforward, employing effective strategies can greatly enhance the results. Start by thoroughly cleaning the area to guarantee proper adhesion. For DIY projects, measure gaps accurately; this helps in selecting the right amount of foam. Use insulation techniques like layering for larger gaps, assuring a snug fit without over-expansion. When applying, hold the nozzle at the proper angle and apply steadily to avoid air pockets. Always wear safety gear, as foam can irritate skin and eyes. Finally, allow adequate curing time before painting or sealing to maximize durability and effectiveness in blocking gaps.
Choosing the Right Foam Sealant Product
When selecting a foam sealant product, it is essential to evaluate the specific requirements of your project, as different formulations cater to various applications. Consider factors like insulation value, curing time, and adhesion properties. Research product comparisons to determine which sealants best match your needs. Pay attention to application techniques as well, since some products require special tools or methods for ideal performance. Whether you need a low-pressure foam for indoor gaps or a weather-resistant option for outdoor use, choosing the right foam sealant can greatly impact your project’s effectiveness and longevity. Make informed decisions for lasting results.
Frequently Asked Questions
Can Foam Sealants Be Painted Over After Application?
Yes, you can paint over foam sealants after application. Certain foam types, like polyurethane, accept paint well, while others may require priming. Always verify the sealant’s fully cured before you start your painting journey.
How Long Does Foam Sealant Take to Cure?
Foam sealants typically have a cure time of 1 to 8 hours, depending on the foam types used. However, full adhesion and strength can take up to 24 hours, so be patient before applying stress.
Are Foam Sealants Safe for Indoor Use?
Yes, foam sealants can be safe for indoor applications if properly used. However, health concerns arise from off-gassing. Guarantee adequate ventilation during application and curing to minimize exposure and maintain a healthy indoor environment.
What Tools Are Needed for Applying Foam Sealants?
You’ll need a caulking gun for applying foam sealant types, a utility knife for trimming excess, and safety gear like gloves and goggles. Mastering application techniques guarantees effective sealing and peak performance in your projects.
How Do I Clean Excess Foam Sealant After Application?
To clean excess foam sealant, you’ll need to act quickly. Use appropriate removal techniques like solvents or scraping. Effective cleaning methods guarantee a smooth finish, allowing you to reclaim your space without the hassle of residue.