Building a gazebo as your outdoor workshop for crafts and DIY projects can elevate your creativity while enjoying the fresh air. You’ll want to choose a location with ample sunlight and minimal debris, ideally close to your home. Select durable materials like cedar and gather essential tools for construction. Once your gazebo is built, organizing supplies and optimizing your workspace is key. Discover even more tips to create the perfect crafting sanctuary that inspires your imagination.
Benefits of an Outdoor Workshop
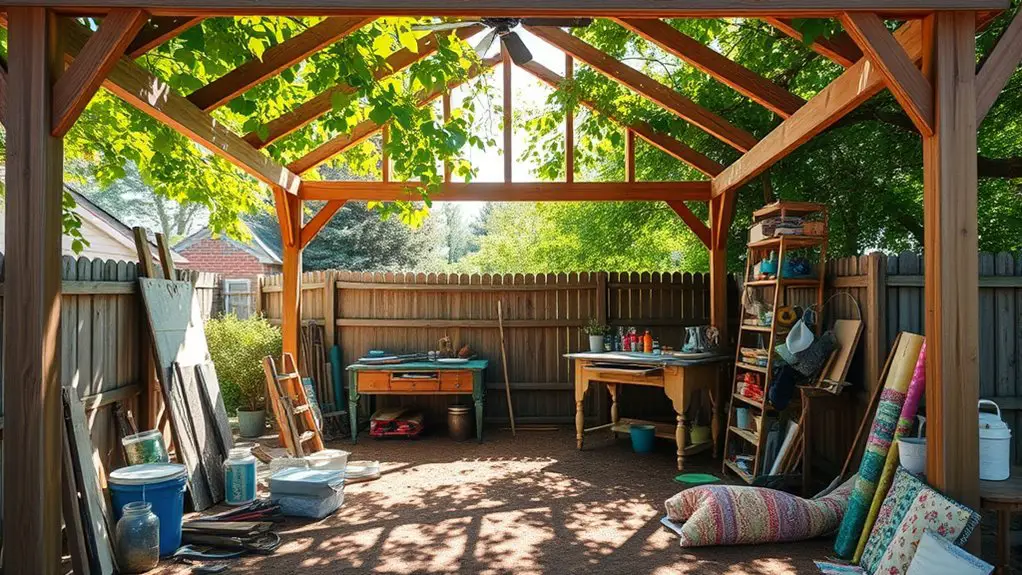
Creating an outdoor workshop can transform your crafting experience into something truly special. Imagine stepping into a space that fosters outdoor creativity, where the fresh air and natural light inspire you to explore new ideas. An outdoor workshop not only provides a unique environment but also enhances your focus and productivity.
Being surrounded by nature can elevate your mood, sparking your imagination and leading to fresh perspectives on your projects. Plus, having your workspace outdoors means you can easily expand into nature, gathering materials or experimenting with new techniques in a relaxed setting.
Additionally, an outdoor workshop encourages social interaction. Invite friends or fellow crafters to join you, turning your creative space into a hub of collaboration and inspiration. With the right setup, your outdoor workshop can be a sanctuary for crafting, where freedom and creativity blend seamlessly. Embrace this opportunity to let your imagination run wild! A gazebo can provide shade and shelter while remaining open to the outdoors, enhancing your crafting experience.
Choosing the Right Location for Your Gazebo
When it comes to choosing the right location for your gazebo, there are several key factors to reflect on that can greatly impact your crafting experience. Start with a thorough site assessment; evaluate sunlight, shade, and wind patterns. A sunny spot can energize your work, while shade might prevent overheating during the summer months. You’ll also want to take into account the environmental impact of your gazebo. Position it away from trees to avoid falling branches and debris, but close enough to enjoy nature’s beauty. Access is essential too—ensure it’s convenient for transporting materials and tools. Proximity to your home can make those spontaneous crafting sessions easier. Finally, think about the views you’ll enjoy while working; a beautiful landscape can inspire your creativity and enhance your DIY projects. By carefully selecting your gazebo’s location, you’ll create an inviting outdoor workshop that truly reflects your spirit of freedom and creativity. Additionally, consider privacy considerations which can enhance your focus and minimize distractions while working.
Designing Your Gazebo: Size and Style Considerations

When designing your gazebo, the size and style you choose are vital to its functionality and appeal. You’ll want to determine the ideal dimensions based on your space and intended use, while also selecting construction materials that suit your aesthetic. Don’t forget to take into account various styles that can complement your home and landscape, allowing your gazebo to become a beautiful focal point in your yard. Additionally, considering material choice is essential as it affects style preferences, budget, and durability.
Determining Ideal Dimensions
Choosing the right dimensions for your gazebo is essential to ensuring it fits seamlessly into your outdoor space. First, consider your workspace dimensions; you want enough room for your crafts and DIY projects, but not so much that it overwhelms your yard. A common size is around 10×12 feet, which provides ample space without feeling cramped. Next, think about the ideal height. A height of 8 to 10 feet allows for comfortable movement and natural light, making it inviting. Don’t forget to think about furniture and storage needs too—those should influence your decisions. Keep in mind your personal style and the overall aesthetic of your property to create a functional and beautiful outdoor workshop you’ll love.
Choosing Construction Materials
After settling on the dimensions and style of your gazebo, it’s time to think about the materials that will bring your vision to life. Your wood selection is essential; you’ll want to choose durable options like cedar or redwood for their natural beauty and resistance to rot. If you’re in a humid area, consider pressure-treated lumber for enhanced weather resistance. Don’t forget about the roof—metal or shingles can provide excellent protection against the elements. For your floors, hardwood or composite materials can withstand wear and tear, allowing you to work freely without worry. By carefully selecting materials that suit your environment and aesthetic, you’ll create a workshop that’s not only functional but also inviting.
Selecting Aesthetic Styles
While you might have a practical vision for your gazebo, the aesthetic style you choose can greatly enhance its overall appeal and functionality. To help you select the perfect style, consider these four options:
- Rustic Charm: Incorporate natural materials and vintage accents for a cozy, inviting feel.
- Modern Minimalism: Opt for clean lines and a sleek design that emphasizes simplicity and open space.
- Traditional Elegance: Use classic shapes and details that complement your home’s architecture.
- Eclectic Fusion: Mix various styles and colors to express your unique personality and creativity.
Whatever style you choose, make certain it reflects your spirit and enhances your outdoor workshop experience. Your gazebo should be a true extension of your creativity and freedom!
Essential Materials and Tools for Construction
When it comes to constructing your gazebo for crafts and DIY projects, having the right materials and tools is vital for a successful build. First, start with your wood selection. Opt for durable options like cedar or treated pine, as they’ll withstand the elements and provide a sturdy frame. Don’t forget to gather screws, nails, and brackets to secure everything together. Additionally, consider the cost implications of the materials you choose, as this will help ensure your project stays within budget.
Now, let’s talk tools. You’ll need essentials like a circular saw, drill, and level. Invest in a good measuring tape and a square to guarantee precise cuts and angles. Remember, tool safety is paramount—always wear protective gear, like goggles and gloves, to keep yourself safe while you work.
With the right materials and tools in hand, you’ll be well on your way to building a beautiful gazebo that’ll serve as your creative sanctuary. Enjoy the freedom of creating your own outdoor workshop!
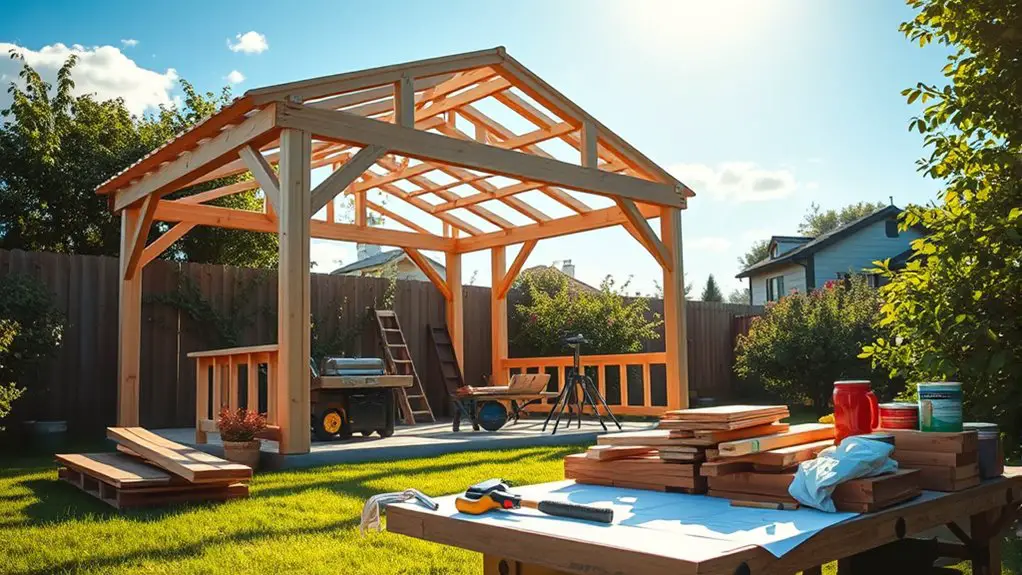
Step-by-Step Guide to Building Your Gazebo
Building your gazebo can be broken down into several manageable steps, making the process less intimidating and more enjoyable. Follow these steps to enhance both your outdoor aesthetics and functionality:
- Choose a Design: Decide on the style and size of your gazebo, considering the features you want, like built-in seating or a work table.
- Select a Location: Find the perfect spot in your yard that complements your landscape while providing ample sunlight and shelter.
- Prepare the Foundation: Level the ground and lay a strong foundation using concrete or gravel, ensuring stability for your gazebo.
- Construct the Frame: Assemble the framework, attaching the posts and beams securely, and then add the roof for protection. Proper anchoring techniques are essential for stability and safety.
Creating a Functional Layout for Your Workshop
Once your gazebo is up and ready, it’s time to think about how to make the most of the space for your workshop. Start by considering workshop ergonomics—place your workbench at a comfortable height, ensuring you can work for hours without strain. Use the corners for shelving or pegboards to hang tools, maximizing vertical space.
Prioritize space optimization by arranging your materials and equipment in zones: one for cutting, one for assembly, and another for finishing. This keeps workflow efficient and minimizes clutter.
Don’t forget about lighting; natural light is fantastic, but adding task lighting will enhance visibility during detailed projects. Additionally, ensure that your workshop layout allows for regular inspections of your gazebo to prevent any maintenance issues that could disrupt your crafting. Finally, think about mobility—use rolling carts for tools that you frequently move around. With a functional layout, your gazebo will become a creative haven, allowing you the freedom to explore your DIY projects without limitations.
Organizing Your Tools and Supplies Efficiently
When you’re ready to organize your tools and supplies, having a solid plan makes all the difference. You’ll want to contemplate effective storage solutions, categorize your supplies for easy access, and create a workstation layout that maximizes efficiency. Let’s explore how these strategies can transform your crafting space into a well-organized haven.
Tool Storage Solutions
As you begin your crafting journey, having your tools and supplies organized can make all the difference in your efficiency and enjoyment. Implementing effective tool organization starts with smart storage solutions. Here are four practical ideas to keep your workspace tidy:
- Pegboards: Hang tools on a pegboard for easy access and visibility.
- Magnetic Strips: Use magnetic strips to hold metal tools, keeping them within reach and neatly displayed.
- Toolboxes: Invest in sturdy toolboxes with compartments for smaller items to prevent clutter.
- Shelving Units: Install shelving to store larger supplies and tools, maximizing your workspace.
With these storage solutions, you’ll find that crafting becomes more enjoyable and stress-free, allowing you to release your creativity freely.
Supply Categorization Methods
To maximize your crafting efficiency, categorizing your supplies is key to creating a functional workspace. Start by grouping items based on their purpose—think tools, paints, fabrics, and embellishments. This supply organization not only saves you time but also sparks creativity when you can easily see what you have. Use clear bins or shelves to keep everything visible and accessible. Implement a simple inventory management system by labeling containers and possibly creating a checklist of supplies. This way, you’ll know when it’s time to restock. Remember, a well-organized space lets your imagination roam free, allowing you to focus on what really matters—bringing your creative visions to life without the hassle of searching for misplaced items.
Workstation Layout Tips
A well-organized supply area sets the stage for an effective workstation layout. To achieve ideal workspace ergonomics and layout optimization, consider these tips:
- Designate Zones: Create specific areas for tools, materials, and projects to minimize clutter.
- Utilize Vertical Space: Install shelves or pegboards to keep frequently used items within reach yet off your work surface.
- Adjustable Surfaces: Use tables or workbenches that can be height-adjusted, ensuring comfort for different tasks.
- Label Everything: Clearly label bins and drawers, making it easier to find what you need without wasting time.
Maximizing Natural Light and Ventilation
When it comes to building your gazebo, ensuring ample natural light and ventilation can transform the space into a welcoming haven. Start by positioning your gazebo to maximize sunlight exposure throughout the day. Large windows or skylights can flood the interior with natural light, enhancing your creativity while you work. Consider using clear polycarbonate roofing; it’s durable and allows light to pour in without compromising protection.
For effective airflow strategies, incorporate adjustable windows or vents that can be opened during warmer days, letting fresh air circulate. Ceiling fans can also help distribute air evenly, keeping the space comfortable. If you’re feeling adventurous, consider adding a screened-in section to keep bugs out while enjoying the breeze. Moreover, incorporating a hardtop gazebo can enhance structural integrity and stability, ensuring a safe and enjoyable workspace.
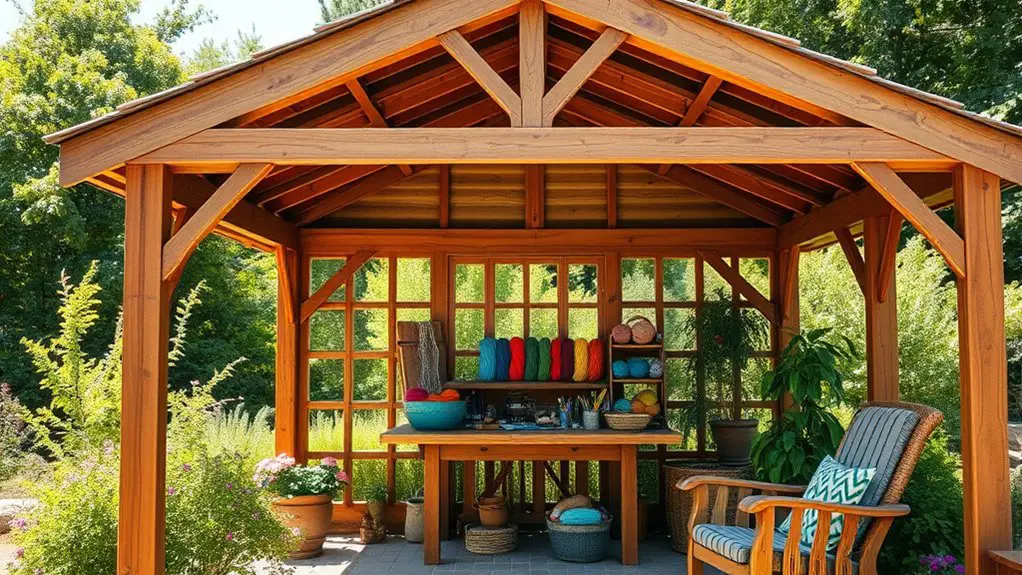
Personalizing Your Workspace With Decor
Personalizing your workspace with decor can make a world of difference in how you feel and work in your gazebo. When you surround yourself with items that inspire you, your creativity can flourish. Here are some ideas to help you add those personal touches and embrace decorative themes:
Personalizing your workspace fosters inspiration and creativity, making your gazebo a true reflection of you.
- Color Palette: Choose colors that resonate with you, whether it’s calming blues or vibrant yellows.
- Artwork: Hang pieces that speak to your interests—paintings, photos, or even your own creations.
- Functional Decor: Incorporate storage solutions that are both practical and visually appealing, like decorative baskets.
- Nature Elements: Bring the outdoors in with plants or natural wood accents, enhancing the connection to your surroundings. Additionally, consider how adding plants and flowers can enhance the overall beauty and atmosphere of your workspace.
Maintenance Tips for Your Gazebo Workshop
Maintaining your gazebo workshop is essential to guarantee it remains a functional and inviting space for your creative endeavors. Start with regular gazebo upkeep by checking for any signs of wear or damage, like loose boards or rusted hardware. Seasonal maintenance is vital—clean your gutters in spring and inspect your roof for leaks before winter arrives.
Don’t forget to treat wooden surfaces with a weatherproof sealant every few years to protect against moisture and pests. Remove any debris regularly and consider adding a coat of paint to keep things looking fresh. Additionally, be sure to perform regular inspections to identify any potential issues before they worsen.
Keep your workspace organized; a clutter-free environment promotes creativity. Finally, if you’ve got electricity, verify all outlets and wiring are safe and functional. By staying on top of these tasks, you’ll create a welcoming atmosphere that inspires your DIY projects for years to come.
Frequently Asked Questions
How Much Does It Cost to Build a Gazebo Workshop?
When considering how much it’ll cost to build a gazebo workshop, think about your budget considerations and material choices. Prices can vary widely, so plan wisely to create the perfect space for your creativity.
Do I Need a Permit to Build a Gazebo?
You might need a permit to build your gazebo, depending on local building codes and gazebo regulations. Always check with your municipality to guarantee you’re compliant and avoid any fines or issues down the line.
Can I Insulate My Gazebo for Year-Round Use?
Yes, you can insulate your gazebo for year-round comfort. Consider using insulation materials like foam boards or fiberglass. Proper insulation keeps it cozy in winter and cool in summer, enhancing your outdoor experience regardless of the season.
What Type of Flooring Is Best for a Gazebo Workshop?
When choosing flooring for your gazebo workshop, consider wood flooring for warmth and aesthetics, or concrete options for durability and easy maintenance. Both choices offer freedom in design, catering to your creative projects throughout the seasons.
How Do I Protect My Gazebo From Pests and Weather?
To protect your gazebo from pests and weather, consider using weatherproof materials and effective pest control methods. Regular maintenance and strategic sealing will safeguard your space, ensuring it remains a serene sanctuary for your creative endeavors.