To plan a traditional cooking class in your gazebo, start by choosing a menu that highlights seasonal ingredients and accommodates dietary restrictions. Set up your space in a U-shape for collaboration, ensuring easy access to utilities. Gather essential tools and ingredients to keep the flow smooth. Invite participants warmly, creating a welcoming atmosphere with decor. Finally, focus on engaging instruction that incorporates traditional techniques and stories. Keep an eye out for tips on structuring your class effectively!
Choosing the Right Menu for Your Cooking Class
When you’re planning a cooking class, choosing the right menu is essential, as it sets the tone for the entire experience. Start by considering seasonal ingredients; they not only enhance flavor but also connect participants to local produce. Think about what’s fresh and available in your area to inspire creativity in the kitchen. Additionally, be mindful of dietary restrictions. Whether your attendees are vegetarian, gluten-free, or have other specific needs, accommodating these preferences guarantees everyone can enjoy the class. Craft a menu that balances flavor and inclusivity, allowing for a diverse culinary experience. By focusing on these elements, you’ll create an engaging atmosphere where everyone feels free to explore new tastes and techniques.
Setting Up Your Gazebo for a Functional Cooking Space
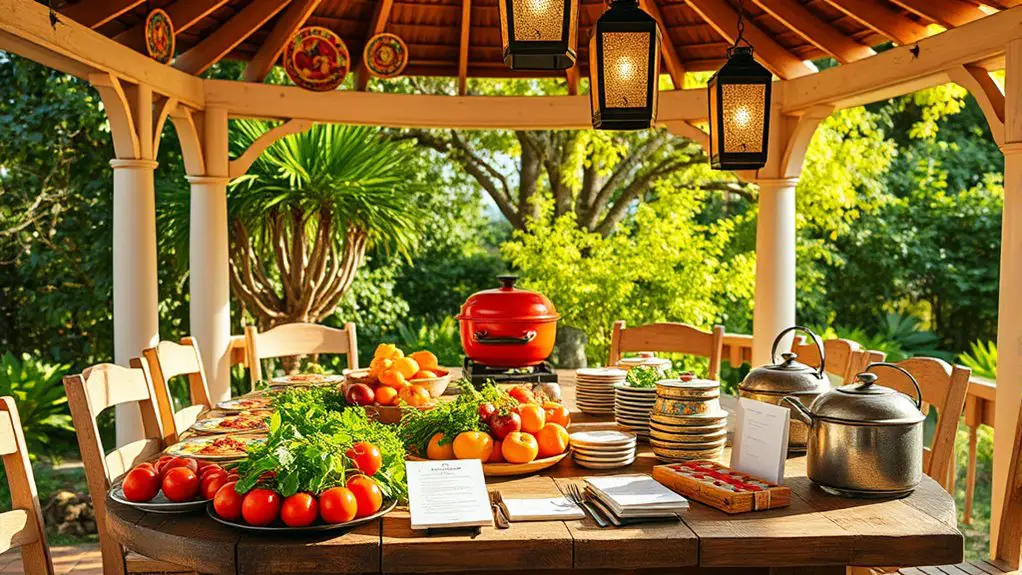
Creating a memorable cooking class experience goes beyond just the menu; it also involves the environment where you’ll be cooking. Start by considering your gazebo layout—ensure there’s enough space for participants to move comfortably. Arrange the cooking area to facilitate interaction; a U-shape layout encourages collaboration.
Next, think about accessibility to utilities like water and electricity for outdoor cooking. Set up tables for ingredients and prep work close to your cooking station. If possible, create shaded areas to keep everyone cool and comfortable. Additionally, ensure that your gazebo is equipped with mosquito netting to keep pests away during the class.
Lastly, don’t forget to add personal touches, like decorative plants or string lights, to enhance the atmosphere. With a well-planned gazebo setup, you’ll foster creativity, making your cooking class an enjoyable experience for everyone involved.
Gathering Essential Cooking Tools and Ingredients
To guarantee your cooking class runs smoothly, gathering the right tools and ingredients is essential. You’ll want to make sure you have all the essential utensils and a variety of spices at hand. Here’s a quick checklist to visualize what you need:
| Essential Utensils | Gathering Spices |
|---|---|
| Chef’s knife | Salt |
| Cutting board | Black pepper |
| Mixing bowls | Oregano |
| Measuring cups | Paprika |
Having these items ready allows you and your participants to focus on the joy of cooking without interruptions. With everything in place, you can create an inviting atmosphere where culinary creativity can flourish. Enjoy the freedom of experimenting with flavors and techniques!
Inviting Participants and Creating a Welcoming Atmosphere
Once you have your tools and ingredients ready, the next step is to invite participants and set the stage for a welcoming atmosphere. Start by engaging in effective participant outreach through social media, community boards, or word-of-mouth. Make it personal; send out invitations that reflect the joy of cooking together. When participants arrive, greet them warmly and guarantee your gazebo feels inviting. Decorate with soft lighting, fresh flowers, or colorful tableware to create a welcoming ambiance. Arrange seating to foster conversation, and have refreshments ready to make them feel at home. Remember, a relaxed and friendly environment encourages creativity and connection, allowing everyone to enjoy the cooking experience to its fullest. Incorporating outdoor lighting can enhance the ambiance, making the gazebo a magical space for culinary adventures.
Structuring the Cooking Class for an Engaging Experience
While planning a cooking class, structuring it effectively is key to keeping participants engaged and excited. Start by breaking the class into manageable segments, allowing for both instruction and hands-on cooking. Use engagement strategies like group work and cooking challenges to foster participant interaction. Encourage questions and discussions during demonstrations, creating an open atmosphere where everyone feels free to share their thoughts. Incorporate breaks for socializing, enabling participants to connect over their culinary experiences. Finally, wrap up with a tasting session where everyone can appreciate the fruits of their labor, reinforcing a sense of accomplishment. By thoughtfully structuring your class, you’ll create an enjoyable environment that inspires creativity and builds connections among participants.
Incorporating Traditional Cooking Techniques and Stories
Incorporating traditional cooking techniques and the stories behind them can elevate your class to a whole new level. By sharing the historical methods and cultural origins of the recipes, you’ll create a rich tapestry of knowledge that connects participants to the food on their plates. This storytelling approach not only enhances their cooking skills but also deepens their appreciation for the culinary traditions that shape our meals.
Historical Cooking Methods
As you investigate the world of cooking classes, exploring historical cooking methods can enrich your understanding of culinary traditions that have shaped our modern kitchens. By incorporating medieval methods and indigenous practices, you’ll not only learn techniques but also the stories behind them.
Here’s a glimpse into some fascinating methods:
| Cooking Method | Description | Cultural Origin |
|---|---|---|
| Open Fire Cooking | Utilizing wood for direct heat | Medieval Europe |
| Pit Roasting | Cooking food underground | Indigenous Traditions |
| Clay Pot Cooking | Using earthenware for stews | Various Indigenous Cultures |
| Smoke Preservation | Drying and flavoring meats | Ancient Techniques |
These methods can inspire participants to connect with the past while experimenting with flavors in your gazebo.
Cultural Recipe Origins
Exploring historical cooking methods not only adds depth to your culinary knowledge but also reveals the rich tapestry of cultural recipe origins. By understanding the cultural influences behind each dish, you’ll discover the recipe significance woven into every ingredient and technique. For example, a traditional Italian pasta dish might reflect the agrarian lifestyle of its region, while a spicy curry reveals the diverse spices that traveled through trade routes. These connections create a sense of belonging and appreciation for the food you prepare. As you incorporate these elements into your cooking class, encourage participants to share stories or experiences that connect them to these recipes. This not only enhances the learning experience but also deepens the cultural appreciation for the dishes you create together.
Storytelling Through Cuisine
While many people see cooking as a simple act of preparing food, it can also be a powerful medium for storytelling. Each dish you create carries flavor narratives that reflect your culinary heritage, connecting you to generations past. When planning your cooking class, encourage participants to share the stories behind their favorite recipes. Incorporate traditional cooking techniques that not only enhance flavors but also preserve cultural identities. For instance, using a family recipe for a classic dish allows participants to taste history while learning new skills. Engage them in discussions about the origins of ingredients and the meanings behind certain cooking methods. This approach fosters a deeper appreciation for food and the rich tapestry of stories it tells.
Tips for Clean-up and Post-Class Engagement
After a fun and educational cooking class, effective clean-up and post-class engagement are essential for leaving a lasting impression on participants. Start by gathering your cleaning supplies—sponges, trash bags, and sanitizers—so you can tackle the mess quickly. Enlist the help of participants for a collaborative clean-up; it not only speeds things up but also fosters camaraderie.
Once the kitchen’s tidy, engage your participants with a feedback session. Ask them what they enjoyed most and any suggestions for improvement. This feedback is invaluable for future classes and shows you value their opinions. Consider sending a follow-up email with recipes or resources discussed during the class, keeping the conversation alive and encouraging them to share their culinary adventures.
Frequently Asked Questions
What Is the Best Time of Year for a Cooking Class in a Gazebo?
The best time for your cooking class is late spring or early summer. You’ll enjoy seasonal ingredients, vibrant outdoor ambiance, and comfortable weather. These elements create a delightful experience, allowing creativity to flourish while cooking.
How Many Participants Can Comfortably Fit in My Gazebo for the Class?
Did you know most gazebos average about 10×12 feet? Depending on your seating arrangements, you can comfortably fit 6-10 participants. Just make sure everyone has enough space to move and enjoy the experience without feeling cramped.
Can I Host a Cooking Class if It Rains?
Absolutely, you can still host your cooking class if it rains! Just prepare indoor alternatives and have weather contingencies in place. That way, your participants won’t miss out on the fun, no matter what!
What Should I Do About Food Allergies Among Participants?
When you gather your culinary crew, visualize a vibrant tapestry of flavors. Keep allergy awareness at the forefront, and embrace ingredient substitutions to guarantee everyone savors the experience without worry. Inclusivity makes every dish shine.
How Can I Promote My Cooking Class to Attract More Attendees?
To attract more attendees, use social media to showcase your unique dishes and cooking techniques. Partner with local businesses for cross-promotion; they’ll help spread the word and create a community vibe that encourages participation.