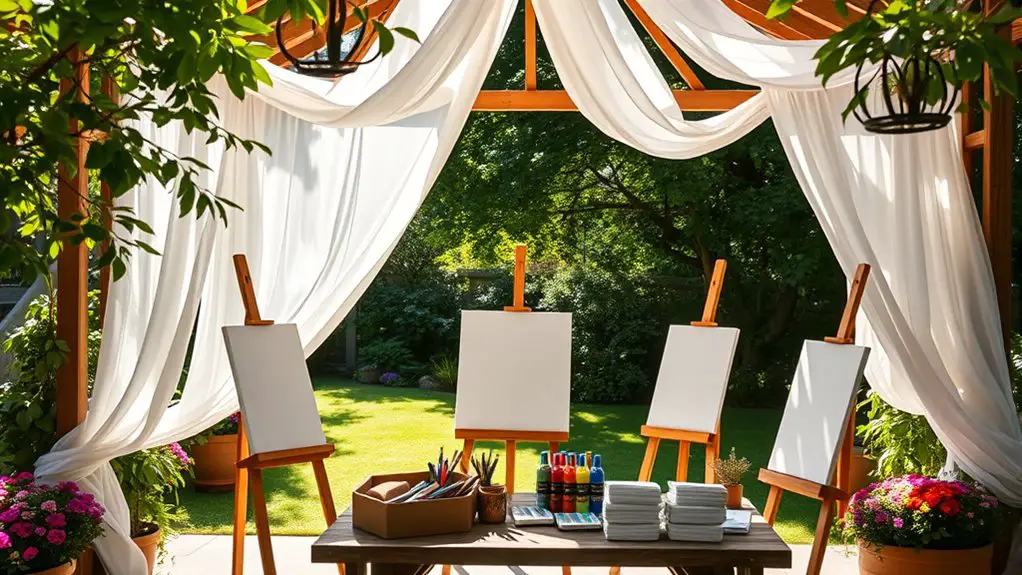
To set up your gazebo for an outdoor art class, begin by choosing a scenic location with level ground for stability. Make certain the best lighting by positioning it where natural sunlight filters in. Organize your art supplies in portable, labeled bins for easy access. Create a comfortable seating arrangement that promotes collaboration, and incorporate shelter from the elements for protection. Don’t forget to plan for clean-up and safety to keep everything running smoothly. You’ll find even more useful tips as you explore further.
Choosing the Perfect Location for Your Gazebo
When it comes to choosing the perfect location for your gazebo, what factors should you consider to create an inspiring environment for your outdoor art class? Start by thinking about gazebo orientation; facing it towards the scenic backdrop can enhance your students’ creativity. A beautiful view of nature, like rolling hills or a tranquil lake, can stimulate artistic expression and make your class truly memorable.
Additionally, consider the surrounding elements—trees can provide gentle shade, while open spaces allow for the breeze to flow freely. Confirm the ground is level for stability, and think about accessibility for your students. By blending these aspects, you’ll create a space that’s not just functional but also invigorating, fostering a love for art and nature. Furthermore, ensure that the gazebo is placed in an area with optimal sun exposure to support creativity and comfort during your class.
Ensuring Adequate Lighting
The right location for your gazebo sets the stage, but adequate lighting is what truly brings your outdoor art class to life. Start by maximizing natural light; positioning your gazebo where sunlight filters through creates a warm, inviting atmosphere. Consider different lighting types, too. String lights can add a whimsical touch, while LED lamps provide focused illumination as daylight fades. If your class extends into the evening, portable work lights can guarantee everyone sees their canvas clearly. Don’t overlook adjustable shades or canopies—they’ll help manage glare and protect your work from harsh sunlight. Balancing natural and artificial lighting will enhance creativity, allowing students to release their artistic potential under a beautifully lit sky. Additionally, incorporating energy-efficient designs into your lighting setup will help reduce electricity costs while maintaining a bright and inviting atmosphere.
Organizing Art Supplies and Materials
To make your outdoor art class run smoothly, you’ll want to gather essential art supplies and organize them effectively. Setting up efficient workstations not only enhances creativity but also keeps everything within reach. Plus, having a solid clean-up and storage strategy guarantees you leave the space just as beautiful as you found it.
Essential Art Supplies
A well-organized selection of essential art supplies can transform your outdoor art class from chaotic to creative. Start by gathering various art supply types, including paints, brushes, canvases, and drawing materials. Don’t forget essential tools like palettes, water containers, and easels to enhance your experience.
Consider portable storage solutions, like bins or caddies, to keep everything easily accessible yet tidy. Labeling supplies not only saves time but also encourages spontaneity—allowing you to focus on the artistic journey without distractions.
Lastly, think about including additional materials such as sketchbooks, charcoal, and pastels for those who want to explore different mediums. With the right supplies organized effectively, you’ll foster an inspiring environment for creativity to flourish.
Organizing Workstations Efficiently
Creating an organized workspace is key to maximizing creativity during your outdoor art class. Start by designing a thoughtful workspace layout that encourages flow and accessibility. Arrange tables in a U-shape, allowing for easy movement and interaction among participants. Group similar supplies together—paints, brushes, and canvases—so you can grab what you need without searching. Utilize labeled containers for effective task management; this helps everyone know exactly where to find materials and keeps distractions at bay. Encourage students to personalize their areas, adding a touch of freedom and individuality. Remember, an efficient workstation fosters inspiration and collaboration, letting imaginations run wild as creativity takes center stage in your beautiful outdoor setting.
Clean-Up and Storage Strategies
While the excitement of an outdoor art class can be infectious, it’s crucial to have effective clean-up and storage strategies in place to maintain that energy throughout the session. First, gather your cleaning supplies, like wipes and trash bags, to streamline your cleaning techniques. Designate a specific area for used brushes and palettes so everyone knows where to go. For storage solutions, use portable bins or caddies to keep art supplies organized and accessible. Label each container clearly to make finding what you need easy. Encourage participants to help with the clean-up process, fostering a sense of community. By implementing these strategies, you’ll create a stress-free environment that allows everyone to focus on their creativity, even during the wrap-up.
Creating a Comfortable Seating Arrangement
Establishing a comfortable seating arrangement is essential for ensuring participants can focus and express their creativity during an outdoor art class. Start by exploring various seating options, such as folding chairs, cushions, or even picnic blankets. Think about the comfort factors that will enhance the experience; for instance, providing cushions can add support and warmth. Arrange the seating in a semi-circle to foster interaction and collaboration among participants. Make sure there’s enough space for everyone to move freely without feeling cramped. Consider adding small tables or portable easels to hold supplies, allowing for a clutter-free environment. By prioritizing comfort, you’ll create an inviting atmosphere that inspires creativity and encourages self-expression throughout the class. Additionally, ensure that your gazebo is properly set up with mosquito netting to keep pests away, allowing for a more enjoyable experience.
Incorporating Shelter From the Elements
To guarantee your outdoor art class remains enjoyable regardless of the weather, it’s crucial to incorporate shelter from the elements. Here are three effective ways to guarantee you have solid weather protection and element barriers:
Ensure your outdoor art class thrives in any weather by incorporating essential shelter and protection elements.
- Gazebo Canopy: Choose a gazebo with a sturdy canopy that offers protection from rain and sun. This keeps you and your students comfortable and focused on creativity.
- Side Panels: Consider adding side panels or curtains that can be closed during windy days or light showers. These barriers enhance the shelter and provide a cozy atmosphere.
- Flooring: Use outdoor rugs or mats to create a defined space and protect against mud or wet grass. This adds an extra layer of comfort while keeping your art supplies safe from the elements.
Additionally, selecting a gazebo with weather-resistant construction will ensure durability and reliability throughout your outdoor art sessions.
With these elements in place, you’ll foster a vibrant and protected creative space!
Adding Inspirational Decor
To spark creativity in your outdoor art class, consider a colorful display of art supplies that catches the eye. Integrating natural elements, like fresh flowers or potted plants, can enhance the ambiance and inspire participants. Together, these touches create a vibrant atmosphere that encourages artistic expression. Additionally, incorporating comfortable seating options can help participants relax and focus on their creative endeavors.
Colorful Art Supplies Display
A vibrant display of art supplies can transform your gazebo into a creative haven that inspires budding artists. To create a colorful art supplies display, consider incorporating these elements:
- Colorful Paints: Choose a variety of hues that evoke color palette inspiration, setting the stage for artistic expression.
- Bright Brushes: Use brushes of different sizes and shapes, arranged in jars or containers that pop with color, inviting creativity.
- Creative Canvases: Stack canvases in various sizes visibly, showcasing their potential for artistic endeavors.
Natural Elements Integration
While incorporating natural elements into your gazebo setup, you can create an inspiring atmosphere that encourages creativity. Start by using natural materials like wood, stone, or bamboo to construct tables and seating. Drape soft fabrics in earthy tones to enhance comfort and connection with the outdoors. Add potted plants or wildflowers for a splash of color and to bring the beauty of nature right into your space. Hang artwork that reflects environmental inspiration, like landscapes or abstract pieces inspired by nature’s forms. Use natural light to illuminate your class, adjusting the gazebo’s layout to capture the sun’s glow throughout the day. This thoughtful integration will foster a freeing, artistic environment that ignites your students’ imaginations.
Planning for Clean-Up and Safety
Before the first brushstroke hits the canvas, it’s essential to establish a clear plan for clean-up and safety to guarantee a smooth and enjoyable outdoor art class. By organizing these aspects, you’ll create an environment that fosters creativity without unnecessary stress. Here are three key points to take into account:
Establishing a clear clean-up and safety plan ensures a stress-free and inspiring outdoor art class experience.
- Gather Cleaning Supplies: Stock up on biodegradable cleaning products, paper towels, and trash bags to manage spills and debris quickly.
- Implement Safety Protocols: Make sure everyone knows the safety guidelines, including proper handling of paint and tools.
- Set Up a Designated Clean-Up Area: Designate a space for clean-up at the end of the class to keep everything organized and efficient. Additionally, ensure that the gazebo is well-maintained to prevent any weather-related damage that could disrupt your class.
With these steps, you’ll cultivate a safe and inspiring atmosphere.
Frequently Asked Questions
What Type of Flooring Is Best for an Outdoor Art Class Gazebo?
For your outdoor art class gazebo, consider wooden decking for a sturdy, aesthetic foundation. You might also use outdoor mats for extra comfort and protection, allowing creativity to flow freely without worrying about uneven surfaces or mess.
How Can I Attract More Students to My Outdoor Art Class?
To draw more students to your outdoor art class, consider weaving together vibrant social media campaigns with engaging community outreach. Showcase your unique offerings, creating an inviting atmosphere where creativity can flourish and freedom reigns.
Should I Provide Refreshments During the Class?
Providing refreshments can enhance your class experience. Consider affordable refreshment options that suit your beverage budget, like water and tea. Engaging students over a drink fosters creativity and connection, making your class more inviting and enjoyable.
How Do I Handle Bad Weather During an Outdoor Class?
Imagine a painter caught in a downpour. For your outdoor class, always have rainy day preparations ready. Consider alternative locations like a nearby community center, ensuring creativity flows, rain or shine. Flexibility’s key!
Can I Host Multiple Classes in One Day?
Absolutely, you can host multiple classes in a day! Just guarantee your class scheduling allows for breaks to maintain student engagement. This way, everyone stays energized and inspired throughout your creative sessions. Enjoy the freedom!