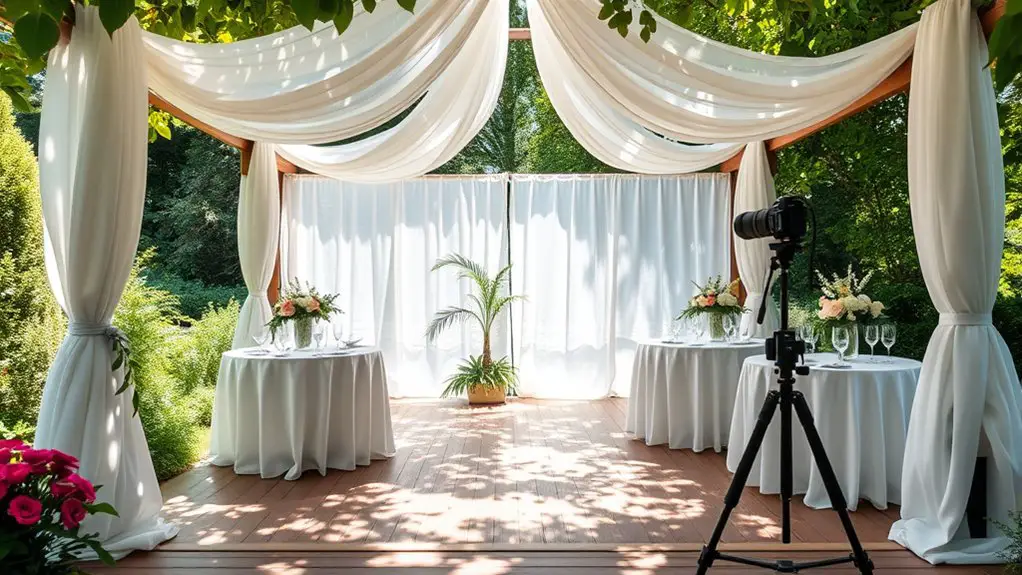
To set up your gazebo for a photography workshop, start by choosing a vibrant location with good accessibility. Make sure you have proper lighting, using both natural light and artificial sources like softboxes. Enhance the space with colorful backdrops and props to inspire creativity. Organize your equipment for easy access and prioritize comfort with adequate seating and refreshments. Don’t forget to prepare for weather changes, so your workshop runs smoothly. You’ll discover more tips to elevate your setup even further.
Choosing the Right Location for Your Gazebo
When you’re planning a photography workshop, selecting the right location for your gazebo is essential, as it can greatly enhance the overall experience. Start by considering environmental considerations; look for a spot that complements your theme and offers natural beauty. Think about the scenery: vibrant landscapes or serene forests can provide stunning backdrops.
Next, don’t overlook accessibility options. Guarantee your location is easy for all participants to reach, regardless of their mobility. A well-chosen site should provide clear paths, parking, and necessary amenities. Additionally, consider the privacy considerations that may impact the workshop atmosphere, ensuring a comfortable space for creativity to flourish.
Essential Lighting Setup for Photography
Although natural light can be beautiful, setting up an essential lighting scheme for your photography workshop is crucial to guarantee your subjects look their best. Combining natural light with artificial lighting can create stunning effects. Here’s a quick guide to help you decide on the right setup:
| Lighting Type | Usage |
|---|---|
| Natural Light | Best during golden hour; soft, warm |
| Softbox Lighting | Ideal for even, diffused light |
| LED Panels | Versatile; great for color control |
| Reflectors | Bounce natural light for highlights |
Experiment with different combinations to find what works for your style. Remember, the goal is to enhance your subjects while allowing your creativity to flow freely.
Decor and Props to Enhance the Space
To create an inviting atmosphere in your gazebo, consider incorporating colorful backdrops and fabrics that complement your photography theme. Unique props can also add visual interest and spark creativity for your participants. By thoughtfully selecting these elements, you can enhance the overall experience and inspire stunning shots. Additionally, consider using lighting options like string twinkle lights to create a magical ambiance that will elevate your photography.
Colorful Backdrops and Fabrics
How can vibrant backdrops and fabrics transform your photography workshop into an enchanting visual experience? By incorporating bright colors and diverse fabric textures, you can create a dynamic atmosphere that inspires creativity. Here are some ideas to elevate your space:
- Bold solid colors: Use large, bright sheets for a striking background that energizes your photos.
- Patterned fabrics: Incorporate floral or geometric designs to add depth and character to your compositions.
- Layered textures: Mix different fabric textures like lace, burlap, or velvet to create visual interest.
- Natural elements: Combine your fabrics with natural elements like plants to add a touch of organic beauty.
These thoughtful choices will not only enhance your workshop but also provide your participants with fascinating photography opportunities.
Creative Prop Ideas
Incorporating creative props can elevate your photography workshop, making it a more engaging and visually appealing environment. Consider using items that showcase unique texture combinations and vibrant creative color schemes. Here’s a table to inspire your prop selection:
| Prop Type | Description |
|---|---|
| Vintage Suitcases | Adds nostalgia and depth to scenes |
| Colorful Pillows | Introduces comfort and pops of color |
| Rustic Wooden Crates | Perfect for adding layers and height |
| Floral Arrangements | Brings life and natural beauty |
Mixing these elements allows you to create a fascinating atmosphere. Remember, the goal is to reflect your workshop’s theme while giving participants the freedom to express their creativity in stunning visuals.
Organizing Your Equipment and Supplies
When organizing your photography equipment, it’s vital to keep your essential gear easily accessible. Consider using labeled bags or containers to streamline your setup and guarantee everything’s in its place. With a well-organized workspace, you can focus more on capturing stunning images and less on searching for supplies.
Essential Photography Gear
To capture stunning images during your photography workshop, having the right gear organized and easily accessible is vital. You want to guarantee that your lens selection and camera settings are optimized for the best results. Here’s a quick list of must-have items to keep on hand:
- Camera body – Make sure it’s fully charged and ready to go.
- Variety of lenses – Bring different focal lengths to adapt to various scenes.
- Tripod – Stability is key for sharp images, so don’t forget this vital support.
- Memory cards – Extra storage is important, so have plenty on hand to avoid missing great shots.
With your gear organized, you can focus on creativity and capturing beautiful moments!
Setup and Organization Tips
With your photography gear ready, the next step is to set up and organize your equipment and supplies efficiently. A thoughtful layout design makes all the difference. Start with a setup checklist to guarantee you’ve got everything you need. Consider placing frequently used items within easy reach.
| Equipment | Purpose |
|---|---|
| Camera | Capturing images |
| Tripod | Stabilizing shots |
| Lighting | Enhancing natural light |
Organize your workspace to minimize clutter and allow for free movement. Designate zones for different activities, such as shooting, editing, and storing materials. This way, you’ll create an inviting atmosphere for your workshop, making it enjoyable for everyone involved.
Creating a Comfortable Learning Environment
Creating a comfortable learning environment is essential for a successful photography workshop. To guarantee your participants feel relaxed and engaged, consider the following tips:
- Provide comfortable seating: Use chairs or cushions that allow for long periods of sitting without discomfort.
- Encourage interactive activities: Incorporate hands-on exercises that let participants experiment with their cameras and creativity.
- Control the temperature: Make sure your gazebo is well-ventilated and shaded from harsh sunlight, keeping everyone cool and focused.
- Offer refreshments: Keep water and snacks on hand to keep energy levels high and spirits up.
- Incorporate comfortable seating options that align with your chosen theme for cohesive design.
Incorporating Demonstration Areas
Incorporating demonstration areas into your photography workshop not only enhances learning but also provides participants with practical insights into techniques and equipment. Setting up interactive sessions can greatly boost engagement and comprehension. Here’s a simple table to outline demonstration techniques you might consider:
| Technique | Description | Equipment Needed |
|---|---|---|
| Portrait Lighting | Show how to set up natural light | Reflectors, diffusers |
| Composition Tips | Discuss framing and rule of thirds | Sample photos, props |
| Camera Functions | Explain shutter speed and aperture | Camera, tripod |
Planning for Weather Contingencies
Since weather can be unpredictable, planning for contingencies is essential when setting up a gazebo for your photography workshop. Having a backup plan in place will guarantee your workshop runs smoothly, even on a rainy day. Here are some steps to take into account:
- Check the forecast: Keep an eye on the weather leading up to the event.
- Have tarps ready: Protect equipment and participants from unexpected rain.
- Choose an indoor alternative: Know where you can move the workshop if the weather turns bad.
- Communicate with participants: Keep everyone informed about potential changes to the schedule or location. Additionally, consider that a gazebo’s lifespan can be significantly affected by climate and weather conditions, so be prepared for all scenarios.
Frequently Asked Questions
What Types of Cameras Are Best for Beginners in Workshops?
For beginners in workshops, you’ll find that entry-level DSLRs and mirrorless cameras are ideal. They’re user-friendly, versatile, and offer great image quality, allowing you to explore your creativity without feeling overwhelmed by complicated settings.
How Many Participants Can Comfortably Fit in the Gazebo?
When considering participant capacity, think about your gazebo layout. Generally, a space can comfortably accommodate 8 to 10 participants, allowing everyone freedom to move and engage without feeling cramped. Adjust seating for ideal comfort.
What Time of Day Is Best for Outdoor Photography Workshops?
When the sun kisses the horizon, that’s your golden hour. It offers the best lighting conditions for outdoor photography workshops, where soft, warm light creates magic in every shot, inspiring creativity and freedom in your participants.
What Should I Include in a Photography Workshop Checklist?
For your photography workshop checklist, include essential workshop materials like cameras and tripods, and plan activities to boost participant engagement. Don’t forget refreshments and handouts to enhance their learning experience and foster creativity.
How Can I Market My Photography Workshop Effectively?
When it comes to marketing your photography workshop, you’ve got to think outside the box. Utilize social media and email campaigns to reach your audience, showcasing unique offerings that spark their interest and ignite their passion.