Imagine a flurry of delicate paper snowflakes gracefully drifting through your home, each one unique and crafted by your own hands. With just a few simple materials and techniques, you can transform ordinary paper into stunning winter decorations. Discover the joys of folding, cutting, and displaying your creations, and let your creativity take flight as you explore the endless possibilities of DIY paper snowflakes. What will your winter wonderland look like?
Materials Needed for Paper Snowflakes
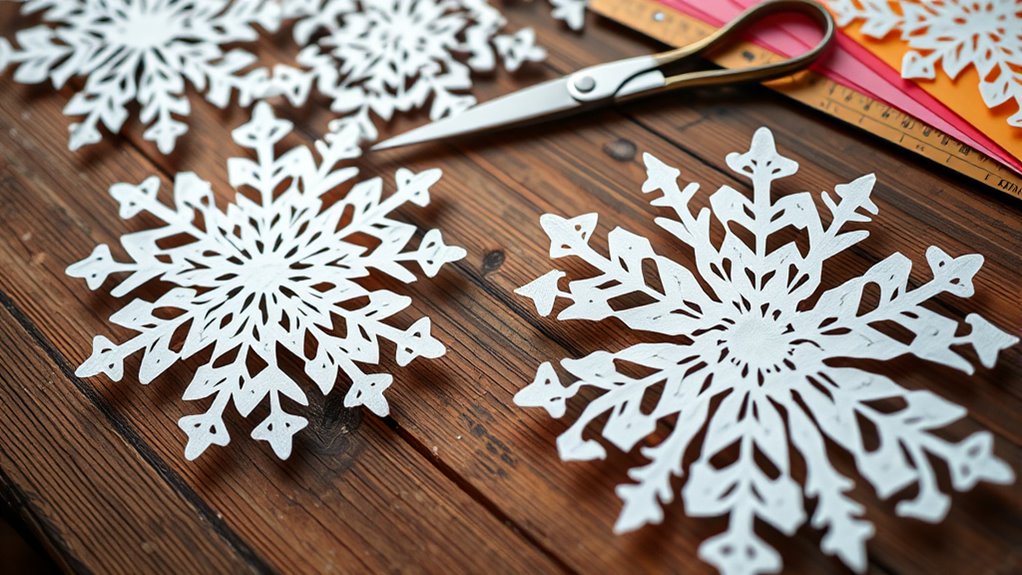
Creating beautiful paper snowflakes is a delightful way to embrace the winter season, and you don’t need much to get started! First, gather various paper types—thin printer paper, colorful scrapbook sheets, or even recycled wrapping paper. Each type can create unique textures and patterns. You’ll also want scissors and a pencil for sketching your designs. Consider cutting different snowflake sizes to add variety to your winter wonderland. From delicate mini flakes to larger, bold shapes, the choice is yours! Let your creativity flow, and soon you’ll have a stunning assortment of snowflakes to adorn your space.
Basic Folding Techniques
When it comes to crafting your paper snowflakes, mastering basic folding techniques is key to releasing your creativity. You’ll want to explore the essential methods that will set the stage for stunning designs. Get ready to transform simple paper into a winter wonderland with just a few folds and snips!
Basic Folding Methods
Mastering a few basic folding methods can turn an ordinary sheet of paper into a stunning snowflake. Understanding essential folding techniques is key to achieving beautiful designs that adhere to symmetry principles. Here’s a quick reference table to guide you:
| Folding Technique | Description | Symmetry Type |
|---|---|---|
| Triangular Fold | Fold paper diagonally | Radial symmetry |
| Accordion Fold | Fold in parallel sections | Bilateral symmetry |
| Square Fold | Fold corners to the center | Radial symmetry |
| Diamond Fold | Fold diagonally, then in half | Bilateral symmetry |
Get creative and experiment with these methods!
Essential Cutting Techniques
Cutting is where the magic truly happens in crafting your paper snowflakes. With cutting precision, you’ll bring your folded paper to life! Start by envisioning your design symmetry; balance is key. Use sharp scissors to create intricate shapes—think curves, angles, and unique patterns. Don’t be afraid to experiment; each cut reveals something new. Remember, the more you practice, the more confident you’ll become. Embrace freedom in your designs; there are no strict rules! Let your creativity flow, and soon, you’ll have a beautiful array of snowflakes that reflect your personal touch, perfect for adding charm to your winter decor.
Cutting Patterns for Unique Designs
As you plunge into the world of DIY paper snowflakes, you’ll quickly discover that the magic lies in the cutting patterns you choose. Your adventure begins with design inspirations from nature, like leaves or stars, leading to intricate patterns that mesmerize. Grab your scissors and let your imagination run wild! Experiment with different shapes—try sharp angles for a modern flair or soft curves for a whimsical touch. Don’t hesitate to combine various patterns; the more unique, the better! Remember, each cut creates a new possibility, allowing you to craft snowflakes that truly reflect your creative spirit. Happy cutting!
Decorating Your Snowflakes
Now that you’ve crafted your stunning paper snowflakes, it’s time to give them some personality! You can play with colorful paper options, sprinkle on some glitter, or even experiment with unique cutting techniques for added texture. Let your creativity shine as you transform each snowflake into a one-of-a-kind winter masterpiece!
Colorful Paper Options
Transforming your paper snowflakes into vibrant works of art can be as simple as choosing the right colorful paper. Consider using patterned paper for an extra pop! Here’s a quick guide to inspire your selection:
| Paper Type | Effect |
|---|---|
| Bright Cardstock | Bold and eye-catching |
| Pastel Paper | Soft and whimsical |
| Metallic Sheets | Shiny and festive |
| Holiday-themed Paper | Seasonal charm |
| Textured Paper | Unique visual interest |
With these vibrant colors and playful patterns, your snowflakes will become stunning decorations that brighten any space! Let your creativity flow!
Glitter and Sparkle
While your colorful paper snowflakes already capture attention, adding a touch of glitter and sparkle can elevate them to a whole new level of enchantment. Here’s how to create stunning sparkle effects:
- Choose Your Glitter: Select fine or chunky glitter based on the look you want.
- Glitter Application: Use glue to apply glitter on edges or specific designs for a dazzling finish.
- Seal the Sparkle: A light spray of clear adhesive will keep your glitter in place and add a glossy sheen.
With these simple steps, your snowflakes will shimmer like the winter wonderland they represent!
Unique Cutting Techniques
If you want your paper snowflakes to stand out, mastering unique cutting techniques is essential for adding a personal touch. Try advanced cutting methods like layering multiple sheets or using scissors to create intricate patterns. Experiment with shapes—think stars, hearts, or even abstract designs. Don’t hesitate to incorporate small cutouts; they’ll elevate your snowflakes from simple to stunning. Remember, the more detailed your cuts, the more enchanting your creations will be. So grab your scissors, unleash your creativity, and let your imagination run wild. You’ll be amazed at how these techniques can transform ordinary paper into extraordinary winter wonders!
Creative Ways to Display Your Snowflakes
There are countless creative ways to showcase your beautiful paper snowflakes, each adding a whimsical touch to your winter decor. Here are three fun ideas for displaying them:
- Hanging Displays: Use fishing line to suspend your snowflakes from the ceiling, creating a magical winter wonderland.
- Window Decorations: Tape your snowflakes to windows, allowing sunlight to filter through and cast delicate shadows.
- Table Centerpieces: Arrange snowflakes on your dining table or mantle, layered with candles or pinecones for a cozy vibe.
Let your imagination run wild and enjoy the festive charm these displays bring to your space!
Snowflake Crafting With Kids
After showcasing your stunning paper snowflakes, why not invite the kids to join in on the fun of crafting their own? Snowflake crafting is a fantastic way for them to express creativity and invent unique snowflake designs. Gather colorful paper, scissors, and maybe some glitter for extra sparkle! Encourage them to fold and cut freely, turning simple sheets into one-of-a-kind creations. As you share this joyful activity, you’ll be crafting memories that last longer than the winter season. So, roll up your sleeves, let their imaginations soar, and watch as the magic of snowy wonder fills your home!
Gifting Handmade Snowflakes
As you prepare for the holiday season, consider the joy of gifting handmade snowflakes that carry a personal touch. These delicate creations can brighten anyone’s day and add charm to your gift wrapping. Here are three fun ideas to make your gifts extra special:
- Attach a Snowflake Card: Write a heartfelt message on a card adorned with a snowflake design.
- Use as Gift Tags: Cut smaller snowflakes to label your gifts uniquely.
- Create a Snowflake Mobile: Gift a hanging decoration made from several snowflakes for a whimsical touch.
Your thoughtful gifts will be cherished and remembered!
Frequently Asked Questions
Can I Use Colored Paper for Snowflakes?
Absolutely, you can use colored paper options for your snowflakes! They’ll add a playful twist to your festive designs, making your decorations pop with color and creativity. Let your imagination run wild this holiday season!
How Do I Prevent My Snowflakes From Tearing?
To prevent your snowflakes from tearing, use sturdy paper and sharp scissors. Explore various snowflake patterns and employ gentle cutting techniques. Remember, patience is key; take your time to create beautiful, delicate designs!
Is There a Specific Paper Thickness to Use?
You’ll want to use medium-weight paper, like cardstock, for durability. Experiment with various paper types and cutting techniques to achieve intricate designs without tearing. Embrace your creativity and let your imagination guide your snowflake journey!
Can I Reuse Snowflakes From Previous Years?
Absolutely, you can reuse your snowflakes! Just make certain to store them carefully to guarantee their preservation. A little extra effort in snowflake storage now means enjoying those cherished decorations for years to come.
How Long Does It Take to Make a Snowflake?
Making a snowflake typically takes about 10 to 15 minutes. You’ll enjoy experimenting with different snowflake patterns and crafting techniques, letting your creativity flow and creating unique pieces that bring winter magic to life!