Hosting pottery classes under your gazebo can turn your outdoor space into a creative sanctuary. With open sides inviting the breeze and natural light flooding in, students can express their artistic flair. Set up your workspace with essential tools like pottery wheels and carving tools at hand. Promote your classes through social media and engage your community with fun themes. Ready to create a unique pottery experience? There’s so much more to explore!
Choosing the Right Gazebo for Your Pottery Classes
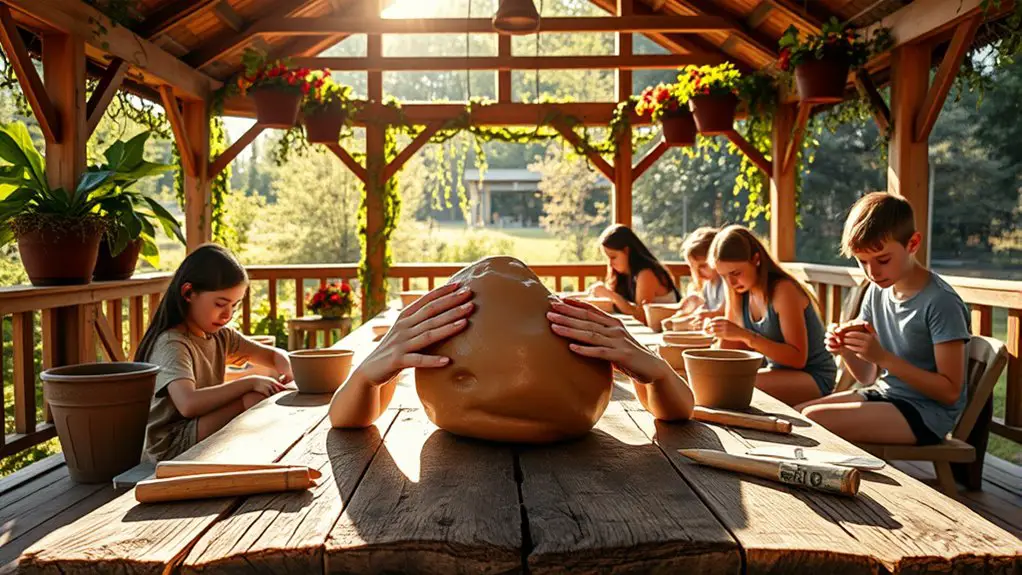
When you’re ready to host pottery classes outdoors, choosing the right gazebo can make all the difference. Picture a charming space where creativity flows freely, sheltered from the whims of nature. First, consider size considerations—your gazebo should comfortably fit your students, supplies, and their masterpieces. Imagine the laughter and camaraderie as everyone gathers under its protective embrace. Weather protection is essential; go for a sturdy structure that shields against rain and sun, allowing you to focus on crafting rather than dodging raindrops. Opt for a design that inspires—open sides for a breeze, yet cozy enough to invite warmth. With the right gazebo, your outdoor pottery classes will transform into unforgettable experiences, where imagination knows no bounds. A well-constructed gazebo will provide weather protection that enhances your outdoor activities year-round.
Essential Tools and Materials for Pottery
As you step into the magical world of pottery, you’ll quickly discover that having the right tools is like holding the keys to creativity. From the smooth caress of clay to the sturdy grip of your favorite carving tools, each item plays a crucial role in shaping your artistic vision. Let’s explore the basics of pottery tools and the enchanting varieties of clay that will ignite your imagination!
Basic Pottery Tools
Every potter’s journey begins with a handful of essential tools that transform raw clay into beautiful creations. To help you immerse yourself in this artistic world, here’s a quick guide to the basics you’ll need:
| Tool | Purpose | Must-Have? |
|---|---|---|
| Pottery Wheel | Shapes clay effortlessly | Yes |
| Wire Cutter | Cuts clay easily | Yes |
| Needle Tool | Details and textures | Yes |
| Wooden Rib | Smooths and shapes | Optional |
| Sponge | Wetting and cleaning | Optional |
With these hand tools in hand, you’ll feel the freedom to explore your creativity. Embrace the process, and let your imagination flow through every piece you create!
Clay Types Overview
While diving into the world of pottery, you’ll quickly discover that the type of clay you choose plays an essential role in shaping your creations. Earthenware, with its earthy charm, offers a porous quality perfect for decorative pieces, while stoneware’s durability makes it ideal for functional items like mugs and plates. Each has its unique character, inviting you to explore different techniques. If you’re looking for something that requires no kiln, air dry options can release your creative spirit without the fuss! On the other hand, porcelain types—known for their elegance—bring a refined touch to your work. Embrace the freedom to experiment; your clay choices will spark your imagination and elevate your pottery journey!
Setting Up Your Pottery Workspace
Creating your pottery workspace can be an exciting journey, especially when you envision the masterpieces that will emerge from it. Start by designing your workspace layout to foster creativity—think about the flow of your movements as you shape and mold. Position your wheel and tools within arm’s reach, allowing for an effortless experience.
Next, consider lighting considerations. Natural light is your best friend, so set up near windows or under your gazebo’s open areas to bask in that lovely glow. Supplement with adjustable task lights for those detailed moments. Embrace the freedom to express yourself in this space, where every curve of clay tells a story, and every color bursts with your unique vision! Additionally, setting up your workspace under a gazebo allows for year-round use, ensuring that you can enjoy pottery classes regardless of the weather conditions.
Promoting Your Pottery Classes
To get your pottery classes buzzing with excitement, you’ll want to harness the power of social media and connect with your local community. Picture sharing vibrant snapshots of your creations, inviting people to join the fun, and forging friendships over clay. Let’s explore how to turn your passion into a thriving hub of creativity!
Social Media Strategies
As you immerse yourself in the vibrant world of pottery, harnessing the power of social media can transform your classes into a sought-after experience. With the right strategies, you’ll attract enthusiastic participants who crave creativity. Here’s how to get started:
- Instagram Promotions: Share stunning images of your pottery creations. Use engaging captions and relevant hashtags to draw in your audience.
- Facebook Events: Create inviting events for each class. Encourage attendees to RSVP and share with friends.
- Behind-the-Scenes Content: Post videos of your pottery process, making it relatable and inspiring.
- User-Generated Content: Encourage students to share their creations on their profiles, tagging you to expand your reach.
Let your passion shine through, and watch your pottery classes flourish!
Local Community Engagement
Connecting with your local community can elevate your pottery classes to new heights. Embrace community outreach by collaborating with local businesses or schools. This not only fosters relationships but also brings diversity to your classes. Imagine the creativity that blossoms when a local café showcases your students’ work!
Here’s a simple table to inspire your partnerships:
| Local Partner | Collaboration Idea | Benefit |
|---|---|---|
| Local Cafe | Host pottery-themed events | Attract new customers |
| Art Supply Store | Offer discounts to students | Increased foot traffic |
| Community Center | Organize workshops for kids | Strengthen community ties |
| Library | Create pottery storytime sessions | Engage families |
Structuring Your Pottery Lessons
When crafting your pottery lessons, it’s essential to weave creativity and structure together, ensuring that each session flows seamlessly into the next. Think of your class structure as a beautiful clay vessel, shaped by thoughtful lesson pacing. Here are four tips to guide you:
- Outline Objectives: Begin with clear goals for what you want students to achieve.
- Break Down Techniques: Introduce new skills in manageable chunks to avoid overwhelming your learners.
- Interactive Elements: Incorporate hands-on activities, allowing for exploration and personal expression.
- Feedback Loops: Create moments for students to share their experiences, fostering a sense of community.
With this approach, your pottery lessons will inspire creativity while maintaining an engaging, dynamic flow. Enjoy the process!
Creating a Welcoming Atmosphere for Students
Creating a welcoming atmosphere for your pottery classes can transform the learning experience, making each student feel valued and inspired. Start by ensuring student comfort with cozy seating and plenty of space to work. Use inviting decor that reflects creativity—think bright colors, plants, and art to stimulate the senses.
Here’s a simple way to organize your space:
| Element | Purpose | Inspiration |
|---|---|---|
| Seating | Comfort & relaxation | Cushioned chairs, pillows |
| Lighting | Warmth & ambiance | Fairy lights, lanterns |
| Decor | Creativity & engagement | Pottery displays, art pieces |
Incorporating energy-efficient lighting can enhance the ambiance while keeping your electricity bills low.
Frequently Asked Questions
What Is the Best Time of Year to Host Pottery Classes Outdoors?
When the sun kisses the earth, spring sessions bloom, inviting creativity. Summer evenings offer a warm embrace, perfect for shaping clay under the stars. You’ll find inspiration in nature’s rhythm, making each class a magical experience.
How Many Students Can Fit Comfortably Under a Standard Gazebo?
Under a standard gazebo, you can comfortably fit about six to eight students. With thoughtful seating arrangements, you’ll encourage vibrant student interaction, allowing creativity to flow freely, transforming your space into a hub of artistic expression.
What Type of Flooring Is Best for Outdoor Pottery Classes?
Did you know that 30% of outdoor classes struggle with uneven surfaces? For your pottery sessions, consider durable outdoor materials like compacted gravel or permeable pavers—both excellent flooring options that offer stability and creative freedom for your students.
Can I Host Classes in Inclement Weather?
You can absolutely host classes in inclement weather! With proper weather preparedness and alternative locations, you can turn challenges into creative opportunities, allowing your artistic spirit to flourish, rain or shine. Embrace the adventure!
How Do I Handle Cleanup After a Pottery Class?
After your class, gather your cleanup supplies. Use gentle techniques like damp sponges for clay and sweeping for debris. Let creativity flow into cleaning, turning it into a joyful ritual rather than a chore.