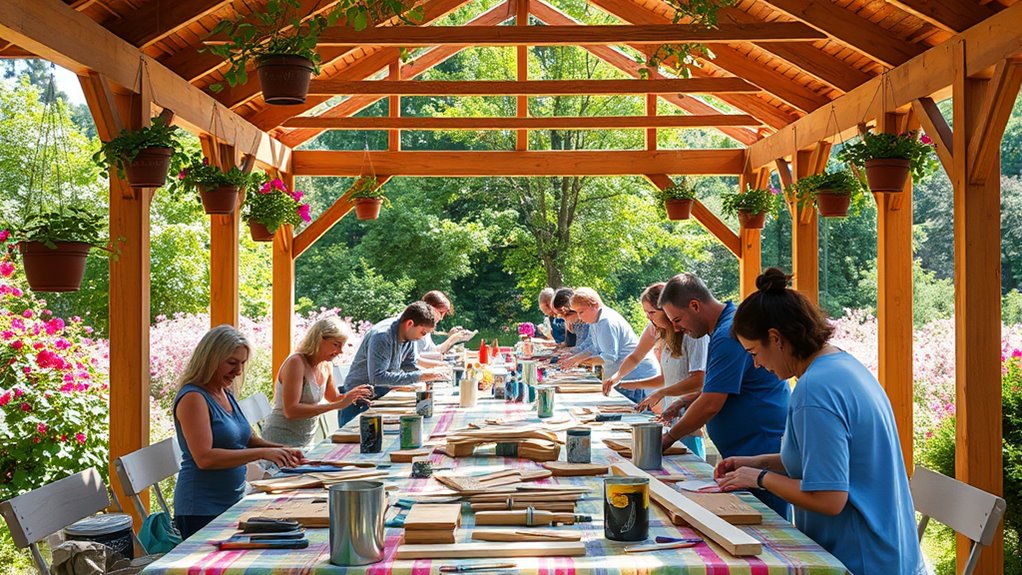
Hosting a weekend workshop for DIY home improvements in your gazebo is a fantastic idea! Start by choosing a spacious gazebo to accommodate tools and materials. Gather essential tools like drills and levels, and outline a flexible schedule that allows for breaks and idea sharing. Pick project ideas suited for all skill levels, like birdhouses or garden benches, for an enjoyable experience. By focusing on safety and creating a welcoming atmosphere, you’ll encourage creativity and collaboration—there’s plenty more to explore!
Choosing the Right Gazebo for Your Workshop
When you’re setting up a workshop in your backyard, choosing the right gazebo can make all the difference in creating a functional and enjoyable space. Start by considering gazebo size; you’ll want enough room for your tools, materials, and yourself without feeling cramped. A larger gazebo offers flexibility for projects, while a smaller one can still provide a cozy atmosphere. Next, think about gazebo materials. Wood exudes charm and warmth, but metal or vinyl can offer durability and lower maintenance. Each material has its pros and cons, so weigh them based on your climate and aesthetic preferences. Additionally, considering essential features like lighting and seating can significantly enhance your workshop functionality. Ultimately, the right gazebo will enhance your workshop experience, giving you the freedom to create without limitations. Choose wisely!
Essential Tools and Materials for DIY Projects
When you tackle a DIY project, having the right tools and materials is key to your success. You’ll want to gather a must-have toolkit and an essential materials list to make your tasks easier and more efficient. Let’s explore what you really need to get started on your home improvements!
Must-Have Tools
While starting on a DIY project can be thrilling, having the right tools is essential to secure your success. Here’s a quick reference to must-have tools that every DIY enthusiast should consider:
| Tool Type | Purpose |
|---|---|
| Tape Measure | For accurate measurements |
| Power Drill | For drilling and fastening |
| Level | To guarantee straight lines |
| Utility Knife | For cutting various materials |
Essential Materials List
Before diving into your DIY project, it’s essential to gather the right materials, as they can make or break your endeavor. Start by sourcing your supplies through reliable DIY material sources, like local hardware stores or online retailers. Don’t forget to explore eco-friendly options that align with your values, such as reclaimed wood or low-VOC paints. Depending on your project, you might need items like screws, nails, adhesives, and primer. Consider investing in quality materials that guarantee durability and sustainability. And remember, engaging with your local community can lead to discovering unique materials you may not have thought of. With the right essentials in hand, you’ll be ready to create something extraordinary in your gazebo workshop!
Planning Your Workshop Schedule
When planning your workshop schedule, it’s essential to first define your objectives so you know what you want to achieve. Once you’ve set your goals, allocate specific time slots for each task to keep your projects on track. This structured approach will help you maximize productivity and enjoy your DIY experience even more.
Define Workshop Objectives
As you plan your DIY home improvements workshop, it’s important to define clear objectives that will guide your schedule and activities. Establishing workshop goals will help guarantee participant engagement and a fulfilling experience. Reflect on what you want to achieve and how attendees will benefit. Here are some objectives to take into account:
- Introduce basic DIY skills for beginners
- Provide hands-on activities to reinforce learning
- Encourage collaboration among participants
- Inspire creativity in home improvement projects
- Share resources for continued learning after the workshop
Allocate Time Slots
With clear objectives set, the next step is to allocate time slots effectively to guarantee your workshop runs smoothly. Start by breaking down your activities into manageable segments, allowing for adequate time management. Consider how long each project will take, but also build in schedule flexibility to accommodate questions or unexpected challenges. For example, if you’re demonstrating a painting technique, set aside extra time for participants to practice. Don’t forget to include breaks, giving everyone a chance to recharge and share ideas. By creating a balanced schedule, you’ll keep the energy high and the atmosphere relaxed. Remember, a well-planned timeline not only secures productivity but also enhances the overall experience for everyone involved.
Fun DIY Project Ideas for All Skill Levels
Whether you’re a seasoned DIY enthusiast or just starting out, there’s a world of fun projects waiting for you. From creative upcycle projects to beginner woodworking techniques, you’ll find something that sparks your imagination. Here are some ideas to get you started:
- Pallet coffee table using simple tools
- Upcycled garden planters from old tires
- Decorative wooden shelves for your home
- DIY birdhouses to attract feathered friends
- Customized picture frames for personal touches
These projects are not only enjoyable but also a great way to express your creativity. Additionally, working in a comfortable area for relaxation like your gazebo can enhance your DIY experience. Embrace the freedom of DIY and choose a project that fits your skill level. Immerse yourself, and you’ll be amazed at what you can create!
Creating a Comfortable and Inviting Atmosphere
Creating a comfortable and inviting atmosphere in your home can transform your living space into a sanctuary, where you can relax and recharge. For your DIY workshop, focus on cozy seating and ambient lighting to create a welcoming vibe. Here’s how to set the scene:
| Element | Description | Tips |
|---|---|---|
| Cozy Seating | Use cushions and throws | Arrange in circles for chats |
| Ambient Lighting | Soft, warm tones | Use string lights or lamps |
| Natural Elements | Incorporate plants | Choose low-maintenance options |
| Personal Touches | Add artwork or crafts | Showcase your DIY projects |
Consider enhancing the atmosphere with soft lighting to set the perfect mood for creativity and collaboration.
Safety Tips for a Successful Workshop
While setting up your DIY workshop to foster a cozy atmosphere, keeping safety in mind is just as important for a successful experience. Prioritizing workshop safety not only protects you but also enhances the enjoyment of your projects. Here are some essential tips for effective tool handling and overall safety:
Setting up a cozy DIY workshop is great, but never underestimate the importance of safety for a truly enjoyable experience.
- Always wear protective gear, like goggles and gloves.
- Keep your workspace well-lit and organized.
- Verify tools are in good condition and appropriate for each task.
- Familiarize yourself with each tool’s operation before use.
- Have a first aid kit nearby for any minor accidents.
- Ensure your gazebo is set up on a stable and level surface to prevent any accidents during your workshop activities.
Collaborating and Sharing Ideas With Friends
Here’s something special about collaborating with friends on DIY projects that can spark creativity and elevate your ideas to new heights. Hosting brainstorming sessions in your gazebo allows for relaxed, open dialogue, where everyone can share their thoughts freely. Use project collaboration to divide tasks and blend unique skills for the best results. Here’s a simple table to guide your sessions:
| Idea | Suggested Tools | Possible Challenges |
|---|---|---|
| Garden Bench | Wood, Paint | Weather, Time |
| Outdoor Planters | Pots, Soil | Budget, Design |
| BBQ Station | Grill, Tools | Safety, Space |
| Pergola | Wood, Fabric | Permits, Cost |
| Birdhouse | Wood, Paint | Sizing, Materials |
Make sure to set up a gazebo correctly to create a comfortable environment for your workshop. Get ready to transform your ideas into reality together!
Showcasing Your Finished Projects
After collaborating with friends and bringing your DIY ideas to life, it’s time to showcase your finished projects. Creating project showcases is a fantastic way to celebrate your hard work and inspire others. Consider setting up a dedicated area in your gazebo for finished displays that highlight your creativity and craftsmanship.
Here are some ideas to elevate your showcase:
- Use decorative lighting to enhance visibility
- Incorporate signage with project descriptions
- Arrange items by theme or color for visual appeal
- Include before-and-after photos for context
- Host a mini-tour to walk guests through your process, and consider using decorative lighting to create a warm and inviting ambiance for your displays.
Maintaining and Upgrading Your Gazebo Space
To keep your gazebo space looking its best, regular maintenance and thoughtful upgrades are essential. Start with routine gazebo maintenance—cleaning debris, checking for rot, and ensuring proper drainage. You’ll want to enhance your space with upgrades that reflect your style. Regular cleaning helps maintain the gazebo’s appearance and prolongs its lifespan.
Here’s a quick reference table to help you plan:
| Maintenance Task | Frequency | Upgrade Idea |
|---|---|---|
| Clean gutters | Monthly | Add decorative lighting |
| Inspect for damage | Seasonally | Install a ceiling fan |
| Repaint or stain | Every 2 years | Upgrade furniture |
| Check foundation | Annually | Add a fire pit |
Frequently Asked Questions
Can I Host a Workshop in a Small Gazebo?
Yes, you can host a workshop in a small gazebo, but consider space limitations and the gazebo layout. Make certain there’s enough room for participants and materials, so everyone feels comfortable and engaged in the activities.
What Is the Best Time of Year for a DIY Workshop?
The best time for a DIY workshop’s during the spring months or autumn weather. Spring offers fresh inspiration, while autumn provides comfortable temperatures. Both seasons encourage creativity and make your projects more enjoyable.
How Do I Promote My DIY Workshop to Attract Participants?
To attract participants for your DIY workshop, leverage social media platforms for targeted outreach and share engaging content. Combine this with local advertising, like flyers or community boards, to reach potential attendees effectively.
What if It Rains During the Workshop?
If it rains during your workshop, don’t worry! Have some rainy day alternatives ready, like indoor activities or projects using waterproof materials. This way, you’ll keep the energy high and participants engaged, no matter the weather.
Can I Charge a Fee for Participating in the Workshop?
Absolutely, you can set workshop pricing that reflects the value you’re offering. Consider adding participation incentives, like exclusive materials or discounts for early sign-ups, to entice attendees and make the experience even more rewarding.