Installing clear PVC wall panels can transform a space, yet improper installation can lead to costly mistakes. To achieve a professional finish, you’ll need to focus on preparation and precision. From selecting the right materials to ensuring a secure application, each step is vital. If you’re ready to enhance your walls with these durable panels, let’s explore the essential techniques for a successful installation.
Materials and Tools Needed
Before you begin installing clear PVC wall panels, it’s essential to gather all the necessary materials and tools. First, decide on the types of panels you’ll use; options include solid or multi-wall panels, each offering different benefits. Next, consider panel thickness, as thicker panels provide better insulation and durability. You’ll need a saw for cutting, a level for alignment, adhesive or screws for installation, and a measuring tape for precision. Don’t forget safety gear like gloves and goggles. Having everything on hand will streamline your installation process and give you the freedom to create your ideal space efficiently.
Preparing the Wall Surface
Before installing your clear PVC wall panels, you’ll need to prepare the wall surface properly. Start by cleaning the area to remove any dust or debris, and then check for moisture, as dampness can affect adhesion. Ensuring a clean, dry surface is essential for a successful installation.
Clean the Surface
To guarantee a smooth installation of clear PVC wall panels, it’s essential that you start with a clean surface. Proper surface preparation sets the foundation for success. Follow these cleaning techniques:
- Dust and Debris: Use a broom or vacuum to remove loose dirt and dust from the wall.
- Wash the Surface: Mix warm water with mild detergent, and scrub the wall using a sponge to eliminate grime.
- Rinse and Dry: Wipe down with clean water and a cloth, ensuring the surface is completely dry before proceeding.
A clean surface not only enhances adhesion but also contributes to a polished final look.
Check for Moisture
Checking for moisture is vital since excess dampness can compromise the adhesion of your clear PVC wall panels. Start with moisture testing on your wall surface to identify any hidden issues. Use a moisture meter for accuracy, or simply tape a plastic sheet to the wall for 24 hours; condensation indicates a problem. If you find moisture, address it before installation to guarantee a secure bond. This step is essential for preventing mold growth, which could undermine your project’s integrity. By taking the time to check for moisture, you’ll achieve a durable and long-lasting finish that stands the test of time.
Measuring and Cutting the Panels
To successfully measure and cut your clear PVC wall panels, you’ll need some essential tools like a measuring tape and a utility knife. Getting accurate measurements is vital, as even slight errors can lead to poor fitting panels. Once you have your measurements, using the right cutting techniques will guarantee clean edges for a professional finish.
Tools You’ll Need
When installing clear PVC wall panels, having the right tools for measuring and cutting is essential for a successful project. You’ll want to guarantee your installation techniques are spot on and compatible with the different panel types. Here’s what you’ll need:
- Tape Measure – For accurate measurements, guaranteeing your panels fit perfectly.
- Utility Knife – Ideal for cutting the panels cleanly and efficiently.
- Straight Edge – Helps guide your cuts, keeping them straight and precise.
With these tools, you’ll have the freedom to create a seamless installation that looks professional and lasts.
Accurate Measurements
Having the right tools sets the stage for getting accurate measurements, which is essential for a successful installation of clear PVC wall panels. Use reliable measurement tools like a tape measure, level, and square to guarantee precision. Employ measuring techniques like taking measurements from multiple points and double-checking your figures to avoid errors. Always account for any obstacles or irregularities in the wall when measuring. Mark your measurements clearly on the panels, so you can cut confidently later. Remember, taking the time to measure accurately now saves you from headaches during installation and guarantees a seamless, professional-looking result.
Cutting Techniques
Cutting clear PVC wall panels requires precision and the right techniques to guarantee a clean, professional finish. To confirm your panels are cut accurately for your desired panel sizes, follow these cutting techniques:
- Measure Twice: Always double-check your measurements to avoid mistakes.
- Use a Straight Edge: Align a straight edge for a smooth, even cut, ensuring your line is visible.
- Select the Right Tool: Use a fine-toothed saw or utility knife for cleaner edges, depending on the thickness of the panels.
Applying Adhesive or Fasteners
Before you start applying your clear PVC wall panels, it’s essential to choose the right adhesive or fasteners to guarantee a secure fit. For adhesive types, consider using construction adhesive or double-sided tape, as they provide a strong bond without damaging the panels. If you prefer fastener options, screws or clips can be effective, ensuring your panels stay in place. Make sure to check the manufacturer’s recommendations for compatibility and strength. Whichever method you choose, be mindful of even spacing and alignment to achieve a professional finish. With the right materials, you’ll enjoy the freedom of a beautifully installed wall.
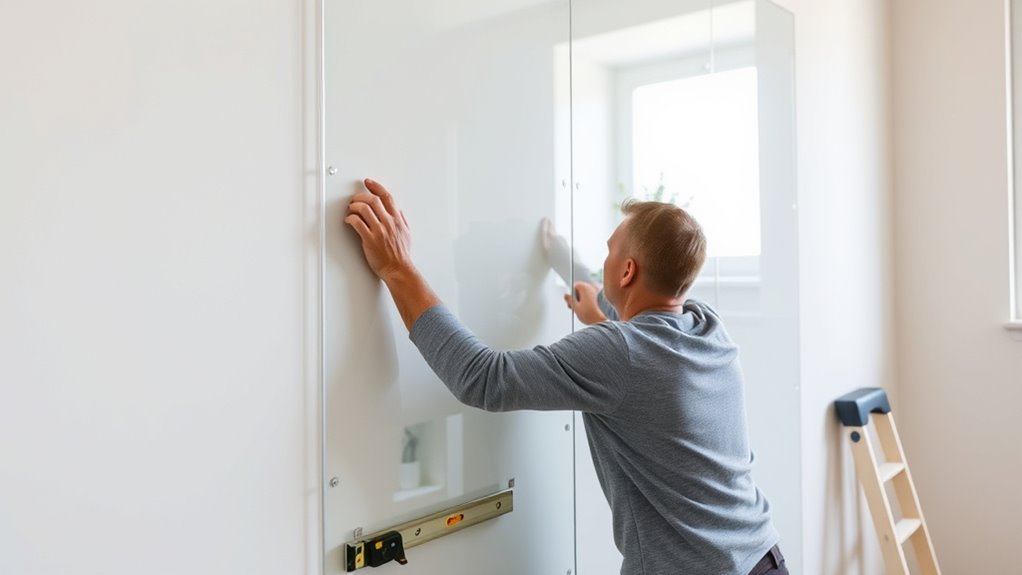
Installing the First Panel
Once you’ve selected the right adhesive or fasteners, it’s time to install your first clear PVC panel. Here are some installation tips to guarantee perfect panel alignment:
- Position the panel: Hold it against the wall, aligning it with your starting point.
- Secure it temporarily: Use a few screws or adhesive spots to keep it in place.
- Check alignment: Make sure it’s level by using a spirit level before fully securing it.
Once it’s aligned correctly, press firmly to guarantee a solid bond. You’re on your way to a beautiful, free space!
Aligning and Securing Additional Panels
Aligning and securing additional panels is essential for achieving a seamless look in your installation. To guarantee proper panel alignment, use techniques like adjusting the panels side-to-side and checking for level with a spirit level. Once aligned, utilize securing methods such as adhesive or screws, depending on your wall type. Make sure to space screws evenly, typically every 16 inches, to provide stability. If you’re using adhesive, apply it consistently along the edges for a strong bond. Double-check your alignment before the adhesive sets or screws are tightened, as this will save you time and hassle in the long run.
Finishing Edges and Seams
To achieve a polished finish for your installation, it’s essential to properly address the edges and seams of your clear PVC wall panels. Start with effective edge sealing to prevent moisture penetration. Next, focus on seam finishing to create a seamless look that enhances the overall aesthetic. Here’s how you can do it:
- Apply edge sealant evenly along the edges for a waterproof barrier.
- Use adhesive tape for clean seams, ensuring they’re aligned and smooth.
- Trim excess material carefully to maintain a neat appearance.
Taking these steps will give your installation a professional touch, allowing you to enjoy your space freely.
Cleaning and Maintaining Your Panels
Although clear PVC wall panels are durable, keeping them clean and well-maintained is crucial for preserving their clarity and appearance. To help you with panel cleaning, here are some maintenance tips:
| Cleaning Method | Frequency |
|---|---|
| Mild Soap & Water | Weekly |
| Vinegar Solution | Monthly |
| Soft Cloth Wipe | As needed |
Regularly remove dust and grime using a soft cloth. Avoid harsh chemicals that can scratch or dull the surface. By following these simple maintenance tips, you’ll guarantee your panels remain crystal clear for years to come.
Tips for a Professional Look
When you’re looking to achieve a professional look with your clear PVC wall panels, attention to detail is essential. Here are three tips to enhance visual appeal:
- Ensure Level Installation: Use a laser level to guarantee your panels are perfectly aligned.
- Seal the Edges: Apply silicone caulk around edges for a clean finish and prevent moisture infiltration.
- Choose the Right Trim: Use complementary trim to frame your panels, adding a polished look.
Frequently Asked Questions
Can Clear PVC Wall Panels Be Painted or Stained?
You can’t paint or stain clear PVC wall panels effectively. The surface repels most coatings. If you’re looking for a different look, consider using specialized painting techniques or explore other staining options designed specifically for plastics.
Are Clear PVC Wall Panels Suitable for Outdoor Use?
Think of clear PVC wall panels as your protective shield against the elements. They’re ideal for outdoor use, offering excellent weather resistance and UV protection, ensuring your space stays bright and vibrant without compromising durability.
How Do I Repair a Scratched or Damaged Panel?
To repair a scratched panel, you can use a scratch repair kit or fine sandpaper for minor scratches. If damage is extensive, consider panel replacement for a seamless look and ideal functionality.
What Is the Lifespan of Clear PVC Wall Panels?
Clear PVC wall panels can last 10 to 20 years, depending on installation tips and maintenance practices. Regular cleaning and avoiding harsh chemicals can help extend their lifespan, giving you the freedom to enjoy them longer.
Can I Install These Panels Over Existing Tiles or Wallpaper?
Yes, you can install these panels over existing tiles or wallpaper. Just guarantee proper surface preparation for a successful installation process. Clean the surface thoroughly and check for any imperfections that might affect adhesion.