Refresh your outdoor living space with a new paint job for your gazebo or pergola. Not only will it protect the wood or any gazebo material from weather and wear, but by using the right materials and techniques, you can make sure that this special place of entertainment continues to look its best for years!
In this blog post, we will walk you through the step-by-step process of how to paint a gazebo. Whether it’s a wooden pergola or a metal gazebo, we will help you find the right paint and tools to achieve a beautiful new look.
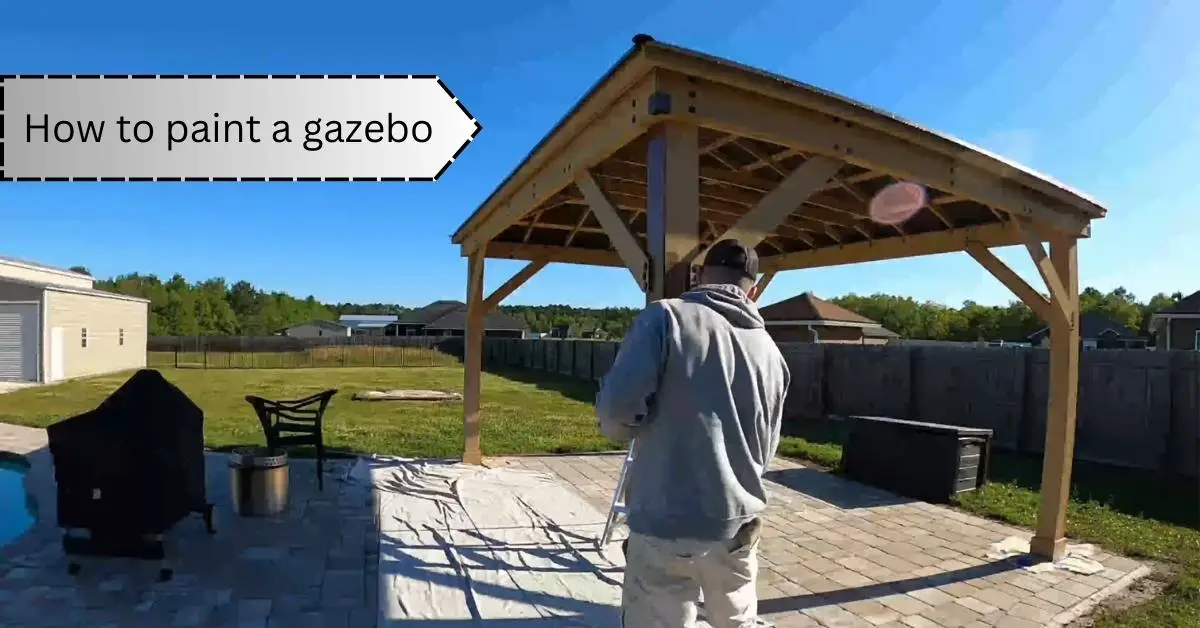
How to paint a gazebo: Transform your gazebo with a fresh coat of paint. Clean and prepare the surface, apply primer if needed, and use brushes or rollers to apply multiple thin coats. Enjoy your revitalized gazebo!
Pre-Painting Considerations for a New Gazebo
When preparing to paint a newly constructed gazebo, it is important to ensure that the moisture content of the wood is below 20 percent. Excess moisture in the wood can lead to issues such as paint peeling or wood rot.
You can obtain this information from the lumber yard where you purchased the wood, or you can borrow a moisture meter to measure it yourself.
If the moisture content is too high, meaning it exceeds 20 percent, it is recommended to allow the wood to dry out naturally for about four to six weeks.
This allows the moisture to evaporate and brings the wood to an acceptable level of moisture. After this period, retest the moisture content to ensure it is within the desired range.
To prevent trapping any excess moisture within the wood, it is advisable to use an acrylic latex primer instead of an oil-based primer. Acrylic latex primers are breathable and allow moisture to escape from the wood, which helps maintain its condition and durability.
Applying an acrylic latex primer creates a suitable base for the paint and ensures a long-lasting finish.
By following these steps and ensuring the wood is properly prepared, you can create a solid foundation for your paint job and ensure the longevity and beauty of your newly constructed gazebo.
Pre-Painting Considerations for an Older Gazebo
If your gazebo was constructed prior to 1978, it is crucial to perform a lead paint test before starting any painting projects. Lead-based paint was commonly used before this period, and disturbing it can release harmful lead particles into the air.
Lead test kits approved by the U.S. Environmental Protection Agency (EPA) are readily available at paint and hardware stores. Following the instructions provided with the test kit, check the painted surfaces of your gazebo for the presence of lead.
If the test reveals elevated levels of lead, it is strongly recommended to seek guidance from a certified lead-based paint professional. They have the expertise to safely handle and address lead hazards, ensuring the protection of your health and the environment.
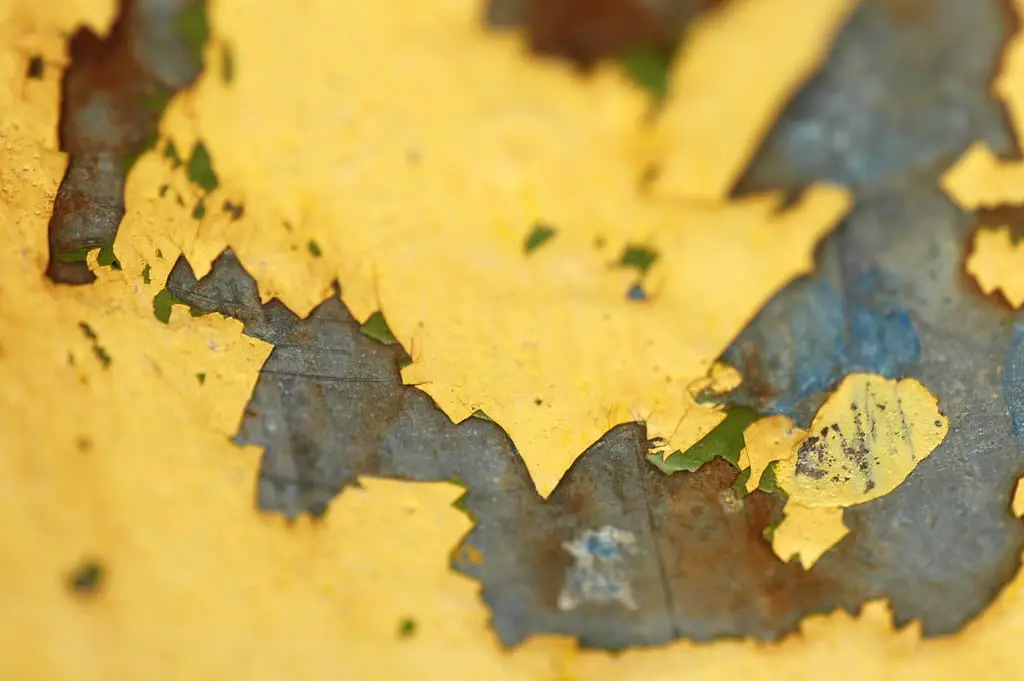
In the case of a lead-free gazebo, the first step is to remove any loose or peeling paint. Scrape off the damaged areas using a putty knife or paint scraper, and sand the surface to create a smooth finish.
It is important to wear appropriate protective gear, such as gloves and a mask, to avoid inhaling any dust or particles.
Next, thoroughly clean the gazebo using a pressure washer or a scrub brush with mild detergent and water. This will remove dirt, debris, and any remaining loose paint. Allow the gazebo to dry completely before proceeding to the next step.
To ensure good adhesion and a long-lasting finish, apply an all-purpose acrylic latex primer. The primer acts as a base coat, providing a smooth surface for the paint to adhere to. Follow the manufacturer’s instructions for proper application and drying time.
After the primer has dried, you can proceed with applying your chosen paint. Select a high-quality exterior paint suitable for the gazebo material and desired finish.
Apply the paint using brushes or rollers, ensuring even coverage and smooth strokes. Apply multiple coats as necessary, allowing each coat to dry before applying the next.
By following these steps, you can safely and effectively paint your older gazebo, whether it contains lead-based paint or is lead-free, resulting in a refreshed and beautiful outdoor space.
How to paint a gazebo? Step By Step Process
Whether you’re giving your gazebo or pergola a fresh new look, this step-by-step guide will have it feeling brand spankin’ new in no time! Follow the instructions and soon enough that old patio structure of yours won’t even resemble its former self.
Step 1:
Check the Wood Wetness before applying Paint:

Before you embark on the exciting journey of painting, there is some groundwork to be done! Carefully consider the moisture content in your wood before any paintbrush graces its surface.
Anything above 20% will require waiting a month or more for it to drop. Then comes time for purchasing an acrylic latex primer that won’t trap excessive amounts of water inside when painted, just make sure not to get an oil based one as that’s simply incompatible with these conditions!
Step 2:
Check for the presence of lead paint:
Before you start any work on an older gazebo, it’s essential to check for lead paint. To do this safely and accurately, pick up a lead test kit from your local hardware store or get one online from the EPA in order to be sure that there are no traces of dangerous hazards lingering around.
If detected, call upon certified professionals who can take away all residue before proceeding further with wood projects. Make use of sandpaper and pressure washers after removal, then finish things off by applying the acrylic latex primer as much-needed armor against future decay!
Step 3:
The first step is to prime, then paint the sides:
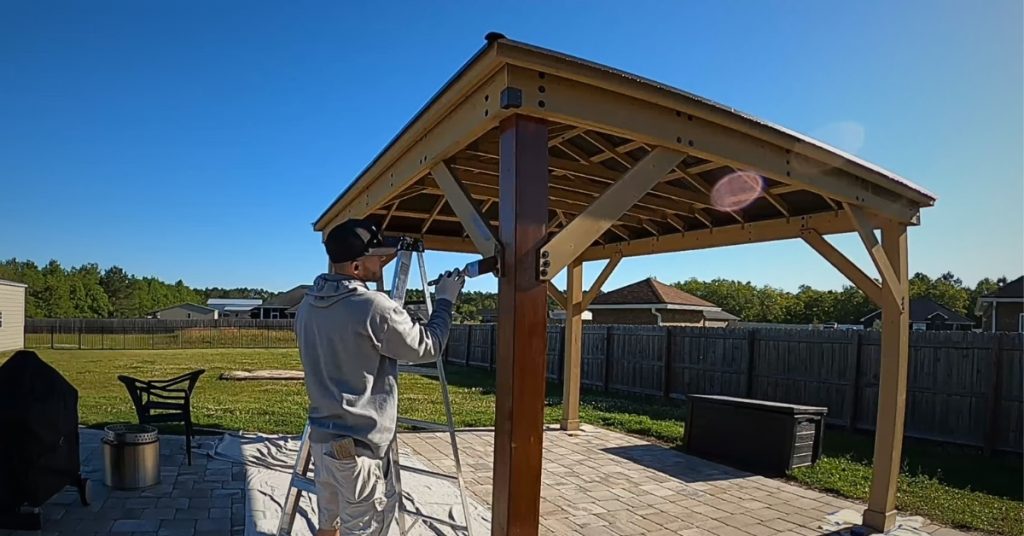
To give the gazebo a revitalized look, start with sanding and pressure washing to create an even surface on which to apply acrylic latex primer.
Let this coat dry before selecting an exterior paint color that will truly bring your vision of the space’s appearance alive!
Once you have chosen your hue of choice, use it to fully cover each support column beneath the roof as well as wood railings or frieze under its eaves, two coats should suffice for maximum protection against potential wear-and-tear.
Enjoy watching your outdoor sanctuary take shape in all its painted glory!
Important Suggestions:
To ensure your home sparkles and stays looking spick-and-span, pick a paint with an eggshell, glossy sheen, or satin finish. A high quality synthetic brush will also give you the smoothest look imaginable, just no old wooden sticks!
But of course, the real secret to picture perfect walls is using acrylic latex which expands and contracts with temperature changes meaning fewer cracked blisters from painted surfaces.
Step 4:
Lastly, paint the ceilings and floors:
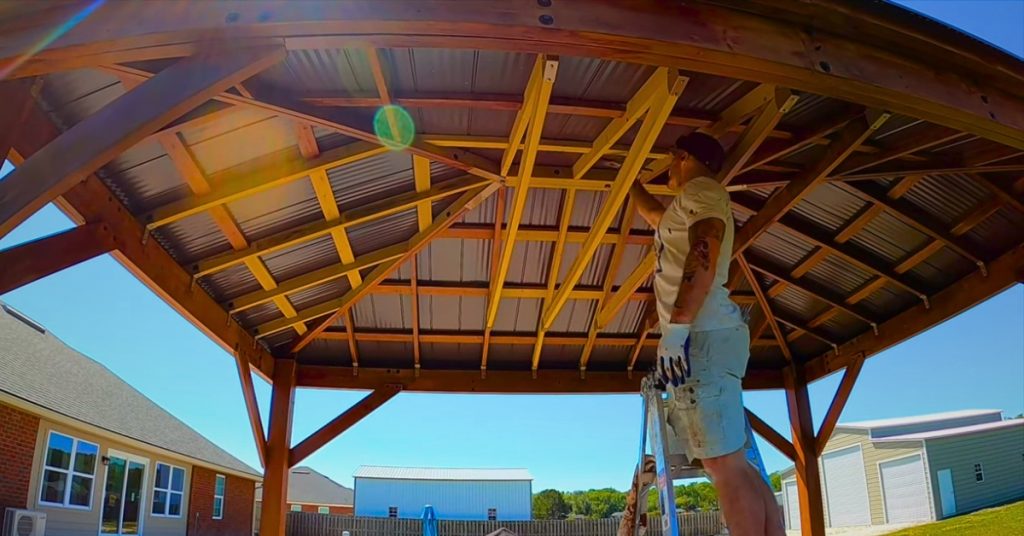
Time to give the ceiling of your gazebo a makeover! You’ll want paint specifically designed for porch ceilings, this will reduce pesky splatters and prevent any mold or mildew from infiltrating.
Get ready to climb ladders, use an extension pole with a roller, then switch it up by painting those hard-to-reach edges with a brush.
Don’t forget about giving the floors some love too; tough acrylic latex is just what you need for lush porches that last through all kinds of weather conditions.
With these specialized coatings, your gazebo’s wooden floor is prepared to withstand the hustle and bustle of foot traffic along with any other harsh weather elements that could come it’s way.
Not only are they resistant against abrasion but also moisture for long-term protection!
Also Read: How To Prevent Metal Gazebo From Rust? [Easy Step Guide 2023]
Guide: Painting Balcony Railings
Painting balcony railings serves two important purposes: enhancing their appearance and protecting them from damage. Whether your railings are made of wood or metal, using the appropriate type of paint is crucial to ensure long-lasting results.
Preparation:
- Clean the railings thoroughly using a mild detergent and water to remove any dirt, grime, or grease.
- Sand any rough areas or peeling paint to create a smooth surface for better paint adhesion.
- Use a primer designed for exterior surfaces and suitable for the material of your railings (wood or metal). Apply the primer evenly and let it dry according to the manufacturer’s instructions.
Paint Selection:
- Choose a paint specifically formulated for exterior use, as it is designed to withstand outdoor elements such as sun exposure, moisture, and temperature changes.
- Opt for a paint suitable for the material of your railings (wood or metal) to ensure proper adhesion and protection.
- Consider using a paint color that complements your outdoor design scheme, creating an inviting and visually appealing balcony space.
Painting Process:
- Stir the paint thoroughly before use to ensure consistent colour and texture.
- Use a high-quality brush or roller appropriate for the size and shape of the railings.
- Apply the paint evenly and smoothly, working from one end of the railing to the other.
- Pay attention to detail, covering all surfaces and hard-to-reach areas.
- If needed, apply multiple coats of paint, allowing sufficient drying time between each coat as recommended by the paint manufacturer.
- Follow any additional instructions provided by the paint manufacturer regarding drying time and curing.
Maintenance:
- Regularly inspect your painted balcony railings for any signs of wear, such as peeling or chipping.
- Address any maintenance issues promptly, such as sanding and repainting damaged areas, to ensure the continued protection and aesthetic appeal of the railings.
By following these steps, you can achieve a professional-looking finish while ensuring that your balcony railings are well-protected against the elements and maintain their visual appeal for years to come.
Guide: Painting the Sides of a Gazebo
You can use the same type of exterior paint on a gazebo’s wooden support columns, decorative railings, and friezes as you would on your home’s exterior walls. It’s best to apply two coats of acrylic latex topcoat, which is durable and resistant to temperature changes.
Opt for a paint with an eggshell, satin, or glossy finish for easier cleaning and removal of handprints or dirt. For a smooth and streak-free result, use a high-quality synthetic-bristle brush.
Guide: Painting the Gazebo Floor
When it comes to painting the floor of your gazebo, it’s crucial to choose a paint that can withstand the challenges it will face. Look for an acrylic latex porch floor paint that is specifically designed to be durable and resistant to abrasion.
This type of paint will be able to handle the foot traffic, furniture scrapes, and exposure to rain or snow that the gazebo floor will endure.
Before applying the paint, it’s important to prepare the surface properly. Start by smoothing the wood deck of the gazebo floor using a rotary sander. This will help create a smooth and even surface for the paint to adhere to.
Once you’ve sanded the floor, it’s recommended to clean it thoroughly using a pressure washer to remove any dirt, debris, or previous paint coatings. Allow the floor to dry completely before proceeding with the painting process.
While some porch floor paints don’t require priming, it’s a good idea to check the manufacturer’s instructions to see if any additional surface preparation is needed.
If priming is necessary, make sure to apply the appropriate primer according to the paint manufacturer’s recommendations.
When you’re ready to paint, use a paint roller that has been mounted to an extension pole. This will make it easier to reach all areas of the gazebo floor without straining yourself.
Apply the paint evenly and smoothly, working in manageable sections. Depending on the coverage and desired finish, you may need to apply multiple coats of paint. Allow each coat to dry fully before applying the next one.
Once the painting is complete, allow the paint to cure according to the manufacturer’s instructions before using the gazebo. This will ensure that the paint has fully dried and hardened, providing maximum protection for the gazebo floor.
By following these detailed steps, you can ensure that your gazebo floor is properly painted and able to withstand the demands of foot traffic, furniture, and outdoor conditions, while also enhancing the overall appearance of your gazebo.
Guide: Painting the Gazebo Ceiling
When it comes to painting the ceiling of your gazebo, you have the flexibility to use any exterior paint. However, opting for a paint specifically formulated for porch ceilings offers certain benefits.
These specialty coatings often include an anti-spatter additive, which helps minimize paint splatter during application. Additionally, some porch ceiling paints may contain biocidal ingredients that provide protection against mold and mildew growth, which is particularly important in outdoor settings.
To paint the gazebo ceiling, you may need to use a ladder to access and apply paint to the edge areas using a brush. However, for the majority of the ceiling surface, you can use a paint roller that is attached to an extension pole. This allows you to reach higher areas without straining or needing additional equipment.
Before painting, ensure that the ceiling surface is clean and free of any dust, debris, or loose paint. It’s advisable to use a primer if recommended by the paint manufacturer or if the ceiling has not been previously painted. Follow the manufacturer’s instructions regarding the application of the primer.
Once the surface is prepared, start painting the ceiling using the chosen paint. Begin by cutting in the edges with a brush, carefully applying paint along the perimeter where the ceiling meets the walls or other structures.
Then, use the paint roller on the extension pole to apply the paint to the larger areas of the ceiling, working in manageable sections.
Apply the paint evenly and with smooth strokes, making sure to overlap each stroke slightly to achieve consistent coverage. Depending on the desired finish and coverage, you may need to apply multiple coats of paint.
Allow each coat to dry completely before applying the next one, following the recommended drying times provided by the paint manufacturer.
After completing the painting process, allow the paint to cure fully according to the manufacturer’s instructions before using the gazebo. This ensures that the paint has fully dried and hardened, providing a durable and attractive finish.
Enhancing the Gazebo with Colors
When it comes to adding colour to your gazebo, many homeowners choose neutral shades like white, beige, or gray for the frame. This allows the gazebo to stand out against the vibrant colors of the surrounding outdoor foliage.
Inside the gazebo, a popular color scheme includes gray flooring and a sky-blue ceiling, creating a serene and airy atmosphere.
For those seeking a more adventurous approach, Victorian-style decoration can be embraced. This involves assigning a vibrant colour to each architectural element of the gazebo.
Following the Painted Lady style, you can incorporate up to six contrasting colors on different surfaces of the gazebo. This bold and vibrant look adds a unique touch to your outdoor space and can serve as a stunning focal point in your garden or backyard.
When choosing colours for your gazebo, consider the overall aesthetic of your outdoor area and the desired atmosphere you wish to create. Experimenting with different colour combinations can help you achieve a look that suits your personal style and complements the surrounding landscape.
Before painting, ensure that the surfaces are properly prepared by cleaning and priming if necessary. Use high-quality exterior paint that is specifically designed for outdoor applications, as it will provide better durability and resistance to weather conditions.
Take your time to apply the paint evenly and allow each coat to dry fully before proceeding. Multiple coats may be required to achieve the desired colour intensity and coverage. Be sure to follow the manufacturer’s instructions regarding drying times and application techniques.
By carefully selecting and applying colours to your gazebo, you can transform it into a vibrant and visually appealing outdoor space that reflects your personal style and enhances the overall ambiance of your home’s exterior.
Essential Tips for Outdoor Painting Success
Here are some essential tips for outdoor painting success:
Check the Weather Forecast:
Before starting an outdoor painting project, it’s crucial to consider the weather conditions. Choose a day with dry and sunny weather for optimal paint drying. Avoid painting during rainy or extremely cold conditions, as it can affect the paint’s ability to dry properly.
Select Suitable Colours:
When choosing the colour for your gazebo, consider the surrounding environment and architectural style. Opt for colours that harmonize with the natural surroundings and complement the overall aesthetic of your outdoor space. Subtle and neutral shades often work well, blending the gazebo with the landscape.
Protect Furniture and Surroundings:
Before you begin painting, cover any furniture, plants, or other items near the gazebo that cannot be moved. Use drop cloths or plastic sheets to prevent paint splatters or accidental damage to these objects. It’s important to create a clean and safe workspace.
Properly Prepare the Surface:
Ensure that the surface of the gazebo is clean and free from dirt, debris, and loose paint. Use a power washer or a scrub brush with mild soap and water to remove any grime. If there are areas with peeling paint, scrape off the loose paint and sand the surface to create a smooth base for the new paint.
Use High-Quality Exterior Paint:
Invest in high-quality exterior paint specifically designed for outdoor use. These paints are formulated to withstand weather elements and provide long-lasting protection. Consider factors such as durability, resistance to fading, and ease of cleaning when selecting the paint.
Apply Primer if Needed:
Depending on the condition of the gazebo’s surface and the type of paint you’re using, applying a primer may be necessary. Primer helps to create a smooth and even base for the paint, enhances adhesion, and improves the durability of the finished paint job.
Follow Proper Painting Techniques:
Use a brush or a roller appropriate for the size and texture of the surface you’re painting. Start with the edges and hard-to-reach areas using a brush, then use a roller for larger flat surfaces.
Apply multiple thin coats of paint, allowing each coat to dry completely before applying the next. This ensures a smooth and even finish.
Maintain the Painted Gazebo:
After completing the painting project, regularly inspect the gazebo for any signs of peeling or damage. Touch up any areas that require attention to maintain the appearance and protection of the paint. Clean the gazebo periodically to remove dirt, dust, or mildew buildup and preserve its fresh look.
Remember, proper preparation, high-quality materials, and attention to detail are key to achieving a successful and long-lasting outdoor painting project.
FAQs:
Q:4 Can I paint a gazebo without any prior preparation?
No, it is important to properly prepare the surface before painting. Clean the gazebo to remove dirt, debris, and loose paint. Scrape off any peeling paint and sand the surface for a smooth base. This ensures better adhesion and a more durable paint job.
Q:5 What type of paint should I use for a gazebo?
Use an exterior paint that is suitable for outdoor surfaces. Look for paints specifically designed for wood or metal, depending on the material of your gazebo. Consider using acrylic latex paint, as it offers good durability and flexibility to withstand weather conditions.
Q:6 Do I need to use a primer before painting a gazebo?
Depending on the condition of the surface and the type of paint you’re using, using a primer may be beneficial. Primers help to create an even base, enhance paint adhesion, and improve the longevity of the paint job. It is particularly useful when dealing with bare wood or metal surfaces.
Q:7 What tools do I need to paint a gazebo?
The tools you may need include a brush or roller for applying the paint, drop cloths or plastic sheets to protect surrounding areas, a power washer or scrub brush for cleaning the surface, sandpaper for smoothing rough areas, and a ladder or extension pole for reaching high or difficult-to-access spots.
Additionally, have a paint tray, paintbrushes of various sizes, and paint stirrers on hand.
Conclusion:
In conclusion, painting a gazebo requires proper preparation, the right type of paint, and the appropriate tools. Before starting, ensure the surface is clean, free from loose paint, and properly sanded.
Choosing an exterior paint designed for wood or metal surfaces, such as acrylic latex paint, provides durability and weather resistance. Consider using a primer for better adhesion and longevity.
Protect surrounding areas with drop cloths or plastic sheets, and cover furniture that cannot be moved. Use a brush or roller for application, and have a ladder or extension pole for reaching high areas. Take into account the weather conditions, aiming for sunny and warm days for optimal drying.
By following these steps and taking your time, you can transform your gazebo into a beautiful, long-lasting centerpiece for your outdoor space.
We hope you will be well aware of How to paint a gazebo after reading this comprehensive article. If you have any questions, feel free to comment below!