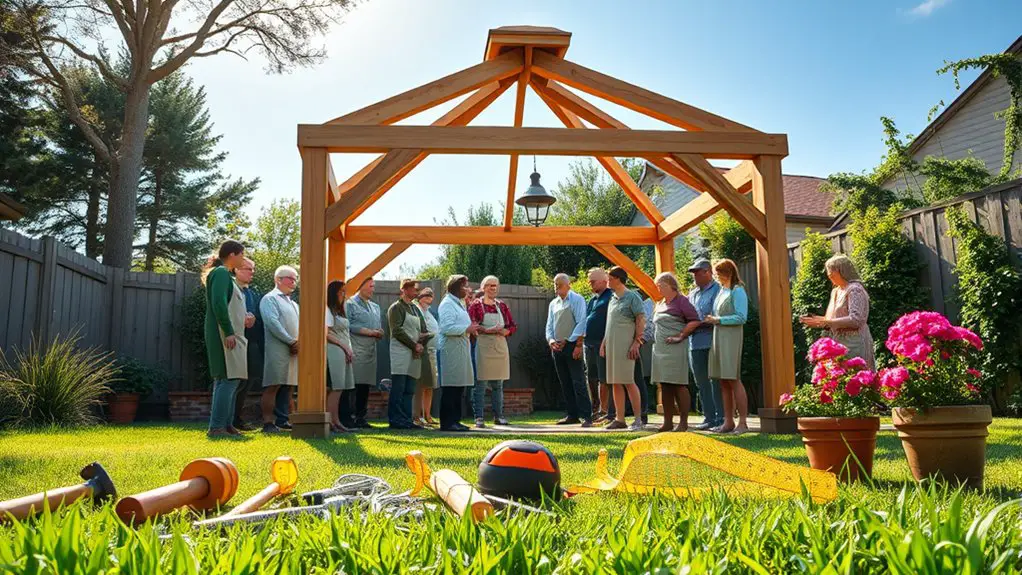
To set up your gazebo for a DIY home improvement class, choose a location with a great view and natural shade. Gather essential tools and materials, guaranteeing you have organized storage solutions. Arrange seating for comfort, allowing for group discussions and collaboration. Ascertain proper lighting for visibility, and create a welcoming atmosphere with decor. Don’t forget refreshments and safety measures, like a first aid kit. There’s plenty more to explore to make your class a success!
Choosing the Right Location for Your Gazebo
Choosing the right location for your gazebo is essential to maximizing its use and enjoyment. Start by considering gazebo orientation; face it toward the best view in your yard, whether it’s a garden, pond, or sunset. This not only creates an inviting atmosphere but also enhances your outdoor experience.
Next, think about natural shade. Position your gazebo near trees or taller structures to provide shelter from the sun during hot summer days. This way, you can relax comfortably without the harsh glare.
Also, consider wind patterns; you’ll want to avoid placing it in an area where strong winds can disrupt your peace or damage the structure. Finally, guarantee easy access to utilities like electricity, if needed, for lighting or fans. By thoughtfully selecting your gazebo’s location, you’ll craft an ideal retreat that complements your lifestyle and embraces the freedom of outdoor living. Additionally, consider sun and shade exposure to ensure comfort throughout the day.
Selecting the Appropriate Tools and Materials
Before you start building your gazebo, you’ll want to gather the right tools and materials. You’ll need a solid checklist to guarantee you have everything from hammers to screws, and understanding the best materials will help your structure last for years. Selecting materials such as wood types can significantly influence the durability and aesthetic appeal of your gazebo. Let’s explore what you’ll need to make this DIY project a success!
Essential Tools Checklist
When you’re ready to set up your gazebo, having the right tools and materials at your fingertips can make the process smoother and more enjoyable. Start by gathering essential equipment like a power drill, level, and tape measure. These tool types will help guarantee everything’s aligned correctly. Don’t forget safety gear, such as gloves and goggles, to protect yourself while you work. A mallet and screwdrivers will also come in handy as you assemble your gazebo. Consider including a sturdy ladder for those hard-to-reach spots. With this essential tools checklist, you’ll feel empowered to tackle the project with confidence. Remember, the right tools can transform a challenging task into a joyous DIY adventure!
Recommended Materials Overview
As you engage in your gazebo project, selecting the right materials is essential for both durability and aesthetics. You’ll want to evaluate various material types that not only fit your vision but also withstand the elements. Here are some recommended materials to inspire your project:
- Pressure-treated wood: Offers durability and resistance to decay.
- Composite decking: Low-maintenance and eco-friendly, great for flooring.
- Metal roofing: Provides excellent weather resistance and longevity.
- Outdoor fabric: Ideal for curtains or cushions that withstand fading.
- Decorative stones: Perfect for creating a charming walkway or base.
These project examples can transform your gazebo into a stunning outdoor retreat, allowing you to enjoy the freedom of your creative expression.
Arranging Seating for Comfort and Collaboration
When arranging seating in your gazebo, think about flexibility to accommodate various activities and group sizes. A well-planned collaborative table setup can foster creativity and teamwork, while ensuring comfort and accessibility for everyone is key. Let’s explore how to create a space that encourages interaction and relaxation. Additionally, consider installing mosquito netting to keep pests away, enhancing the overall comfort of your space.
Flexible Seating Arrangements
Creating a comfortable and collaborative environment under your gazebo can greatly enhance your outdoor experience. To achieve this, focus on flexible seating arrangements that cater to your group’s needs. Consider these creative seating solutions and adaptable layouts:
- Use portable chairs that can be rearranged easily.
- Incorporate benches or cushions for a casual vibe.
- Set up small group circles for intimate discussions.
- Provide standing tables for a dynamic atmosphere.
- Add floor space for yoga mats or bean bags for relaxation.
Collaborative Table Setup
To foster collaboration and comfort under your gazebo, consider how the arrangement of tables can influence the atmosphere. A well-thought-out setup encourages collaborative brainstorming and enhances group dynamics. Opt for a circular or U-shaped table layout, which promotes conversation and connection.
Here’s a simple setup to visualize:
| Table Type | Arrangement |
|---|---|
| Round Table | Central for focus |
| U-Shaped Table | Open sides for interaction |
This arrangement allows everyone to see and hear each other easily, creating an inviting space for sharing ideas. Remember, the goal is to cultivate a relaxed environment where creativity can flow freely, making your DIY class a success!
Comfort and Accessibility Considerations
While prioritizing comfort and accessibility, it’s important to arrange seating that accommodates everyone in your gazebo. By creating designated comfort zones, you’ll foster collaboration and guarantee all participants feel welcome. Here are some tips to enhance your setup:
- Use chairs with adjustable heights for diverse needs.
- Include sturdy benches with back support for group discussions.
- Make sure pathways are clear, allowing easy movement for those with mobility challenges.
- Arrange seating in a circular or semi-circular layout to encourage interaction.
- Consider adding shade and cushions for extra comfort during warmer days.
Setting Up Workstations for Different Activities
Setting up effective workstations for different activities can transform your gazebo into a multifunctional space. By creating specific activity zones, you’ll enhance productivity and guarantee everyone has what they need at their fingertips.
Here’s a simple workstation layout to contemplate:
| Activity Zone | Essential Supplies |
|---|---|
| Woodworking | Tools, wood, safety gear |
| Painting | Brushes, paints, drop cloths |
| Gardening | Pots, soil, seeds |
| Sewing | Fabric, sewing machine, thread |
| Crafting | Scissors, glue, materials |
Design each zone to encourage collaboration and creativity. Make certain each area is spacious enough for movement, and try to keep supplies organized. With these stations, you’ll not only have a well-structured environment but also foster a sense of freedom and inspiration in your DIY projects. Additionally, a well-designed outdoor living space can enhance the overall experience by providing comfort and shelter from the elements.
Ensuring Proper Lighting for Visibility
Good lighting is essential for any DIY project, and setting it up in your gazebo can make all the difference. Proper visibility isn’t just about avoiding mistakes; it enhances your creativity and efficiency. Here are some effective lighting techniques to take into account:
Good lighting transforms your gazebo into a creative haven, boosting visibility, efficiency, and confidence for all your DIY projects.
- Natural Light: Position your workspace where sunlight’s abundant, especially during daytime.
- LED Strips: Use flexible LED strips for adjustable lighting that can easily be repositioned.
- Task Lamps: Incorporate focused task lamps for detailed work like cutting or assembling.
- String Lights: Add string lights for a cozy atmosphere without compromising visibility.
- Portable Floodlights: Keep portable floodlights handy for extra brightness during evening sessions.
With these visibility enhancements, you’ll create a vibrant and productive environment in your gazebo, empowering you to tackle all your DIY projects with confidence!
Incorporating Storage Solutions for Supplies
When you’re working on DIY projects in your gazebo, having a well-organized storage system for your supplies can make all the difference. Consider using storage bins and tool organizers to keep everything neat and accessible. You’ll save time and avoid frustration when everything’s in its place. Additionally, having durable materials for your storage solutions can ensure they withstand outdoor conditions.
Here’s a simple setup to get you started:
| Storage Solution | Purpose |
|---|---|
| Storage Bins | Keep paint, screws, and adhesives organized. |
| Tool Organizers | Hold tools like hammers, screwdrivers, and pliers. |
| Shelving Units | Provide additional space for larger materials and equipment. |
Creating a Welcoming Atmosphere With Decor
To create a welcoming atmosphere in your gazebo, it’s essential to reflect on how decor can enhance both its functionality and aesthetic appeal. Using the right decor not only sets the tone but also encourages creativity. Think about incorporating elements that resonate with your DIY class theme.
- Colorful banners that align with your class theme can add a festive touch.
- Themed centerpieces on tables create focal points and spark conversation.
- Mood lighting, like string lights or lanterns, helps create a cozy environment.
- Comfortable seating options guarantee everyone can relax and focus on the class.
- Plants or flowers bring a touch of nature, making the space more inviting. Additionally, consider adding lighting options to enhance the overall decor and atmosphere.
Providing Refreshments for Participants
While you might focus on the activities in your DIY class, providing refreshments can greatly enhance participants’ experience. Offering a variety of beverage options is key. Think about iced tea, lemonade, or infused water for a rejuvenating touch. If you want to take it up a notch, consider a coffee station with cream and sugar for those early risers.
Next, let’s explore snack ideas. Finger foods like veggie platters, cheese and crackers, or homemade muffins are excellent choices. They’re easy to grab while participants engage in hands-on projects. If you’re feeling creative, you could even have a DIY snack station where participants assemble their own trail mix.
Preparing for Safety and Clean-Up Procedures
Ensuring safety and a smooth clean-up process is essential for a successful DIY event. By implementing effective safety reminders and clean-up strategies, you can create an enjoyable atmosphere for everyone involved.
- Set up first aid kits within easy reach.
- Instruct participants about tool usage and safety precautions.
- Designate a clean-up crew to manage waste throughout the event.
- Provide gloves and bags for easy disposal of materials.
- Keep fire extinguishers nearby if working with flammable materials.
Frequently Asked Questions
How Many Participants Can Comfortably Fit Under the Gazebo?
Imagine a cozy gathering beneath your gazebo’s embrace. For participant comfort, a standard gazebo size accommodates around 6-8 people, allowing everyone to enjoy the fresh air while fostering connections without feeling cramped or confined.
What Type of Flooring Is Best for Outdoor Workstations?
For outdoor workstations, you’ll find wooden decking offers stability and charm, while rubber mats provide excellent grip and cushioning. Combining both can create a functional, comfortable space that encourages creativity and freedom in your projects.
Can I Use the Gazebo for Other Events After the Class?
Think of your gazebo as a chameleon, adapting to any occasion. Absolutely, you can embrace its event versatility; its multi-purpose usage makes it perfect for gatherings, parties, or quiet retreats. Freedom to create is yours!
How Should I Handle Inclement Weather During the Class?
When dealing with inclement weather, you’ll want effective rain protection strategies in place. Have backup plans ready, like a tent or an indoor location, ensuring your class remains enjoyable and participants stay dry and engaged.
What Should I Do if I Need Additional Power Sources?
If you think you’ll never need extra power, think again! Consider using power extensions or explore generator options to keep your class energized. Being prepared means you can focus on creativity, not on your power needs.