To set up your gazebo for outdoor photo shoots, start by choosing the right location with stunning backdrops and good landscape compatibility. Timing is essential—shoot during golden hour for the softest light. Enhance the surroundings with decorative elements and props for added depth. Arrange the interior with versatile furniture, and don’t forget to experiment with angles for unique shots. There’s so much more to explore for creating enchanting images that elevate your photography.
Choosing the Right Location for Your Gazebo
Have you considered how the location of your gazebo can impact your outdoor photo shoots? The right gazebo orientation can dramatically enhance your images, allowing you to capture stunning backdrops and natural light. Think about the landscape compatibility; a gazebo nestled among vibrant flowers or shaded by towering trees can create a magical atmosphere. Positioning your gazebo to face striking views or golden hour sunlight will give your photos depth and character. Additionally, consider the surroundings—open fields or serene lakes can provide a beautiful contrast, while urban settings may add an edgy vibe. Ultimately, choosing the perfect spot for your gazebo opens up endless creative possibilities, making every shot feel effortless and free. Proper orientation is essential for achieving optimal sun exposure, so let your imagination soar!
Selecting the Perfect Time of Day
Selecting the perfect time of day for your outdoor photo shoots can transform your gazebo images from ordinary to extraordinary. To capture that stunning light, consider these ideal times:
- Golden Hour: This magical time just after sunrise or before sunset bathes your gazebo in warm, soft light, creating a dreamy atmosphere.
- Blue Hour: Right before dawn or after dusk, the sky takes on deep blues, adding a serene backdrop to your photos.
- Midday: While harsh sunlight isn’t ideal, shooting under your gazebo’s shade can produce enchanting contrasts.
- Cloudy Days: Overcast skies provide diffused light, reducing shadows and enhancing colors, perfect for vibrant shots. Additionally, remember that gazebo materials can affect the level of UV protection, influencing how light interacts with your photos.
Embrace these times to free your creativity and release your inner photographer!
Enhancing the Surroundings With Decor
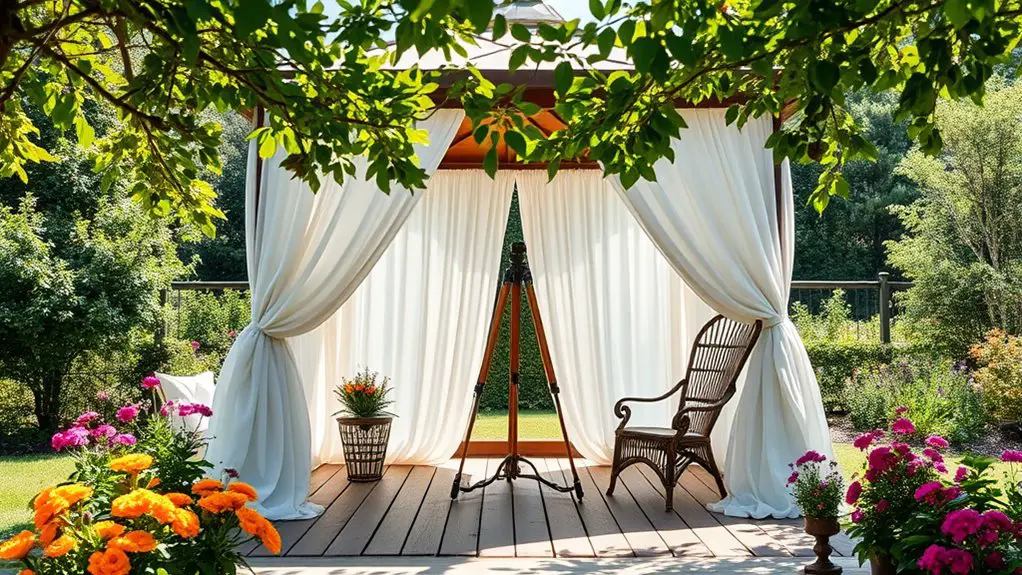
Decor can breathe new life into your gazebo, transforming it into an enchanting backdrop for your outdoor photo shoots. Start by incorporating decorative elements that resonate with your vision—think twinkling fairy lights, flowing drapes, or vibrant cushions. Seasonal themes can add an extra layer of charm; in spring, opt for pastel florals and greenery, while autumn calls for warm tones and rustic touches. Consider adding a statement piece, like a vintage bench or an ornate table, to create focal points. Don’t forget to use natural materials that complement the gazebo’s structure, enhancing its beauty while keeping it inviting. By thoughtfully curating your decor, you’ll create a magical atmosphere that captures the essence of freedom in every shot. Additionally, incorporating outdoor lighting options can elevate the ambiance during evening shoots, adding a twinkling effect that enhances the overall aesthetic.
Utilizing Natural Light to Your Advantage
Creating an enchanting backdrop is just the beginning; once your gazebo is adorned with decor, the next step is to utilize the power of natural light. To capture stunning photos, follow these tips:
Creating a beautiful backdrop is just the start; harness natural light to elevate your gazebo photography.
- Timing: Shoot during the golden hour—an hour after sunrise or before sunset—for that soft, warm glow.
- Positioning: Place your subjects strategically within the gazebo to use natural shadows creatively, enhancing depth.
- Reflectors: Use white reflectors to bounce light onto your subjects, softening harsh shadows.
- Background: Pay attention to the background; verify it complements your lighting and doesn’t distract from your focal point. Additionally, a gazebo provides outdoor comfort by offering shelter from the elements while you capture beautiful moments.
Incorporating Props for Added Interest
While your gazebo already offers a beautiful setting, incorporating props can transform your photo shoot from ordinary to extraordinary. Think about props selection that aligns with your vision—whether it’s elegant drapes, whimsical fairy lights, or rustic wooden crates. Themed accessories can elevate your aesthetic; imagine vintage suitcases for a travel-themed shoot or vibrant florals for a spring vibe. Layering textures and colors through your props brings depth and character to each shot. Don’t hesitate to experiment with items that resonate with your style, as they can tell a story and create a unique atmosphere. Remember, these elements should complement, not overpower, your gorgeous gazebo backdrop, allowing your creativity to flow freely with each click of the camera. Incorporating climbing plants can also provide a stunning natural frame for your photos, adding beauty and depth to your shots.
Arranging the Gazebo Interior
As you prepare to capture stunning images, arranging the gazebo interior can greatly enhance your photo shoot’s overall ambiance. Thoughtful furniture arrangement and color coordination can create a beautiful backdrop that complements your subjects. Here are four tips to get you started:
- Choose Versatile Furniture: Opt for lightweight, movable pieces that can be easily rearranged to suit different angles and compositions.
- Mind Your Color Palette: Select colors that harmonize with the surrounding environment, creating a cohesive look throughout your images.
- Layer Textures: Incorporate cushions, blankets, or drapes to add depth and comfort, inviting subjects to engage naturally.
- Create Focal Points: Place eye-catching decor items strategically to guide the viewer’s gaze, enhancing the overall composition of your photographs. Additionally, consider using outdoor fabrics to bring color and texture to the space while ensuring durability for outdoor conditions.
Positioning Your Subjects for Optimal Shots
When positioning your subjects, consider how angles and lighting interact to create stunning visuals. Experiment with different placements to highlight your backdrop and foreground elements, ensuring they complement rather than distract from your main focus. Remember, the right positioning can transform an ordinary shot into an extraordinary one.
Angles and Lighting Considerations
To capture stunning outdoor photos in your gazebo, you’ll need to carefully consider both angles and lighting to guarantee your subjects shine. Here are some key strategies to enhance your shots:
- Natural Light: Use early morning or late afternoon sun for softer lighting techniques, casting flattering shadows.
- Angle Variations: Experiment with different perspectives—shoot from above, below, or at eye level to add depth.
- Reflectors: Utilize reflectors to bounce light onto your subjects, enhancing their features and reducing harsh shadows.
- Backlighting: Position your subjects with the sun behind them for a dreamy, ethereal glow, creating a mesmerizing silhouette effect.
Background and Foreground Elements
While positioning your subjects within the gazebo, it’s essential to reflect on both background and foreground elements that can dramatically influence the final composition. Consider the background textures—vibrant plants or rustic wood can add depth and interest to your photos. Confirm these elements complement your subjects rather than distract from them.
In the foreground, use props like colorful cushions or decorative lanterns to create layers and lead the viewer’s eye into the scene. These foreground props not only enhance the aesthetic but also provide context and storytelling opportunities. Position your subjects with thoughtful spacing, allowing the background and foreground to harmonize for an engaging shot. This balance invites viewers into the moment, capturing the essence of your outdoor shoot beautifully.
Experimenting With Different Angles
To elevate your outdoor photo shoots, try experimenting with low and high angle shots. A low angle can add drama and grandeur, making your subjects appear more imposing, while high angles can provide a fresh perspective, capturing the essence of the gazebo’s architecture. By shifting your viewpoint, you’ll uncover unique compositions that breathe life into your images.
Low Angle Shots
Capturing the essence of your gazebo from a low angle can transform an ordinary photo into a striking composition. By using low angle techniques, you can emphasize the grandeur of your structure while capturing depth in your images. Here are four tips to enhance your low-angle shots:
- Choose the Right Position: Find a spot where the gazebo stands out against the sky or surrounding landscape.
- Use Leading Lines: Incorporate paths or natural lines that draw the viewer’s eye toward the gazebo.
- Experiment with Lighting: Shoot during golden hour to create dramatic shadows and highlights.
- Include Foreground Elements: Add flowers or grass in the foreground to enhance depth and interest.
Embrace your creativity and let your gazebo shine!
High Angle Perspectives
Exploring high angle perspectives can provide a fresh viewpoint on your gazebo, revealing intricate details and showcasing its surroundings in a unique way. By capturing bird’s eye view shots, you can emphasize the gazebo’s structure against the landscape, creating a striking contrast. Use a drone or a tall ladder for overhead shots, allowing you to frame the scene creatively. This angle not only highlights the design but also incorporates elements like gardens or pathways that enhance the overall composition. Don’t hesitate to play with the framing; consider including nearby trees or seating areas to provide context. High angle perspectives can truly elevate your outdoor photography, adding depth and a sense of freedom to your images.
Post-Processing Tips for Gazebo Photos
While the natural beauty of gazebo photos can be enchanting, post-processing is where you can truly enhance their appeal. Using the right post processing techniques with your favorite editing software can transform your images into stunning visuals. Here are four tips to get you started:
Post-processing can elevate your gazebo photos, transforming them into captivating visuals with the right techniques.
- Adjust Exposure: Brighten or darken your image to emphasize the gazebo’s features.
- Enhance Colors: Use saturation and vibrance tools to make the surrounding greenery pop.
- Sharpen Details: Apply sharpening filters to highlight intricate designs of the gazebo.
- Crop Wisely: Frame your subject better by removing distracting elements from the edges.
Experiment with these techniques, and let your creativity flow to reveal the full potential of your gazebo photos!
Frequently Asked Questions
What Type of Photography Equipment Is Best for Gazebo Shoots?
Imagine capturing a couple’s joyful moment under your gazebo; you’ll need a sturdy tripod for stability and a versatile lens selection, like a 24-70mm, to guarantee you get those beautiful, intimate shots effortlessly.
How Do I Prevent Shadows in My Gazebo Photos?
To prevent shadows in your photos, use shadow management techniques like reflectors or diffusers. You’ll also want to apply lighting adjustments tips, such as repositioning lights or shooting during golden hour for softer illumination.
Can I Shoot at Night in My Gazebo?
Yes, you can absolutely shoot at night in your gazebo! With the right gazebo lighting, you’ll create stunning night photography. Experiment with soft lights to enhance ambiance while ensuring your subjects stand out beautifully against the darkness.
What Should I Wear for a Gazebo Photo Shoot?
Imagine a painter choosing colors for a canvas; your outfit sets the tone for your gazebo shoot. Consider vibrant color schemes and versatile outfit ideas that complement the natural backdrop, letting your personality shine through effortlessly.
How Do I Prepare My Gazebo for Unexpected Weather?
To prepare your gazebo for unpredictable weather, consider weather proofing techniques like waterproof covers and sturdy anchors. Regular gazebo maintenance tips, such as checking for leaks and securing loose parts, guarantee it stands strong against the elements.