Just as a well-insulated home stands resilient against the harshest winter storms, installing roof heat cables can safeguard your roof from ice dams and water damage. If you’ve noticed ice build-up around your eaves or gutters, it’s time to contemplate this effective solution. Understanding the installation process and the necessary precautions can make all the difference in protecting your investment. Let’s explore the steps involved in ensuring your roof remains safe and functional throughout the cold months.
Understanding Roof Heat Cables
When winter weather strikes, understanding roof heat cables becomes vital for preventing ice dams and ensuring proper drainage. These cables are designed to maintain warmth along roof edges, combating ice damming caused by poor roof insulation. When heat escapes from your home, it can lead to melting snow that refreezes at colder eaves, creating dangerous ice formations. By strategically installing heat cables, you can enhance your roof’s thermal performance, allowing for efficient drainage. It’s important to assess your insulation levels and install heat cables in high-risk areas to maintain a safe, ice-free environment during harsh winter months.
Benefits of Installing Roof Heat Cables
Installing roof heat cables offers multiple advantages that extend beyond merely preventing ice dams. By effectively managing snow and ice, you’ll enhance the longevity of your roofing materials, reducing the need for costly repairs. Additionally, these cables can contribute to energy savings by maintaining a consistent temperature on your roof, minimizing heat loss and preventing unnecessary strain on your heating system. This proactive approach to ice prevention not only protects your home but also provides peace of mind during harsh winter months. Ultimately, investing in roof heat cables empowers you to safeguard your property while enjoying the freedom of worry-free winters.
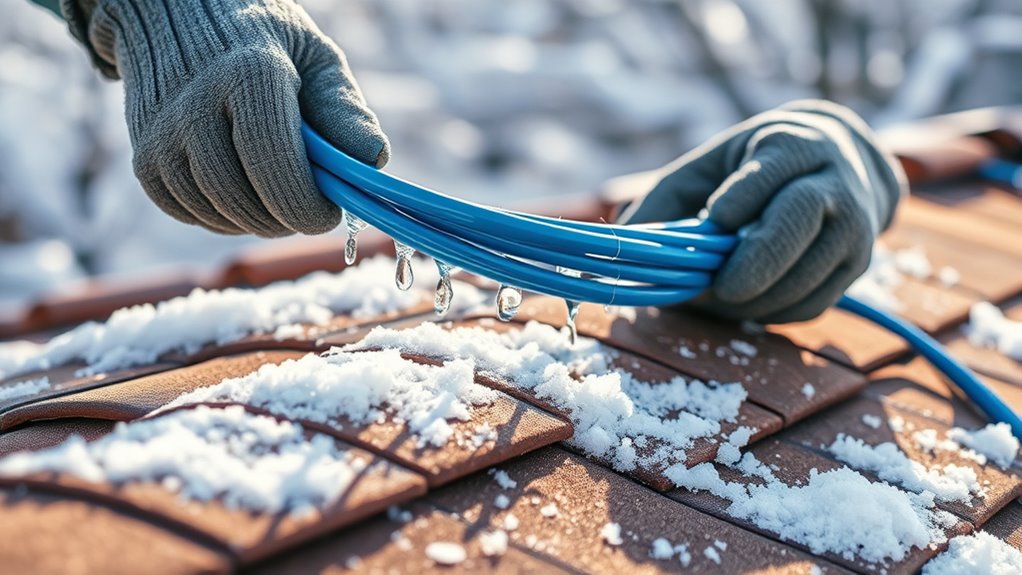
Tools and Materials Needed
To successfully install roof heat cables, you’ll need specific tools and materials to guarantee a safe and effective setup. Essential tools typically include a power drill, wire cutters, and a ladder, while recommended materials encompass the heat cables themselves, mounting clips, and weatherproof connectors. Understanding these requirements will streamline the installation process and enhance performance.
Essential Tools Required
Before diving into the installation of roof heat cables, it’s vital to gather the right tools and materials. You’ll need a sturdy ladder for safe access, a power drill for securing the cables, and a measuring tape to guarantee accurate placement. A utility knife is essential for cutting cable types to length, while wire connectors will help secure connections. Don’t forget safety gear, including gloves and goggles. Familiarizing yourself with various installation techniques can also enhance efficiency, so consider having a user manual handy. With these tools, you’ll be well-equipped to tackle your roof heating project effectively.
Recommended Materials Overview
While selecting the right materials for your roof heat cable installation, it’s essential to contemplate both the specific needs of your roofing system and the local climate conditions. You’ll need quality heat cables, which come in two main cable types: self-regulating and constant wattage. Self-regulating cables adjust their output based on temperature, offering energy efficiency. For installation techniques, gather necessary tools such as a ladder, wire connectors, and weatherproof sealant. Ensuring proper cable spacing and secure attachment will maximize effectiveness. Always consult local codes to guarantee compliance and safety, allowing you the freedom to enjoy a well-protected roof.
Safety Precautions to Consider
Guaranteeing safety during the installation of roof heat cables is essential, as improper handling can lead to serious accidents or damage. Prioritize these safety precautions to protect yourself:
- Always check for electrical safety before starting work.
- Use a sturdy, stable ladder to maintain ladder stability.
- Wear appropriate personal protective equipment (PPE), including gloves and eye protection.
- Confirm the work area is free of debris and hazards.
- Avoid working in wet or windy conditions to reduce the risk of slips or falls.
Step-by-Step Installation Process
Installing roof heat cables involves a systematic approach that confirms both effectiveness and safety. First, select the appropriate cable types based on your roof’s design and local climate. Then, outline your installation techniques, confirming proper spacing and layout. Secure the cables with clips or adhesive, taking care not to damage the roof surface. Connect the cables to a power source, utilizing a GFCI outlet for safety. Finally, test the system to confirm proper functionality.
| Step | Description |
|---|---|
| 1. Cable Selection | Choose suitable cable types |
| 2. Layout Design | Plan installation techniques |
| 3. Installation | Secure cables with clips/adhesive |
| 4. Testing | Verify system functionality |
Maintenance Tips for Roof Heat Cables
To maintain the effectiveness and longevity of your roof heat cables, regular inspections and maintenance are essential. Conduct seasonal checks to confirm proper functionality and prevent issues. Here are some key cable maintenance tips:
- Inspect cables for fraying or damage before winter.
- Clear debris from cables to prevent overheating.
- Test electrical connections for corrosion or loose wiring.
- Check the placement of cables to confirm they’re not obstructed.
- Monitor energy consumption to detect any anomalies.
Troubleshooting Common Issues
When dealing with roof heat cables, you might encounter various issues that can affect their performance. Common problems include cable malfunctioning, which can stem from frayed wires or improper connections. Check each segment for continuity using a multimeter. If the cables aren’t heating, thermostat issues may be to blame. Confirm the thermostat is correctly set and functioning; a faulty unit can prevent the system from activating. Finally, inspect power sources and controls for any disruptions. By systematically addressing these concerns, you can restore your roof heat cables to peak performance and guarantee effective snow and ice management.
Frequently Asked Questions
Can Roof Heat Cables Be Installed in All Climates?
Yes, roof heat cables can be installed in various climates, but you’ll need to follow specific installation guidelines and consider climate considerations. Adapting to local weather patterns guarantees peak performance and longevity of the system.
How Much Do Roof Heat Cables Cost on Average?
On average, roof heat cables cost between $300 to $800, depending on installation factors like roof size and complexity. A detailed cost comparison can help you make informed decisions tailored to your specific needs.
Are There Any Energy Efficiency Concerns With Roof Heat Cables?
Yes, roof heat cables can raise energy consumption, especially if used excessively. Proper installation minimizes heat loss and optimizes efficiency, ensuring you maintain comfort without greatly increasing your energy bills or environmental impact.
Do I Need a Permit for Installation?
In many areas, about 60% of homeowners need a permit for installation. Check your local permit requirements and installation regulations to guarantee compliance, as failure to do so could lead to costly fines or modifications.
Can I Install Roof Heat Cables Myself or Hire a Professional?
You can certainly opt for a DIY installation if you’re comfortable with electrical work, but seeking professional advice guarantees safety and compliance. Hiring a professional might save you time and prevent potential hazards.