If you’re looking to add a touch of winter magic to your home, a DIY snowflake garland might be just what you need. It’s a simple yet beautiful project that allows you to express your creativity while transforming your space. With just a few materials and some easy steps, you can craft unique snowflakes that capture the essence of the season. Let’s explore how you can create this charming decor piece that brings warmth and joy to your gatherings.
Gathering Your Materials
When you’re ready to create your DIY snowflake garland, gathering your materials is the first step. You’ll need craft supply essentials like cardstock or felt in wintery whites and blues. Scissors are a must for precise cuts, while a hole punch will help you thread the snowflakes together effortlessly. Don’t forget twine or string to hang your beautiful creation! You might also want some glitter or sequins for a touch of sparkle. With these materials, you’re set to plunge into winter crafting ideas that celebrate the season’s magic, bringing a cozy, festive spirit to your space. Let your creativity flow!
Choosing the Right Snowflake Design
When it comes to choosing the right snowflake design, consider whether you want a classic or modern aesthetic that suits your space. Don’t forget that size and scale play an essential role in how your garland will look, so think about where you’ll hang it. Finally, the materials you select can add texture and depth, making your creation truly unique.
Classic vs. Modern Styles
While traditional snowflake designs evoke a sense of nostalgia and warmth, modern interpretations can bring a fresh and contemporary flair to your decor. If you love classic aesthetics, opt for intricate, lace-like patterns that remind you of childhood winters. On the other hand, if you’re drawn to sleek lines and minimalism, consider geometric shapes or bold colors that reflect today’s design trends. Mixing both styles can create a unique garland that celebrates the best of both worlds, allowing you to express your creative freedom. Ultimately, choosing the right snowflake design should resonate with your personal style and the atmosphere you want to create.
Size and Scale Matters
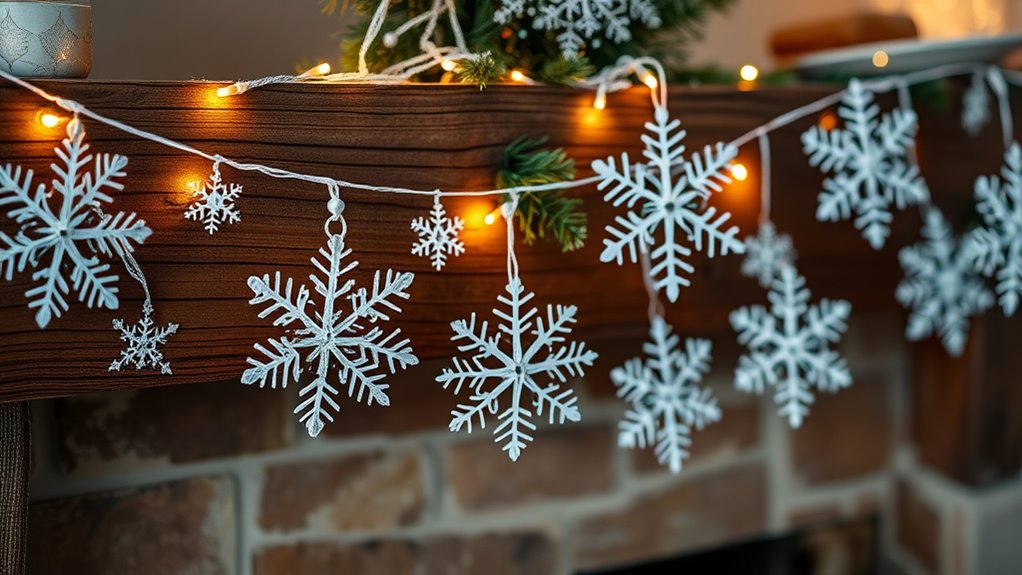
Choosing the right snowflake design goes beyond just style; size and scale play a significant role in how your garland will impact your overall decor. For a harmonious look, you’ll want to reflect on size proportions carefully. Larger snowflakes can serve as focal points, while smaller ones create a sense of depth. Striking a scale balance is essential—too many large pieces might overwhelm, while too many small ones can get lost. Think about your space: if you’re draping your garland over a wide mantle, mix sizes to create visual interest. This way, your winter decor will feel both dynamic and cohesive.
Material Choices Explained
As you immerse yourself in crafting your snowflake garland, the materials you select can dramatically influence the overall effect and durability of your decorations. Consider different paper types: lightweight tissue creates delicate, airy snowflakes, while sturdy cardstock offers a bold, three-dimensional look. Experimenting with various color schemes can elevate your garland’s aesthetic; icy blues, crisp whites, and shimmering silvers evoke a winter wonderland, while vibrant hues can add a playful twist. Don’t shy away from mixing textures and patterns—this will bring depth to your creation. Choose wisely, and let your snowflakes reflect your unique style and spirit this season!
Cutting Out Your Snowflakes
Cutting out your snowflakes is where the magic truly begins. Grab those snowflake templates you’ve printed or drawn, and let your creativity flow! Using scissors, embrace different cutting techniques—experiment with intricate designs or simple shapes. Fold your paper strategically to create stunning, symmetrical patterns. Don’t worry about perfection; the charm of homemade snowflakes lies in their uniqueness. As you cut, feel the freedom of crafting something beautiful for your winter decor. Each snip and slice reveals a new design, ready to be strung together for your enchanting garland. Enjoy the process, and watch your winter wonderland come to life!
Adding Decorative Touches
Once you’ve crafted your snowflakes, it’s time to elevate their charm with some decorative touches that will make your garland truly stand out. Consider incorporating winter-themed elements like glittery stars or tiny pinecones to add a rustic feel. You can also use ribbons in icy blues and whites as decorative accents, tying them between snowflakes for a whimsical touch. If you’re feeling adventurous, try adding faux crystals or beads that shimmer like frost. These small enhancements not only enrich the visual appeal but also capture the enchanting spirit of winter, giving your garland a delightful personality that resonates with the season.
Stringing Your Snowflakes Together
With your snowflakes adorned and ready to shine, the next step is stringing them together to create a stunning garland. Begin by cutting your string lengths to your desired size, allowing for freedom in how long you want your garland to be. Consider different spacing techniques; you might want to cluster them closely or space them out for a more whimsical look. Use a needle to thread the string through the center of each snowflake, ensuring they’re secure. As you work, step back occasionally to visualize the arrangement, adjusting as necessary to achieve that perfect winter wonderland effect.
Finding the Perfect Display Spot
Now that your snowflakes are strung together, it’s time to find the perfect spot to showcase your creation. Think about ideal wall spaces that could use a touch of winter magic, or cozy window displays that catch the light just right. You might even consider a festive table centerpiece, turning your garland into a stunning focal point for gatherings.
Ideal Wall Spaces
Finding the perfect display spot for your DIY snowflake garland can transform your space into a winter wonderland. Consider these ideal wall spaces for effective placement:
| Wall Space | Description |
|---|---|
| Living Room | A focal point for gatherings |
| Entryway | Welcoming guests beautifully |
| Bedroom | Create a cozy, serene vibe |
Cozy Window Displays
As winter blankets the world outside, your window can become a canvas for seasonal charm, inviting warmth and beauty into your home. To create a cozy window display, consider the positioning of your snowflake garland. Drape it along the top of your window treatments, framing your view with delicate designs. This not only enhances the seasonal ambiance but also draws the eye inward. Pair the garland with soft, layered fabrics that complement its sparkle, allowing natural light to filter through. Your windows will radiate a welcoming glow, making the cold outside feel a little less harsh and a lot more inviting.
Festive Table Centerpieces
While you’re setting the stage for a festive gathering, the right table centerpiece can transform your dining experience into something truly special. Consider incorporating festive colors and seasonal themes to create an enchanting display. Place your centerpiece at eye level for an inviting touch.
Here’s a simple guide to choose your centerpiece:
| Element | Description |
|---|---|
| Colors | Bright reds, greens, and golds |
| Seasonal Themes | Snowflakes, pinecones, or holly |
| Height | Varying heights add interest |
| Materials | Natural elements or elegant glass |
Embrace creativity and let your table shine!
Tips for Customizing Your Garland
Customizing your snowflake garland can elevate your holiday decor and make it uniquely yours. Start by choosing a color palette that reflects your personal style or complements your existing decor. Whether you prefer icy blues, warm whites, or vibrant reds, your choices can set the mood. Think about theme coordination; if you’re going for a rustic vibe, consider adding twine or wooden elements. You can also experiment with different snowflake sizes and shapes, layering them for depth. Personal touches like glitter, beads, or even family photos can make your garland stand out, turning it into a cherished seasonal piece.
Enjoying Your Winter Wonderland
Once your snowflake garland is beautifully customized and hung, it’s time to fully embrace the magic of your winter wonderland. Gather your loved ones for cozy gatherings, sipping hot cocoa while basking in the twinkling lights. Engage in delightful winter activities like building a snowman or having a snowball fight, letting the chilly air invigorate your spirit.
| Winter Activities | Cozy Gatherings |
|---|---|
| Snowshoeing | Movie nights |
| Ice skating | Baking together |
| Sledding | Crafting sessions |
| Building snow forts | Game nights |
| Winter hikes | Storytelling |
Enjoy the season’s beauty!
Frequently Asked Questions
How Long Will the Snowflake Garland Last Indoors?
Your snowflake garland’s indoor longevity depends on environmental factors like humidity and light exposure. Generally, it can last weeks to months, retaining its charm—just keep it away from direct sunlight and damp areas for best results.
Can I Use Colored Paper for My Snowflakes?
Absolutely, you can use colored paper for your snowflakes! It adds a vibrant twist to classic snowflake designs, allowing you to explore various colored paper options. Let your creativity soar and brighten up your winter decor!
What Tools Are Best for Cutting Intricate Designs?
For cutting intricate designs, you’ll love using crafting scissors for clean edges and a precision knife for detailed cuts. These tools give you the freedom to explore your creativity without limits, making every project come alive.
How Do I Store the Garland for Next Winter?
You’d think storing your garland is like hiding a prized trophy, but it’s simpler. Roll it gently, tuck it in a box, and label it for next winter’s decor. Freedom from tangled chaos awaits!
Is This Project Safe for Children to Help With?
Yes, this project can be safe for children to help with, but supervision’s required. Make sure they use child-friendly materials and tools, encouraging creativity while keeping safety a priority for a fun, engaging experience together.