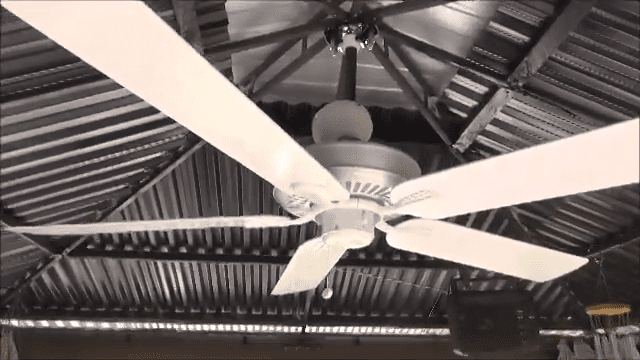
Installing a ceiling fan in a metal gazebo is a practical way to enhance the comfort and beauty of outdoor living spaces. The benefits of having a ceiling fan in a metal gazebo include circulating air, reducing humidity, keeping insects away, and providing additional lighting when needed. Before starting the installation process, safety precautions should be taken, and the necessary tools and materials should be gathered.
The installation process includes choosing the appropriate location for the ceiling fan, assembling the fan according to manufacturer instructions, installing the mounting bracket securely, connecting the wiring, and testing the fan to ensure proper functionality.
Finally, it is essential to check all connections for tightness, clean up the workspace, and enjoy the cool breeze provided by the newly installed ceiling fan in the metal gazebo.
By following the steps in this article, you can successfully install a ceiling fan in a metal gazebo and enjoy your outdoor living space even more.
How to install a ceiling fan in a metal gazebo: Installing a ceiling fan in a metal gazebo can enhance outdoor comfort and airflow. Before starting, take safety precautions and gather the necessary tools and materials. Follow the steps in this outline, including choosing the location, assembling the fan, installing the mounting bracket, connecting the wiring, and testing the fan. Finally, check all connections for tightness and clean up the workspace.
The Importance of Having a Ceiling Fan in a Metal Gazebo
Having a ceiling fan in a metal gazebo can provide a comfortable and refreshing outdoor living space. During hot summer days, a ceiling fan can help to circulate the air, which reduces humidity, and keeps the area cool. Furthermore, the breeze produced by the ceiling fan can keep insects away, making your outdoor experience more enjoyable.
Additionally, a ceiling fan can also provide additional lighting, illuminating the area for nighttime use. All of these benefits make having a ceiling fan in a metal gazebo a practical and cost-effective way to enhance the comfort and beauty of outdoor living spaces.
Safety Considerations Before Installing a Ceiling Fan in a Metal Gazebo
Before installing a ceiling fan in a metal gazebo, it is crucial to take necessary safety precautions to prevent injuries or accidents. First, turn off the power supply to the gazebo to avoid electrical shock. Wear appropriate protective gear, such as gloves and safety glasses, to protect yourself from sharp edges and debris.
When working at heights, use a sturdy ladder or scaffolding to avoid falls. Additionally, make sure the gazebo’s metal frame is sturdy enough to support the weight of the ceiling fan and the movement caused by its operation.
It is also recommended to have another person assist you during the installation process to ensure safety and efficiency. By taking these safety considerations into account, you can install a ceiling fan in a metal gazebo without compromising your well-being.
How to install a ceiling fan in a metal gazebo- Easy Steps
Here are the steps for installing a ceiling fan in a metal gazebo:
- Gathering the Necessary Tools and Materials
- Choose the location and prepare the gazebo
- Assemble the ceiling fan
- Install the mounting bracket
- Properly Installing a Fan Motor
- Install the fan blades and light kit
- Connecting the Wiring and Testing the Ceiling Fan
- Final Checks and Cleanup after Ceiling Fan Installation and Testing
By following these steps, you can successfully install a ceiling fan in your metal gazebo and enjoy a comfortable outdoor living space.
Gathering the Necessary Tools and Materials
Before starting the installation process of a ceiling fan in a metal gazebo, it is important to gather all the necessary tools and materials. The tools and materials required will vary depending on the type and size of the ceiling fan being installed. Refer to the manufacturer’s instructions for a comprehensive list of tools and materials required.
Gathering all of the necessary tools and materials beforehand will save time and prevent unnecessary trips to the hardware store during the installation process. It is crucial to ensure that all tools and materials are of good quality and in good condition to ensure a smooth and efficient installation process.
Essential Tools
here are some of the essential tools required for installing a ceiling fan in a metal gazebo:
- Drill
- Screwdriver
- Wire stripper
- Pliers
- Voltage tester
- Ladder or scaffolding
- Hammer
- Adjustable wrench
- Wire nuts
- Cable ties
- Caulk gun
- Silicone sealant
Keep in mind that the exact tools required may vary based on the specific type and size of the ceiling fan, so always refer to the manufacturer’s instructions for a comprehensive list of tools and materials required.
Essential Materials
Sure, here are some of the essential materials required for installing a ceiling fan in a metal gazebo:
- Mounting bracket specific to the type and size of the ceiling fan
- Electrical wire
- Wire connectors
- Junction box
- Ceiling fan blades
- Screws
- Washers
- Nuts
- Wood screws
- Electrical tape
- Zip ties
Again, the exact materials required may vary based on the specific type and size of the ceiling fan, so always refer to the manufacturer’s instructions for a comprehensive list of tools and materials required. It is important to ensure that all materials are of good quality and in good condition to ensure a smooth and efficient installation process.
Choosing the Right Location and Preparing
Before installing a ceiling fan in a metal gazebo, it is important to choose the right location and prepare the gazebo for the installation process. The ideal location for a ceiling fan is in the center of the gazebo to ensure optimal air circulation.
Choose a location that has easy access to an electrical source, such as an outlet or junction box. Once you have selected the location, remove any existing fixtures or hardware from the area to create space for the ceiling fan.
If necessary, clean the area to remove any debris or dirt. It is also recommended to mark the location with a pencil or marker to ensure accurate installation. Preparing the gazebo in advance will ensure a smooth and efficient installation process, making it easier to install the ceiling fan.
Assembly Process for Installing a Ceiling Fan in a Metal Gazebo
assembling the ceiling fan is an important step in the installation process. Begin by reading the manufacturer’s instructions carefully to ensure that you have all the necessary parts and tools. Generally, the assembly involves attaching the fan blades to the motor housing using screws, washers, and nuts.
Once the blades are attached, you can then attach the motor housing to the mounting bracket using screws and lock washers. Finally, connect the wires from the fan to the electrical wires using wire connectors, making sure to match the color coding of the wires.
It is important to follow the manufacturer’s instructions closely to ensure that the fan is assembled correctly and safely, and to avoid any damage or injury during the installation process.
Reading the Manufacturer’s Instructions
Before installing a ceiling fan in a metal gazebo, it is essential to carefully read the manufacturer’s instructions. These instructions will provide valuable information about the specific tools and materials required for the installation, as well as the step-by-step process for assembling and installing the fan.
It is crucial to follow the instructions closely to ensure that the fan is assembled correctly and safely. The instructions may also contain important safety information and precautions, such as the maximum weight limit and the proper wiring connections.
By carefully reading and following the manufacturer’s instructions, you can ensure a smooth and successful installation process while avoiding any potential damage or injury.
Install the mounting bracket
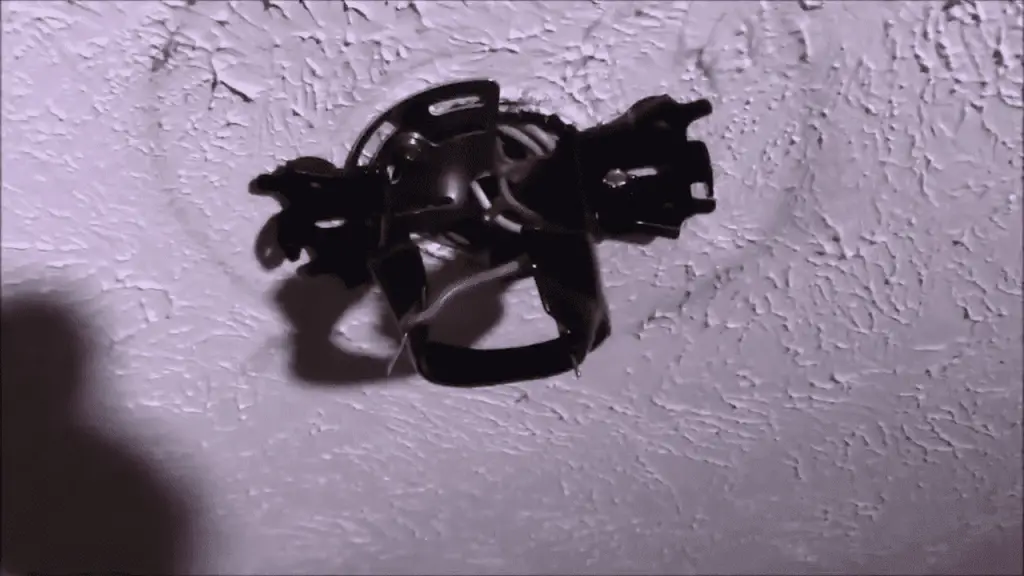
Installing the mounting bracket is a crucial step in the installation process of a ceiling fan in a metal gazebo. First, locate the center of the gazebo ceiling and mark it with a pencil or marker.
Then, hold the mounting bracket in place and use a drill to make pilot holes for the screws. Securely attach the mounting bracket to the ceiling using screws and lock washers, ensuring that it is level and flush with the ceiling.
It is important to make sure the mounting bracket is firmly anchored to the ceiling to support the weight of the fan and prevent any wobbling or instability. By installing the mounting bracket correctly, you can ensure a safe and secure foundation for the fan to be attached.
Marking the Location of the Mounting Bracket
Before installing the mounting bracket for a ceiling fan in a metal gazebo, it is important to mark the location of the bracket on the ceiling. Use a pencil or marker to locate the center of the ceiling and mark it clearly.
This will ensure that the mounting bracket is placed in the correct position for optimal performance and stability of the fan. It is important to take accurate measurements and ensure that the bracket is centered and level to avoid any wobbling or instability of the fan.
By properly marking the location of the mounting bracket, you can ensure a smooth and successful installation process for the ceiling fan in the metal gazebo.
Securing the Mounting Bracket: A Crucial Step
When setting up a gazebo, it’s important to ensure that it is safely secured in place. One crucial step in this process is to securely attach the mounting bracket to the gazebo frame. This bracket serves as the anchor point for securing the gazebo to the ground.
To do this, you’ll need to use appropriate tools and hardware, such as screws and a drill, to fasten the bracket securely to the frame. Once the mounting bracket is securely attached, you can proceed to anchor the gazebo to the ground using appropriate stakes or weights.
Properly securing the mounting bracket is essential to ensure the stability and safety of your gazebo, allowing you to enjoy your outdoor space with peace of mind.
Properly Installing a Fan Motor
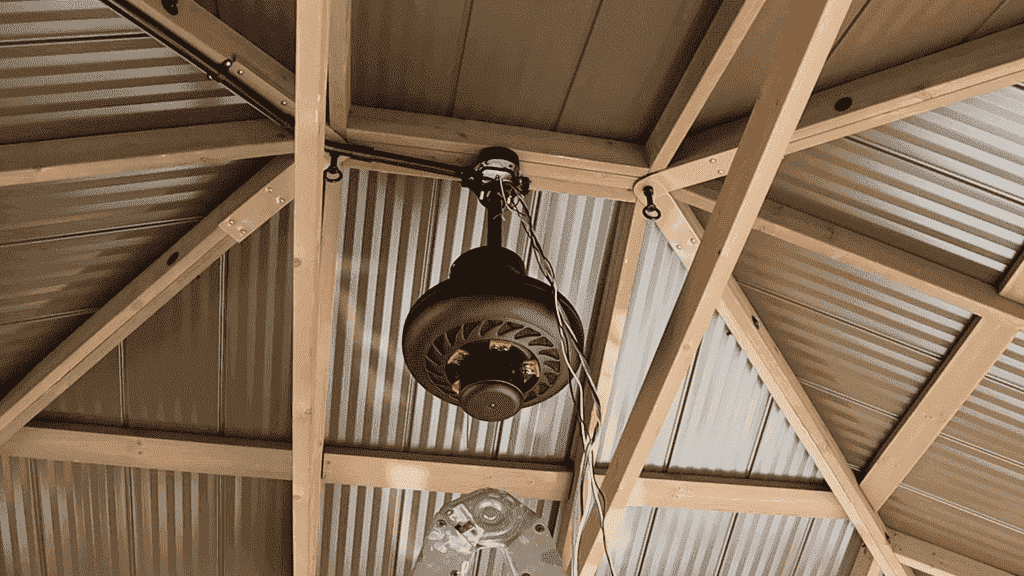
When installing a fan, one of the most important steps is installing the motor properly. To install the fan motor, you’ll need to first identify the appropriate location for the motor and ensure that it is level.
You’ll then need to attach the mounting bracket to the ceiling or wall using appropriate hardware, such as screws and anchors, depending on the type of mounting surface.
Once the bracket is securely in place, you can then attach the motor to the bracket using the provided screws or bolts. It’s important to ensure that the motor is level and securely attached to the bracket to prevent it from wobbling or vibrating during use.
Once the motor is installed, you can then attach the fan blades and any other necessary components, such as a light fixture, if applicable. Proper installation of the fan motor is crucial for optimal performance and safety, so it’s important to follow the manufacturer’s instructions carefully and use appropriate tools and hardware.
Connecting Electrical Wires
When installing any electrical device, it’s important to connect the wires properly to ensure safe and effective operation. When connecting wires, it’s crucial to follow the manufacturer’s instructions carefully to ensure that you are connecting the correct wires to the appropriate terminals.
This will typically involve identifying the hot (black), neutral (white), and ground (green or bare) wires and connecting them to the corresponding terminals on the device or electrical box.
It’s important to use appropriate tools, such as wire strippers and wire nuts, to ensure that the connections are secure and properly insulated.
If you are unsure about how to connect the wires, it’s important to consult a qualified electrician to avoid the risk of electrical shock or fire.
By following the manufacturer’s instructions and taking appropriate safety precautions, you can ensure that your electrical device is properly connected and operating safely.
Securing the Fan Motor to the Mounting Bracket
After installing the fan motor and attaching the blades, the next step is to securely fasten the motor to the mounting bracket. To do this, you’ll need to align the motor with the bracket and insert the provided screws or bolts through the motor housing and into the bracket.
It’s important to ensure that the screws or bolts are tightened securely, but not so tightly that they damage the motor or the bracket.
A loose or wobbly fan motor can be dangerous and cause excessive noise or vibration during operation, so it’s important to take care when securing the motor to the bracket.
Once the motor is securely fastened to the bracket, you can then test the fan to ensure that it is operating smoothly and without any unusual noises or vibrations.
By properly securing the fan motor to the mounting bracket, you can ensure that your fan operates safely and effectively for years to come.
Install the fan blades and light kit
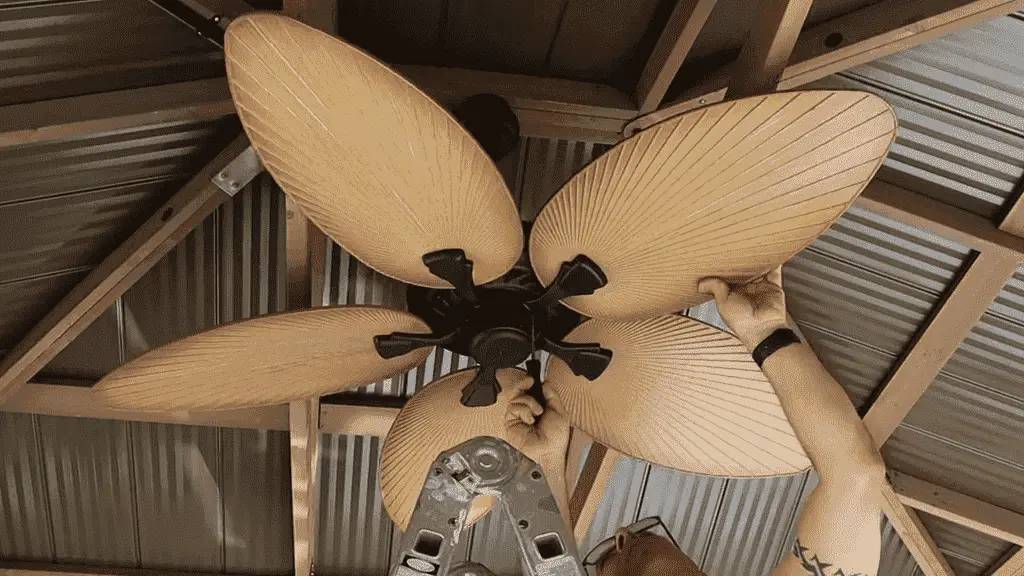
After securely fastening the fan motor to the mounting bracket, the next step is to attach the fan blades and any other accessories, such as a light kit. To attach the blades, you’ll need to insert the blade mounting brackets into the slots on the motor housing and tighten the screws or bolts provided.
It’s important to ensure that the blades are aligned and balanced properly to prevent wobbling or noise during operation. If your fan comes with a light kit, you’ll need to follow the manufacturer’s instructions to install it securely.
This will typically involve connecting the wiring from the light kit to the wiring in the fan housing and attaching the light fixture to the fan. Once you’ve attached the blades and light, you can then turn the fan on and test it to ensure that it is operating properly.
By following the manufacturer’s instructions carefully and taking appropriate safety precautions, you can install your fan blades and light kit securely and enjoy safe and comfortable air circulation in your space.
Attaching the Fan Blades to the Motor
When installing a ceiling fan, attaching the fan blades to the motor is a crucial step. First, identify the correct blade mounting brackets for each blade and insert them into the slots on the motor housing.
Next, use the screws or bolts provided to secure each blade to its mounting bracket. It’s important to ensure that the blades are aligned properly and balanced to prevent wobbling or noise during operation.
You can use a balancing kit, which typically includes a balancing clip and adhesive weights, to balance the blades if needed. Be sure to follow the manufacturer’s instructions carefully when using a balancing kit.
Once you have attached all of the blades securely, you can then test the fan to ensure that it is operating smoothly and without any unusual noises or vibrations.
By attaching the fan blades correctly and ensuring proper balance, you can ensure that your ceiling fan operates safely and effectively.
Installing a Ceiling Fan Light Kit
When installing a ceiling fan with a light kit, the next step after installing the fan motor is to install the light kit. To install the light kit, you will first need to identify the wiring from the light kit and connect it to the wiring in the fan housing.
This typically involves connecting the white wires together, the black wires together, and the green or bare ground wires together using wire nuts or other appropriate connectors. Be sure to follow the manufacturer’s instructions carefully to avoid the risk of electrical shock or fire.
Once the wiring is connected, you can then attach the light fixture to the fan using the screws or bolts provided. It’s important to ensure that the light fixture is securely attached to the fan to prevent it from falling or wobbling during use.
Once the light kit is installed, you can then test it to ensure that it is operating properly. By following the manufacturer’s instructions and taking appropriate safety precautions, you can install your ceiling fan light kit safely and enjoy comfortable air circulation and lighting in your space.
Connecting the Wiring and Testing the Ceiling Fan
After completing the installation of a ceiling fan, the next step is to connect the wiring and test the fan to ensure that it is operating properly. To connect the wiring, you will need to identify the wiring from the fan and connect it to the wiring in the ceiling junction box.
This typically involves connecting the white wires together, the black wires together, and the green or bare ground wires together using wire nuts or other appropriate connectors. Be sure to follow the manufacturer’s instructions carefully to avoid the risk of electrical shock or fire.
Once the wiring is connected, you can then turn the power back on and test the fan to ensure that it is operating properly. Test the fan at different speeds and check for any unusual noises or vibrations.
If you detect any issues, you should turn the power off and check your installation to ensure that everything is properly secured and connected.
By connecting the wiring carefully and testing the fan thoroughly, you can ensure that your ceiling fan is operating safely and effectively.
Instructions for Wiring Connection in Ceiling Fans
When connecting the wiring of a ceiling fan, it is crucial to follow the manufacturer’s instructions carefully. The instructions will provide you with a detailed guide on how to identify the wiring from the fan and how to connect it to the wiring in the ceiling junction box.
Typically, the process involves connecting the white wires together, the black wires together, and the green or bare ground wires together using wire nuts or other appropriate connectors.
It is essential to ensure that the connections are made securely and correctly to avoid the risk of electrical shock or fire. If you are unsure about any aspect of the wiring connection, seek the assistance of a qualified electrician to ensure that the wiring is connected safely and effectively.
Testing and Maintenance of a Ceiling Fan after Wiring Connection
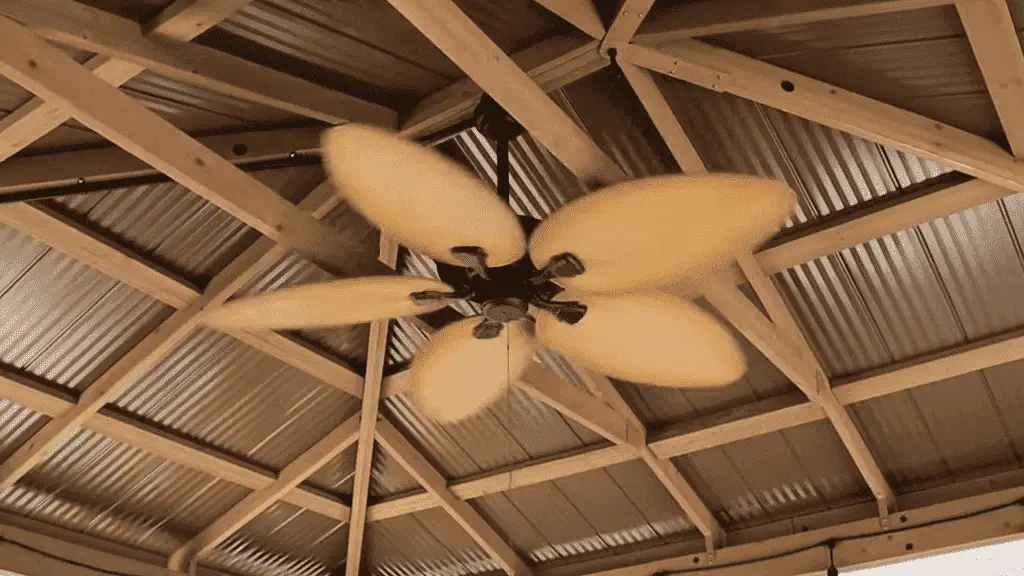
After connecting the wiring of a ceiling fan, it is important to test the fan to ensure that it is working correctly. To do this, turn the power back on and test the fan at different speeds. Check for any unusual noises or vibrations that may indicate an issue with the installation.
If you detect any problems, turn the power off and recheck your installation to ensure that everything is correctly secured and connected.
Once you are satisfied that the fan is operating safely and effectively, you can enjoy the comfort and benefits of having a ceiling fan in your home.
Regular maintenance and cleaning of the fan can also help to prolong its lifespan and keep it operating at its best.
Final Checks and Cleanup after Ceiling Fan Installation and Testing
After completing the installation and testing of your ceiling fan, it is important to conduct some final checks and cleanup. Double-check that all connections are securely fastened and that there are no exposed wires. Ensure that the fan blades are properly attached and that they rotate smoothly without any wobbling.
Finally, clean up any debris, tools, or materials that may have accumulated during the installation process. This will help to ensure that your fan operates safely and effectively for years to come.
Taking the time to conduct these final checks and cleanup can help to prevent any potential safety hazards and provide you with peace of mind knowing that your ceiling fan is installed correctly.
Ensuring Tight and Secure Connections
One crucial step in the final checks after installing a ceiling fan is to ensure that all connections are tight and secure. This includes the connections between the fan wires and the ceiling junction box wires, as well as any other connections such as those between the fan blades and the motor.
Check that all wire nuts or connectors are firmly in place and that there are no exposed wires or loose connections. If any connections are loose, tighten them carefully to ensure that they are secure but do not over-tighten as this can cause damage to the wires.
Properly secured connections are essential to ensure that the fan operates safely and effectively, and to avoid the risk of electrical shock or fire.
Clean up any debris or tools
Another important step in the final checks after installing a ceiling fan is to clean up any debris or tools that may have accumulated during the installation process.
This includes any screws, wires, or other materials that may have fallen to the ground during the installation, as well as any tools that were used.
Cleaning up the area helps to prevent any potential safety hazards, such as tripping over loose materials or stepping on sharp tools.
Additionally, a clean workspace makes it easier to perform future maintenance tasks and can help to prolong the lifespan of the fan.
By taking the time to clean up the workspace, you can ensure that your ceiling fan installation is not only safe and effective but also neat and organized.
FAQs
Q.1 How do you hang a fan in a metal gazebo?
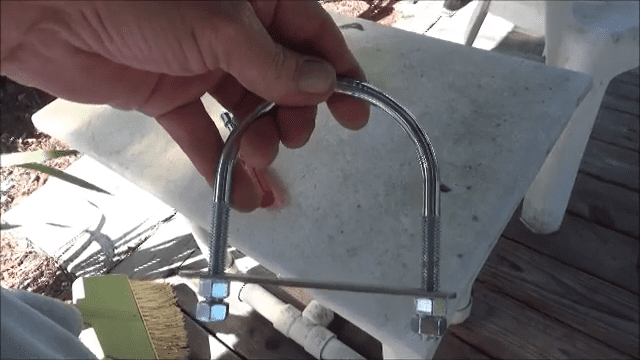
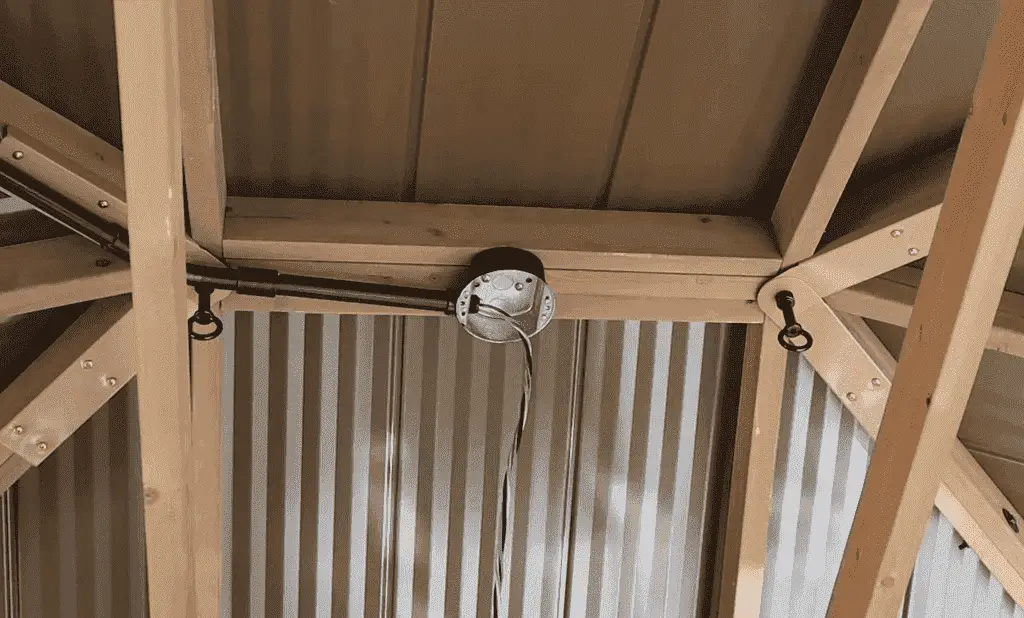
To install a ceiling fan, you need to hang a strong wooden beam (called a ridge pole) between two metal loops that stick out from your ceiling. Then, attach a special fan box to that beam. You can find fan boxes that fit well with this type of beam. Finally, paint the beam the same color as your ceiling so that it looks nice.
Q.2 Can you hang a ceiling fan in a gazebo?
To put a fan in your outdoor gazebo, you need a special fan made for outdoor use. The fan has to be connected to an electrical box using special outdoor wiring and conduit with a GPI circuit. However, most gazebos don’t have enough space for a fan, even the ones that hang close to the ceiling.
Q.3 Can a ceiling fan be installed anywhere?
Certainly, you can install a ceiling fan in many different rooms like living rooms, dining rooms, bedrooms, offices, and kitchens. Usually, bathrooms already have fans built-in, so you may not need to install an additional one. However, if you have extra space and want to have a ceiling fan in your bathroom, you can still install one.
Q.4 What is the minimum distance between ceiling and fan?
Keep the distance between the fan blades and the ceiling at the optimum distance of 8-10 inches to ensure efficient circulation of air. Keep the distance between blades and any light fixture at a minimum of 39 inches. Keep the distance between the fan blades and any wall at a minimum of 18 inches.
Q.5 How do I know if my ceiling will hold a fan?
To install a ceiling fan, you need to check if the outlet box system is suitable for it. The manufacturer should have marked it to confirm this. If it is not marked, you need to make changes to the box to ensure it can hold the weight of the fan and be attached safely to the building structure.
Conclusion
In conclusion, installing a ceiling fan in a metal gazebo can be a great addition to your outdoor space. However, it is important to consider safety considerations before installation, gather the necessary tools and materials, choose the location and prepare the gazebo, assemble the fan, install the mounting bracket, fan motor, blades, and light kit, connect the wiring and test the fan, and perform final checks and cleanup.
By following these steps carefully, you can ensure that your ceiling fan is installed properly and safely, and can enjoy the benefits of a cool breeze on a hot day.
We hope you will be well aware of how to install a ceiling fan in a metal gazebo by reading this comprehensive guide. If you have any questions, feel free to comment below!