
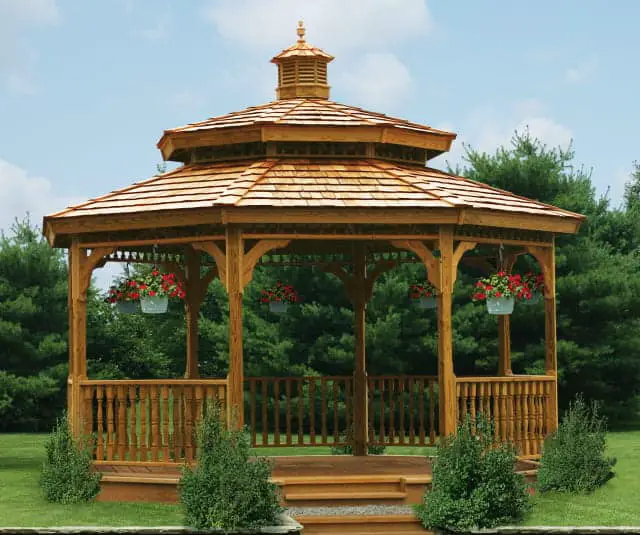
Gazebos are an attractive and functional addition to any outdoor space, providing a sheltered area to relax, entertain or dine in. Putting up a gazebo can seem daunting, but it can be an enjoyable and rewarding experience with the right tools and instructions. One helpful feature of many gazebo kits is the use of numbered parts, which can make assembly much easier and faster.
In this guide, we will provide a step-by-step outline of how to put up a gazebo with numbered parts, including tips on choosing the perfect location, assembling the frame, and installing the canopy. With careful attention to the instructions and patience, you can have a beautiful gazebo ready to enjoy in no time.
How to put up a gazebo with numbers: Setting up a gazebo is a breeze with these steps. 1. Lay out all parts. 2. Connect numbered poles. 3. Attach fabric as directed. 4. Securely anchor. 5. Enjoy your outdoor oasis!
The Importance of Having a Gazebo in Your Outdoor Space

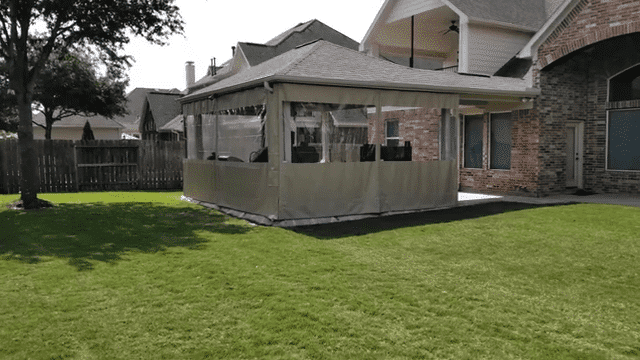
A gazebo can be an important addition to any outdoor space, providing a sheltered area for relaxation and entertainment. It adds value to your property and enhances the aesthetic appeal of your yard or garden. A gazebo can be used for various purposes, such as outdoor dining, hosting gatherings, and even as a private retreat for reading or meditation.
It offers protection from the sun, rain, and wind, allowing you to enjoy the outdoors comfortably in any weather. Additionally, a gazebo can increase the value of your property by creating an attractive and functional outdoor living space. Overall, a gazebo can be an excellent investment for any homeowner, providing both practical and aesthetic benefits.
How to put up a gazebo with numbers-Steps to Assemble a Gazebo
make the heading on his paragraph. “Putting up a gazebo can seem like a daunting task, but by breaking it down into manageable steps, it can be an enjoyable and rewarding experience. The first step is gathering all the materials and tools needed to assemble the gazebo.
Once you have everything you need, choose the perfect spot for the gazebo, ensuring the ground is level and free from obstructions. With the location chosen, you can start assembling the gazebo frame, following the step-by-step instructions carefully.
After the frame is assembled, it is time to install the gazebo canopy and use the numbered parts to align everything properly. Finally, you can add finishing touches, such as securing the gazebo to the ground and adding accessories, to enhance the gazebo’s functionality and appearance.
By following each step carefully and taking your time, you can have a beautiful gazebo ready to enjoy in no time.
1. Gathering the Necessary Materials and Tools for Gazebo Assembly
Before starting to assemble a gazebo, it is essential to gather all the necessary materials and tools. The materials required typically include the gazebo frame, canopy, and any additional accessories such as anchors or stakes for securing the structure to the ground.
The tools needed may vary depending on the type of gazebo, but generally, a drill, screwdriver, hammer, and ladder are necessary. It is essential to ensure that all the components are present and in good condition before beginning the assembly process.
Gathering all the materials and tools required beforehand can help streamline the assembly process and avoid any unnecessary delays or setbacks.
List of Materials and Tools Needed for Gazebo Assembly
Here is an explanation of why each item on the list of materials and tools needed for gazebo assembly is important:
Materials:
Gazebo frame: This is the backbone of the pavilion and provides the structure for the entire assembly.

Canopy: The canopy provides shade and protection from the elements and is typically made of durable, weather-resistant fabric.
Anchors or stakes for securing the gazebo to the ground: These ensure that the gazebo remains stable during windy or inclement weather conditions.
Screws and bolts fasten the gazebo frame components together, creating a stable structure.
Nuts and washers: These hold the screws and bolts in place and ensure a secure fit.

Fabric ties or straps: These are used to secure the canopy to the gazebo frame and prevent it from shifting or coming loose.
Instruction manual: The instruction manual provides step-by-step guidance on how to assemble the gazebo correctly, ensuring a safe and stable structure.
Tools
Drill: A drill is necessary to create pilot holes in the gazebo frame components and drive screws into them.

Screwdriver: A screwdriver is used to tighten screws and bolts.
Hammer: A hammer can tap the gazebo frame components into place or secure anchors or stakes to the ground.
Ladder: A ladder is necessary to reach the higher points of the gazebo during assembly.
Wrenches: Wrenches are used to tighten nuts and bolts securely.

Pliers: Pliers can be used to hold nuts in place while tightening them with a wrench.
Level: A level ensures that the gazebo is assembled on a level surface, which is necessary for stability.
Tape measure: A tape measure measures distances accurately, ensuring that the gazebo components are correctly spaced.
Rubber mallet: A rubber mallet can gently tap components into place.
Utility knife: A utility knife can cut fabric ties or straps to the correct length.
Safety glasses and gloves: Safety glasses and gloves protect the assembler’s hands and eyes from debris and sharp edges.
Factors to Consider When Choosing the Perfect Spot for Your Gazebo
Choosing the perfect spot for the gazebo is crucial to ensure its stability and usability. Here are some factors to consider when selecting the ideal location:
Level ground: The ground should be level to ensure the gazebo is stable and does not tilt or lean. If the ground is not level, it may be necessary to level the area by adding soil or using a leveling tool.
Obstructions: Ensure that there are no obstructions, such as rocks, roots, or debris, that may interfere with the placement of the gazebo.
Sun and shade: Consider the amount of sunlight and shade in the area when selecting the location. Ideally, the pavilion should be in a shaded area to relieve the sun’s heat, but it should not be in a spot that is entirely shaded to ensure adequate natural light.
View: Consider the view from the gazebo when selecting the location. A gazebo can be a perfect place to take in a beautiful landscape or garden view.
Accessibility: Ensure that the location is easily accessible and that there is enough space around the gazebo for people to move around comfortably.
Proximity to the house: Consider the proximity of the gazebo to the house, especially if it will be used for entertaining. Ideally, it should be located near the house for easy access to utilities and entertainment equipment.
By considering these factors, you can select the ideal location for your gazebo, ensuring that it is a comfortable and enjoyable space to relax and entertain in.
Choosing the Best Location for Your Gazebo
Finding the best location for your gazebo is essential in creating a comfortable and enjoyable outdoor space. It requires careful consideration of various factors, such as level ground, obstructions, sunlight and shade, view, accessibility, and proximity to the house.
By assessing these factors, you can identify the most suitable location for your gazebo that provides stability and usability and enhances the aesthetic appeal of your outdoor space.
A well-placed gazebo can offer a perfect spot to relax, entertain guests, or enjoy the beautiful view of your surroundings.
With a little planning and attention to detail, you can create a perfect oasis that adds value and charm to your property.
Clearing the Area of Obstructions
Clearing the area of any obstructions is an essential step in preparing the site for your gazebo. It ensures that the gazebo’s foundation is stable and secure, reducing the risk of damage or collapse.
Before setting up the gazebo, clear the area of any debris, such as rocks, roots, or vegetation. You may need to use a shovel, rake, or other tools to remove any obstacles in the way. Before digging, checking for underground utilities, such as electrical lines, water pipes, or gas lines, is essential.
Contact your local utility company to mark the location of any underground utilities before starting the excavation process. By taking these precautions, you can ensure that your gazebo’s foundation is secure and stable, providing a safe and enjoyable space for years to come.
Checking the Ground for Levelness Before Installing Your Gazebo
Checking the ground for levelness is essential in ensuring that your gazebo is stable and secure. An uneven surface can cause the gazebo to tilt or lean, which can affect its overall stability and usability.
To check the levelness of the ground, use a spirit level or a leveling tool. Place the level on different areas of the ground, and if the bubble is off-center, the ground is uneven. You can level the ground by adding or removing soil, using a compactor, or creating a foundation with concrete or pavers.
It’s important to ensure that the ground is level before setting up your gazebo, as any unevenness can lead to issues down the road.
By checking and leveling the ground, you can ensure your gazebo is stable and secure, providing a comfortable and enjoyable outdoor space for years to come.
Assembling the Gazebo Frame
Assembling the gazebo frame is essential in setting up your outdoor structure. Before starting, carefully read the manufacturer’s instructions and ensure that all parts are present and in good condition.
Begin by laying out all the pieces and organizing them based on their size and shape.
Use the provided hardware to connect the frame pieces together, following the instructions carefully. It’s essential to ensure that all connections are secure and tight to prevent any wobbling or movement of the structure. Assembling the frame may require two or more people, so it’s best to have a partner or team to help with the process.
Once the frame is assembled, it’s time to attach the roof and any other accessories with the gazebo. By carefully assembling the gazebo frame, you can ensure that your outdoor structure is stable, secure, and ready to use.
Instructions for Assembling the Gazebo Frame
To assemble the gazebo frame, follow these step-by-step instructions:
- Lay out all the pieces and organize them based on their size and shape.
- Carefully read the manufacturer’s instructions to ensure that all parts are present and in good condition.
- Use the provided hardware to connect the frame pieces, following the instructions carefully.
- Ensure all connections are secure and tight to prevent any wobbling or movement of the structure.
- Assemble the frame on a level surface to ensure stability and security.
- If necessary, have a partner or team to help with the process.
- Once the frame is assembled, it’s time to attach the roof and any other accessories that come with the gazebo.
By following these step-by-step instructions, you can assemble the gazebo frame correctly, ensuring that your outdoor structure is stable, secure, and ready to use.
Using Numbered Parts to Assemble a Gazebo Frame
When assembling a gazebo frame, it’s common to have a variety of numbered parts that need to be connected in a specific order. To begin, carefully review the manufacturer’s instructions to determine which parts are numbered and how they fit together.
In many cases, the instructions will provide a detailed diagram showing the assembly order and how the numbered parts should be positioned. Once you understand the order of assembly, it’s important to lay out all the parts correctly before beginning to assemble the frame.
This ensures that you have all the necessary parts and can work efficiently without confusion. As you begin to connect the numbered parts, be sure to follow the instructions carefully and ensure that each connection is secure and tight.
By using the numbered parts and following the instructions closely, you can assemble the gazebo frame quickly and efficiently.
Installing the Canopy on a Gazebo Frame

Once the gazebo frame is assembled, installing the canopy is time. First, check the manufacturer’s instructions to see if the canopy has a separate set of assembly instructions. If so, review those instructions carefully before beginning. Next, lay out the canopy and identify any straps, hooks, or other attachment points.
These will need to be connected to the frame to secure the canopy in place. If the canopy is large, having a partner hold it in place while you make the initial connections may be helpful. Once the canopy is attached, make any necessary adjustments to ensure that it’s straight and level.
Finally, double-check all connections to make sure they are secure and tight. With the canopy installed, your gazebo is ready to provide shade and shelter for outdoor gatherings and activities.
Unpacking and Preparing a Gazebo Canopy for Installation
When you first receive your gazebo canopy, it’s important to carefully unpack it to ensure that all parts are present and in good condition. Start by laying out all the pieces and comparing them to the manufacturer’s instructions or assembly diagram.
Look for any damage or missing parts and contact the manufacturer if you have concerns. Next, identify any straps, hooks, or other attachment points that will be used to connect the canopy to the frame.
Finally, take a few minutes to familiarize yourself with the overall layout of the canopy and how it will fit onto the frame. By unpacking the canopy carefully, you can ensure that it’s ready for a smooth and efficient installation process.
Securing and Adjusting a Gazebo Canopy to the Frame
Once the canopy is laid out and all attachment points are identified, it’s time to secure it to the gazebo frame. This typically involves attaching straps or hooks to the frame and then clipping the canopy onto these attachment points.
It’s important to follow the manufacturer’s instructions closely to ensure that the canopy is securely fastened and properly tensioned. Once the canopy is attached, please take a few minutes to adjust it and make sure it’s straight and level.
You may need to tighten or loosen some straps to achieve the desired tension. Finally, double-check all connections to make sure they are secure and tight. With the canopy properly attached, your gazebo is ready for use.
Using Numbered Parts to Install a Gazebo Canopy
When installing a gazebo canopy, it’s common to have a variety of numbered parts that need to be connected in a specific order. Check the manufacturer’s instructions for a detailed diagram showing the order of assembly and how the numbered parts should be positioned.
As you begin to connect the numbered parts, be sure to follow the instructions carefully and ensure that each connection is secure and tight. This will help ensure that the canopy is properly installed and tensioned.
It’s also important to have a partner or team to help with the process, especially if the canopy is large or difficult to handle on your own. By using the numbered parts and following the instructions closely, you can install the gazebo canopy quickly and efficiently.
Enhancing Functionality and Style
After the gazebo frame and canopy are installed, some finishing touches can enhance the overall look and functionality of the structure. Consider adding some decorative elements, such as string lights, plants, or curtains, to make the gazebo feel like a cozy outdoor retreat.
You can also add furniture, such as chairs or a table, to create a comfortable seating area. Additionally, consider adding some practical features, such as mosquito netting or a rain cover, to make the gazebo more versatile and functional in different weather conditions.
With a few finishing touches, your gazebo can become a beautiful and functional addition to your outdoor living space.
Tips for Securing Your Gazebo to the Ground
When setting up a gazebo, it’s important to secure it to the ground to prevent it from tipping over or being damaged by strong winds. The best way to do this will depend on the type of gazebo and the surface on which it will be installed.
For grass or dirt surfaces, it’s common to use stakes or anchors that can be driven into the ground to hold the frame in place. For hard surfaces, such as concrete or wood, it may be necessary to use weights or sandbags to anchor the gazebo.
It’s important to follow the manufacturer’s instructions or consult with a professional to determine the best method for securing your particular gazebo to the ground.
Adding Features and Accessories
Adding any additional features or accessories to your home can enhance its functionality and aesthetic appeal. The same is true for outdoor structures like gazebos. Depending on your needs and preferences, there are a variety of accessories and features that can be added to your gazebo.
For example, you may want to install lighting fixtures to create a cozy ambience in the evening or add mosquito netting to keep pesky bugs at bay. You could also consider adding shelves or hooks for hanging plants, bird feeders, or other decorative items.
When selecting accessories for your gazebo, be sure to choose high-quality materials designed to withstand the elements and follow any installation instructions provided by the manufacturer to ensure a safe and secure setup.
FAQS
Q.1 How do you set up a non-pop gazebo?
First, hold onto two legs of the gazebo and lift it off the ground. Then, take a small step back and let the gazebo frame open up. Be careful not to pull too hard, or you might bend the frame. Once the frame is open, push the top and bottom parts of the diamond shape toward the side supports. This will lock them in place.
Q.2 How do you assemble a 10×10 gazebo?
Here are simpler instructions for setting up a gazebo:
- Open the side panel posts and attach brackets.
- Use screws to attach the bolts to the crossbars.
- Attach the cross bars to the panel posts.
- Connect the top pieces of the canopy.
- Join the gazebo crossbars and posts to the main assembly.
Q.3 What is the difference between a gazebo and a popup gazebo?
A pop-up gazebo is easy to set up and take down because it’s flexible. However, a traditional metal garden gazebo is different. It’s built to stay in one place for a long time and is not meant to be moved around easily.
Q.4 How long does it take to assemble a gazebo?
The time it takes depends on your experience, the complexity of the gazebo design, and the number of people assisting you. On average, it might take 4-8 hours for a simple gazebo. More intricate designs could take longer.
Q.5 Can I set up a gazebo by myself?
While having a friend’s assistance is helpful, you can set up a gazebo on your own if the instructions are clear. Some steps, like raising the roof frame, might require extra hands. Safety is crucial, so having someone assist you is recommended.
Conclusion
In conclusion, assembling a gazebo can seem like a daunting task, but following the necessary steps, can be a rewarding and enjoyable experience. The first step is to gather all the required materials and tools for assembly, including the gazebo frame, canopy, anchors or stakes, screws and bolts, nuts and washers, and fabric ties or straps.
Once you have everything you need, selecting the perfect location for your gazebo is crucial to ensure stability, usability, and aesthetic appeal. Considerations such as level ground, obstructions, sunlight and shade, view, accessibility, and proximity to the house should be taken into account when choosing the location.
Following these steps carefully and taking your time will result in a beautiful and functional gazebo that you can enjoy for years to come.
We hope you will be well aware of How to put up a gazebo with numbers by reading this comprehensive guide. If you have any questions, feel free to comment below!